Add Edge Nodes
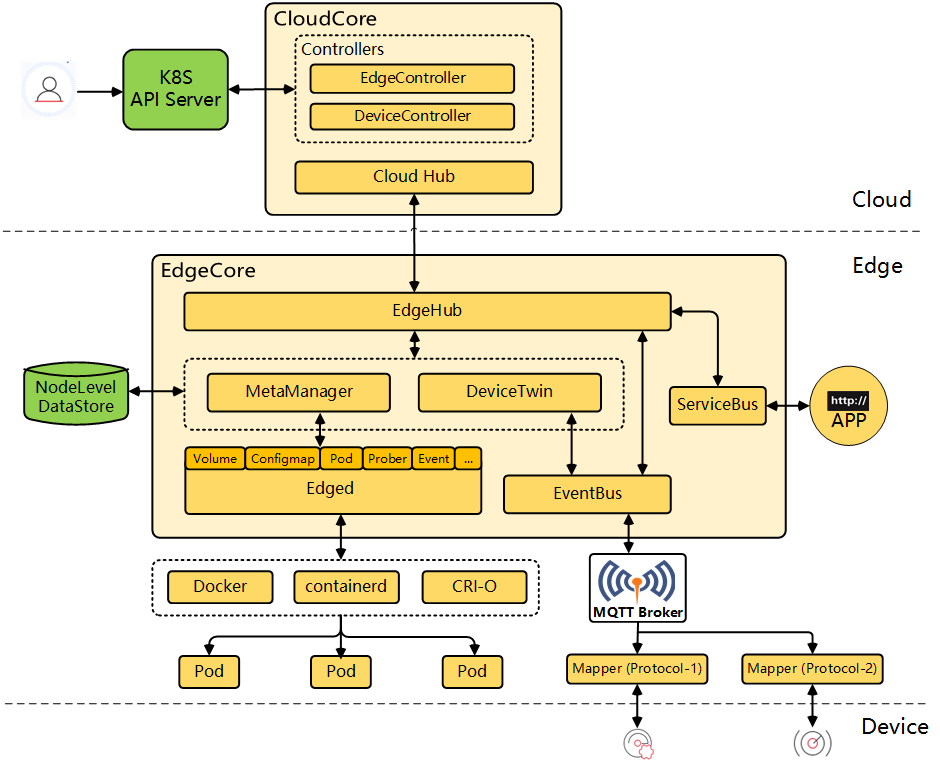
KubeSphere leverages KubeEdge, to extend native containerized application orchestration capabilities to hosts at edge. With separate cloud and edge core modules, KubeEdge provides complete edge computing solutions while the installation may be complex and difficult.

Note
This tutorial demonstrates how to add an edge node to your cluster.
Prerequisites
- You have enabled KubeEdge.
- To prevent compatability issues, you are advised to install Kubernetes v1.23.x.
- You have an available node to serve as an edge node. The node can run either Ubuntu (recommended) or CentOS. This tutorial uses Ubuntu 18.04 as an example.
- Edge nodes, unlike Kubernetes cluster nodes, should work in a separate network.
Prevent non-edge workloads from being scheduled to edge nodes
Due to the tolerations some daemonsets (for example, Calico) have, to ensure that the newly added edge nodes work properly, you need to run the following command to manually patch the pods so that non-edge workloads will not be scheduled to the edge nodes.
#!/bin/bash


NoShedulePatchJson='{"spec":{"template":{"spec":{"affinity":{"nodeAffinity":{"requiredDuringSchedulingIgnoredDuringExecution":{"nodeSelectorTerms":[{"matchExpressions":[{"key":"node-role.kubernetes.io/edge","operator":"DoesNotExist"}]}]}}}}}}}'

ns="kube-system"


DaemonSets=("nodelocaldns" "kube-proxy" "calico-node")

length=${#DaemonSets[@]}

for((i=0;i<length;i++));
do
         ds=${DaemonSets[$i]}
        echo "Patching resources:DaemonSet/${ds}" in ns:"$ns",
        kubectl -n $ns patch DaemonSet/${ds} --type merge --patch "$NoShedulePatchJson"
        sleep 1
done
Create Firewall Rules and Port Forwarding Rules
To make sure edge nodes can successfully talk to your cluster, you must forward ports for outside traffic to get into your network. Specifically, map an external port to the corresponding internal IP address (control plane node) and port based on the table below. Besides, you also need to create firewall rules to allow traffic to these ports (10000 to 10004).
Note
ClusterConfiguration of the ks-installer, if you set an internal IP address, you need to set the forwarding rule. If you have not set the forwarding rule, you can directly connect to ports 30000 to 30004.| Fields | External Ports | Fields | Internal Ports |
|---|---|---|---|
cloudhubPort | 10000 | cloudhubNodePort | 30000 |
cloudhubQuicPort | 10001 | cloudhubQuicNodePort | 30001 |
cloudhubHttpsPort | 10002 | cloudhubHttpsNodePort | 30002 |
cloudstreamPort | 10003 | cloudstreamNodePort | 30003 |
tunnelPort | 10004 | tunnelNodePort | 30004 |
Configure an Edge Node
You need to configure the edge node as follows.
Install a container runtime
KubeEdge supports several container runtimes including Docker, containerd, CRI-O and Virtlet. For more information, see the KubeEdge documentation.
Note
Configure EdgeMesh
Perform the following steps to configure EdgeMesh on your edge node.
Edit
/etc/nsswitch.conf.vi /etc/nsswitch.confAdd the following content to this file:
hosts: dns files mdns4_minimal [NOTFOUND=return]Save the file and run the following command to enable IP forwarding:
sudo echo "net.ipv4.ip_forward = 1" >> /etc/sysctl.confVerify your modification:
sudo sysctl -p | grep ip_forwardExpected result:
net.ipv4.ip_forward = 1
Add an Edge Node
Log in to the console as
adminand click Platform in the upper-left corner.Select Cluster Management and navigate to Edge Nodes under Nodes.
Note
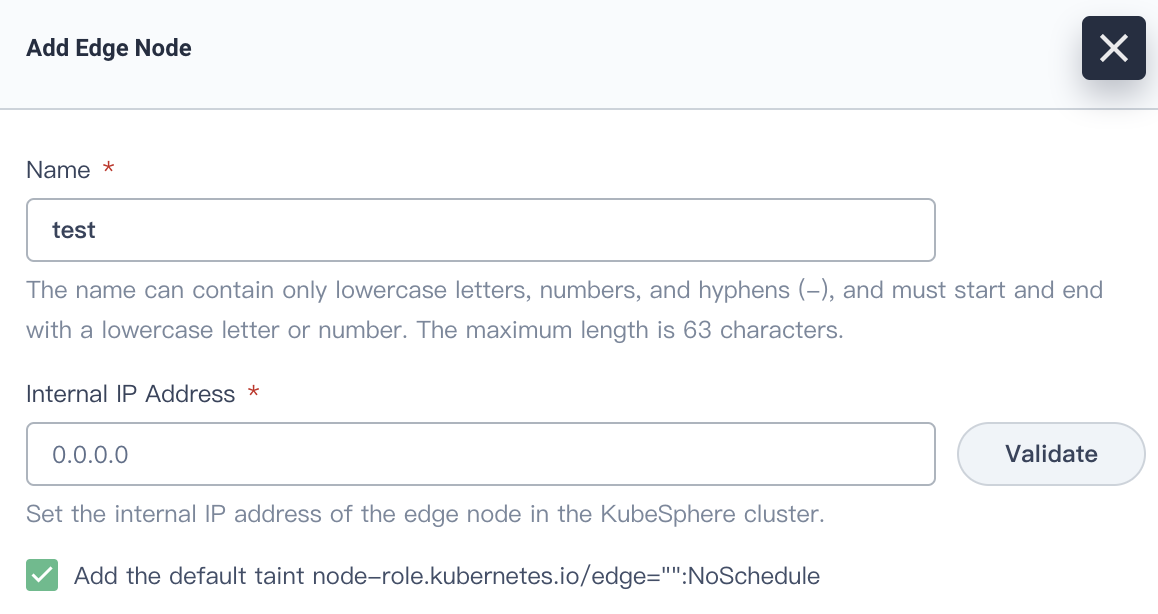
If you have enabled multi-cluster management, you need to select a cluster first.Click Add. In the dialog that appears, set a node name and enter an internal IP address of your edge node. Click Validate to continue.

Note
- The internal IP address is only used for inter-node communication and you do not necessarily need to use the actual internal IP address of the edge node. As long as the IP address is successfully validated, you can use it.
- It is recommended that you check the box to add the default taint.
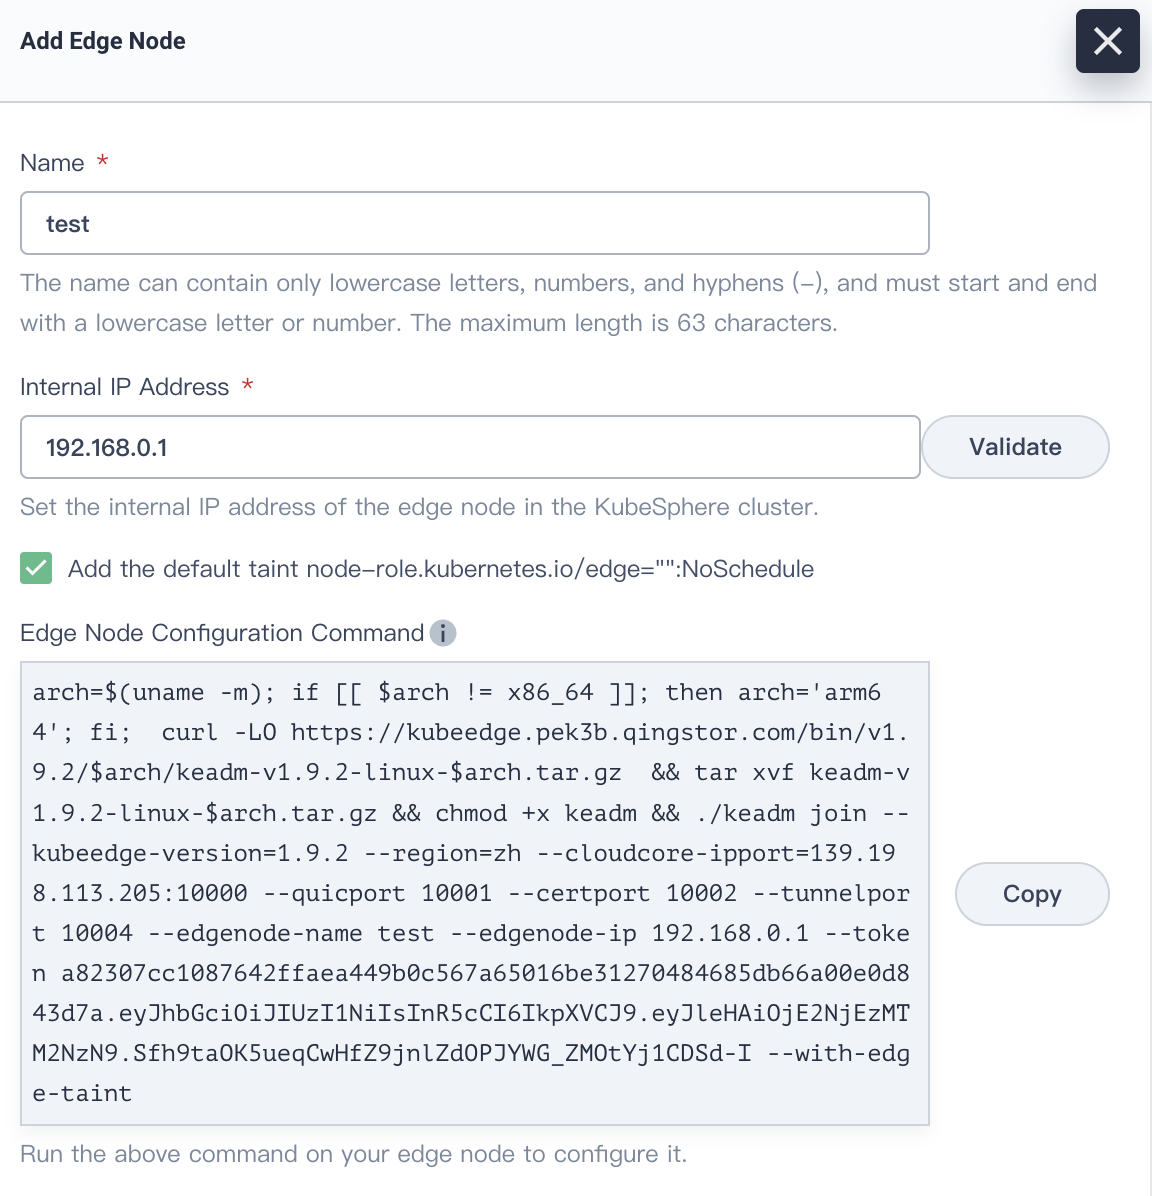
Copy the command automatically created under Edge Node Configuration Command and run it on your edge node.

Note
Make surewgetis installed on your edge node before you run the command.Close the dialog, refresh the page, and the edge node will appear in the list.
Note
After an edge node is added, if you cannot see CPU and memory resource usage on the Edge Nodes page, make sure Metrics Server 0.4.1 or later is installed in your cluster.
Collect Monitoring Information on Edge Nodes
To collect monitoring information on edge node, you need to enable metrics_server in ClusterConfiguration and edgeStream in KubeEdge.
On the KubeSphere web console, choose Platform > Cluster Management.
On the navigation pane on the left, click CRDs.
In the search bar on the right pane, enter
clusterconfiguration, and click the result to go to its details page.Click
 on the right of ks-installer, and click Edit YAML.
Search for metrics_server, and change the value of
enabledfromfalsetotrue.metrics_server: enabled: true # Change "false" to "true".Click OK in the lower right corner to save the change.
Open the
/etc/kubeedge/configfile, search foredgeStream, changefalsetotrue, and save the change.cd /etc/kubeedge/config vi edgecore.yamledgeStream: enable: true #Change "false" to "true".。 handshakeTimeout: 30 readDeadline: 15 server: xx.xxx.xxx.xxx:10004 #If port forwarding is not configured, change the port ID to 30004 here. tlsTunnelCAFile: /etc/kubeedge/ca/rootCA.crt tlsTunnelCertFile: /etc/kubeedge/certs/server.crt tlsTunnelPrivateKeyFile: /etc/kubeedge/certs/server.key writeDeadline: 15Run the following command to restart
edgecore.service.systemctl restart edgecore.serviceIf you still cannot see the monitoring data, run the following command:
journalctl -u edgecore.service -b -rNote
Iffailed to check the running environment: kube-proxy should not running on edge node when running edgecoreis displayed, refer to Step 8 to restartedgecore.serviceagain.
Remove an Edge Node
Before you remove an edge node, delete all your workloads running on it.
On your edge node, run the following commands:
./keadm resetapt remove mosquittorm -rf /var/lib/kubeedge /var/lib/edged /etc/kubeedge/ca /etc/kubeedge/certsNote
If you cannot delete the tmpfs-mounted folder, restart the node or unmount the folder first.Run the following command to remove the edge node from your cluster:
kubectl delete node <edgenode-name>To uninstall KubeEdge from your cluster, run the following commands:
helm uninstall kubeedge -n kubeedgekubectl delete ns kubeedgeNote
After uninstallation, you will not be able to add edge nodes to your cluster.
Feedback
Was this page Helpful?
Receive the latest news, articles and updates from KubeSphere
Thanks for the feedback. If you have a specific question about how to use KubeSphere, ask it on Slack. Open an issue in the GitHub repo if you want to report a problem or suggest an improvement.


 Previous
