


发布于:2023-05-24
本文总阅读量:


在 openEuler 22.03 上安装 KubeSphere 实战教程
前言
知识点
- 定级:入门级
- KubeKey 安装部署 KubeSphere 和 Kubernetes
- openEuler 操作系统的基本配置
- Kubernetes 常用工作负载的创建
演示服务器配置
| 主机名 | IP | CPU | 内存 | 系统盘 | 数据盘 | 用途 |
|---|---|---|---|---|---|---|
| ks-master-0 | 192.168.9.91 | 4 | 16 | 40 | 200 | KubeSphere/k8s-master/k8s-worker |
| ks-master-1 | 192.168.9.92 | 4 | 16 | 40 | 200 | KubeSphere/k8s-master/k8s-worker |
| ks-master-2 | 192.168.9.93 | 4 | 16 | 40 | 200 | KubeSphere/k8s-master/k8s-worker |
| 合计 | 3 | 12 | 48 | 120 | 600 |
演示环境涉及软件版本信息
- 操作系统:openEuler 22.03 LTS SP1 x86_64
- KubeSphere:3.3.2
- Kubernetes:v1.25.5
- KubeKey: v3.0.7
简介
本文介绍了如何在 openEuler 22.03 LTS SP1 X86 架构服务器上部署 KubeSphere 和 Kubernetes 集群。我们将使用 KubeSphere 开发的 KubeKey 工具实现自动化部署,在三台服务器上实现高可用模式最小化部署 Kubernetes 集群和 KubeSphere。我们将提供详细的部署说明,以便读者轻松地完成部署过程。
操作系统基础配置
请注意,以下操作无特殊说明时需在所有 openEuler 服务器上执行。本文只选取其中一台服务器作为演示,并假定其余服务器都已按照相同的方式进行配置和设置。
配置主机名
hostnamectl hostname ks-master-0
配置 hosts 文件
编辑 /etc/hosts 文件,将规划的服务器 IP 和主机名添加到文件中。
192.168.9.91    ks-master-0
192.168.9.92    ks-master-1
192.168.9.93    ks-master-2
配置基于 SSH 密钥的身份验证
KubeKey 支持在自动化部署 KubeSphere 和 Kubernetes 服务时,利用密码和密钥作为远程服务器的连接验证方式。本文会演示同时使用密码和密钥的配置方式,因此,需要为部署用户 root 配置免密码 SSH身份验证。
本小节为可选配置项,如果你使用纯密码的方式作为服务器远程连接认证方式,可以忽略本节内容。
本文将 master-0 节点作为部署节点,下面的操作仅需要在 master-0 节点操作。
以 root 用户登陆系统,然后使用 ssh-keygen 命令生成一个新的 SSH 密钥对,命令完成后,SSH 公钥和私钥将存储在 /root/.ssh 目录中。
ssh-keygen -t ed25519
命令执行效果如下:
[root@ks-master-0 ~]# ssh-keygen -t ed25519
Generating public/private ed25519 key pair.
Enter file in which to save the key (/root/.ssh/id_ed25519):
Created directory '/root/.ssh'.
Enter passphrase (empty for no passphrase):
Enter same passphrase again:
Your identification has been saved in /root/.ssh/id_ed25519
Your public key has been saved in /root/.ssh/id_ed25519.pub
The key fingerprint is:
SHA256:2OWDf+17N2d10UwoEtpg06Swd9l40NNUNOcZgSLpWME root@ks-master-0
The key's randomart image is:
+--[ED25519 256]--+
|      . =+*o ooB=|
|       + Eo*+.o.*|
|      . B B.+o +o|
|       = * .   .o|
|      . S o     .|
|         . . .  o|
|          . . . o|
|           . . .=|
|              o++|
+----[SHA256]-----+
接下来,输入以下命令将 SSH 公钥从 master-0 节点发送到其他节点。命令执行时输入 yes,以接受服务器的 SSH 指纹,然后在出现提示时输入 root 用户的密码。
ssh-copy-id root@ks-master-0
下面是密钥复制时,正确的输出结果:
[root@ks-master-0 ~]# ssh-copy-id root@ks-master-0
/usr/bin/ssh-copy-id: INFO: Source of key(s) to be installed: "/root/.ssh/id_ed25519.pub"
/usr/bin/ssh-copy-id: INFO: attempting to log in with the new key(s), to filter out any that are already installed
/usr/bin/ssh-copy-id: INFO: 1 key(s) remain to be installed -- if you are prompted now it is to install the new keys

Authorized users only. All activities may be monitored and reported.
root@ks-master-0's password:

Number of key(s) added: 1

Now try logging into the machine, with:   "ssh 'root@ks-master-0'"
and check to make sure that only the key(s) you wanted were added.
添加并上传 SSH 公钥后,您现在可以执行下面的命令验证,通过 root 用户连接到所有服务器,无需密码验证。
[root@ks-master-0 ~]# ssh root@ks-master-0
# 登陆输出结果 略
配置服务器时区
配置服务器时区为 Asia/Shanghai。
timedatectl set-timezone Asia/Shanghai
验证服务器时区,正确配置如下:
[root@ks-master-0 ~]# timedatectl
               Local time: 一 2023-05-22 10:11:52 CST
           Universal time: 一 2023-05-22 02:11:52 UTC
                 RTC time: 一 2023-05-22 02:11:52
                Time zone: Asia/Shanghai (CST, +0800)
System clock synchronized: yes
              NTP service: active
          RTC in local TZ: no
安装 chrony 配置时间同步
安装 chrony 作为时间同步软件:
yum install chrony
修改配置文件 /etc/chrony.conf,修改 ntp 服务器配置
vi /etc/chrony.conf

# 删除所有的 pool 配置
pool pool.ntp.org iburst

# 增加国内的 ntp 服务器,或是指定其他常用的时间服务器
server ntp.api.bz iburst
重启 chrony 服务
systemctl restart chronyd
验证 chrony 同步状态:
# 执行查看命令
chronyc sourcestats -v

# 正常的输出结果如下
[root@ks-master-0 ~]# chronyc sourcestats -v
                             .- Number of sample points in measurement set.
                            /    .- Number of residual runs with same sign.
                           |    /    .- Length of measurement set (time).
                           |   |    /      .- Est. clock freq error (ppm).
                           |   |   |      /           .- Est. error in freq.
                           |   |   |     |           /         .- Est. offset.
                           |   |   |     |          |          |   On the -.
                           |   |   |     |          |          |   samples. \
                           |   |   |     |          |          |             |
Name/IP Address            NP  NR  Span  Frequency  Freq Skew  Offset  Std Dev
==============================================================================
185.53.177.52               0   0     0     +0.000   2000.000     +0ns  4000ms
关闭系统防火墙
systemctl stop firewalld && systemctl disable firewalld
安装系统依赖
在所有节点上,以 root 用户登陆系统,执行下面的命令为 Kubernetes 安装系统基本依赖包。
# 安装 Kubernetes 系统依赖包
yum install curl socat conntrack ebtables ipset ipvsadm

# 安装其他必备包
yum install tar
安装部署 KubeSphere 和 Kubernetes
下载 KubeKey
本文将 master-0 节点作为部署节点,把 KubeKey (下文简称 kk) 最新版(3.0.7)二进制文件下载到该服务器。具体 kk 版本号可以在 kk 发行页面查看。
- 下载最新版的 KubeKey
cd ~
mkdir kubekey
cd kubekey/

# 选择中文区下载(访问github受限时使用)
export KKZONE=cn
curl -sfL https://get-kk.kubesphere.io | sh -

# 也可以使用下面的命令指定具体版本
curl -sfL https://get-kk.kubesphere.io | VERSION=v3.0.7 sh -

# 正确的执行效果如下
[root@ks-master-0 ~]# cd ~
[root@ks-master-0 ~]# mkdir kubekey
[root@ks-master-0 ~]# cd kubekey/
[root@ks-master-0 kubekey]# export KKZONE=cn
[root@ks-master-0 kubekey]# curl -sfL https://get-kk.kubesphere.io | sh -

Downloading kubekey v3.0.7 from https://kubernetes.pek3b.qingstor.com/kubekey/releases/download/v3.0.7/kubekey-v3.0.7-linux-amd64.tar.gz ...


Kubekey v3.0.7 Download Complete!

[root@ks-master-0 kubekey]# ll
总用量 111988
-rwxr-xr-x 1 root root 78901793  1月 18 09:59 kk
-rw-r--r-- 1 root root 35769576  5月 22 10:24 kubekey-v3.0.7-linux-amd64.tar.gz
- 查看 KubeKey 支持的 Kubernetes 版本列表
./kk version --show-supported-k8s

# 输出如下
[root@ks-master-0 kubekey]# ./kk version --show-supported-k8s
v1.19.0
v1.19.8
v1.19.9
v1.19.15
v1.20.4
v1.20.6
v1.20.10
v1.21.0
v1.21.1
v1.21.2
v1.21.3
v1.21.4
v1.21.5
v1.21.6
v1.21.7
v1.21.8
v1.21.9
v1.21.10
v1.21.11
v1.21.12
v1.21.13
v1.21.14
v1.22.0
v1.22.1
v1.22.2
v1.22.3
v1.22.4
v1.22.5
v1.22.6
v1.22.7
v1.22.8
v1.22.9
v1.22.10
v1.22.11
v1.22.12
v1.22.13
v1.22.14
v1.22.15
v1.22.16
v1.22.17
v1.23.0
v1.23.1
v1.23.2
v1.23.3
v1.23.4
v1.23.5
v1.23.6
v1.23.7
v1.23.8
v1.23.9
v1.23.10
v1.23.11
v1.23.12
v1.23.13
v1.23.14
v1.23.15
v1.24.0
v1.24.1
v1.24.2
v1.24.3
v1.24.4
v1.24.5
v1.24.6
v1.24.7
v1.24.8
v1.24.9
v1.25.0
v1.25.1
v1.25.2
v1.25.3
v1.25.4
v1.25.5
v1.26.0
创建 Kubernetes 和 KubeSphere 部署配置文件
创建集群配置文件,本示例中,选择 KubeSphere v3.3.2 和 Kubernetes v1.25.5,同时,指定配置文件名称为 kubesphere-v3.3.2.yaml,如果不指定,默认的文件名为 config-sample.yaml。
./kk create config -f kubesphere-v3.3.2.yaml --with-kubernetes v1.25.5 --with-kubesphere v3.3.2
命令执行成功后,在当前目录会生成文件名为 kubesphere-v3.3.2.yaml 的配置文件。
[root@ks-master-0 kubekey]# ./kk create config -f kubesphere-v3.3.2.yaml --with-kubernetes v1.25.5 --with-kubesphere v3.3.2
Generate KubeKey config file successfully
[root@ks-master-0 kubekey]# ll
总用量 111996
-rwxr-xr-x 1 root root 78901793  1月 18 09:59 kk
-rw-r--r-- 1 root root 35769576  5月 22 10:24 kubekey-v3.0.7-linux-amd64.tar.gz
-rw-r--r-- 1 root root     4680  5月 22 10:25 kubesphere-v3.3.2.yaml
本示例采用 3 个节点作为 control-plane 节点同时复用为 worker 节点。
编辑配置文件 kubesphere-v3.3.2.yaml,修改 hosts 和 roleGroups 等信息,修改说明如下。
- hosts 指定节点的 IP、ssh 用户、ssh 密码、ss h密钥,示例演示了同时使用密码和密钥的配置方法。
- roleGroups 指定 ks-master-0、ks-master-1、ks-master-2 作为 etcd、control-plane、worker节点。
- internalLoadbalancer 启用内置的 HAProxy 负载均衡器。
修改后的示例如下:
apiVersion: kubekey.kubesphere.io/v1alpha2
kind: Cluster
metadata:
  name: sample
spec:
  hosts:
  - {name: ks-master-0, address: 192.168.9.91, internalAddress: 192.168.9.91, user: root, password: "P@88w0rd"}
  - {name: ks-master-1, address: 192.168.9.92, internalAddress: 192.168.9.92, user: root, privateKeyPath: "~/.ssh/id_ed25519"}
  - {name: ks-master-2, address: 192.168.9.93, internalAddress: 192.168.9.93, user: root, privateKeyPath: "~/.ssh/id_ed25519"}
  roleGroups:
    etcd:
    - ks-master-0
    - ks-master-1
    - ks-master-2
    control-plane:
    - ks-master-0
    - ks-master-1
    - ks-master-2
    worker:
    - ks-master-0
    - ks-master-1
    - ks-master-2
  controlPlaneEndpoint:
    ## Internal loadbalancer for apiservers
    internalLoadbalancer: haproxy

    domain: lb.kubesphere.local
    address: ""
    port: 6443
  kubernetes:
    version: v1.25.5
    clusterName: cluster.local
    autoRenewCerts: true
    containerManager: containerd
  etcd:
    type: kubekey
  network:
    plugin: calico
    kubePodsCIDR: 10.233.64.0/18
    kubeServiceCIDR: 10.233.0.0/18
    ## multus support. https://github.com/k8snetworkplumbingwg/multus-cni
    multusCNI:
      enabled: false
  registry:
    privateRegistry: ""
    namespaceOverride: ""
    registryMirrors: []
    insecureRegistries: []
  addons: []
部署 KubeSphere 和 Kubernetes
接下来我们执行下面的命令,使用上面生成的配置文件部署 KubeSphere 和 Kubernetes。
./kk create cluster -f kubesphere-v3.3.2.yaml
上面的命令执行后,首先 kk 会检查部署 Kubernetes 的依赖及其他详细要求。检查合格后,系统将提示您确认安装。输入 yes 并按 ENTER 继续部署。
[root@ks-master-0 kubekey]# ./kk create cluster -f kubesphere-v3.3.2.yaml


 _   __      _          _   __
| | / /     | |        | | / /
| |/ / _   _| |__   ___| |/ /  ___ _   _
|    \| | | | '_ \ / _ \    \ / _ \ | | |
| |\  \ |_| | |_) |  __/ |\  \  __/ |_| |
\_| \_/\__,_|_.__/ \___\_| \_/\___|\__, |
                                    __/ |
                                   |___/

10:32:17 CST [GreetingsModule] Greetings
10:32:17 CST message: [ks-master-2]
Greetings, KubeKey!
10:32:18 CST message: [ks-master-0]
Greetings, KubeKey!
10:32:18 CST message: [ks-master-1]
Greetings, KubeKey!
10:32:18 CST success: [ks-master-2]
10:32:18 CST success: [ks-master-0]
10:32:18 CST success: [ks-master-1]
10:32:18 CST [NodePreCheckModule] A pre-check on nodes
10:32:22 CST success: [ks-master-0]
10:32:22 CST success: [ks-master-2]
10:32:22 CST success: [ks-master-1]
10:32:22 CST [ConfirmModule] Display confirmation form
+-------------+------+------+---------+----------+-------+-------+---------+-----------+--------+--------+------------+------------+-------------+------------------+--------------+
| name        | sudo | curl | openssl | ebtables | socat | ipset | ipvsadm | conntrack | chrony | docker | containerd | nfs client | ceph client | glusterfs client | time         |
+-------------+------+------+---------+----------+-------+-------+---------+-----------+--------+--------+------------+------------+-------------+------------------+--------------+
| ks-master-0 | y    | y    | y       | y        | y     | y     | y       | y         | y      |        |            | y          |             |                  | CST 10:32:22 |
| ks-master-1 | y    | y    | y       | y        | y     | y     | y       | y         | y      |        |            | y          |             |                  | CST 10:32:22 |
| ks-master-2 | y    | y    | y       | y        | y     | y     | y       | y         | y      |        |            | y          |             |                  | CST 10:32:22 |
+-------------+------+------+---------+----------+-------+-------+---------+-----------+--------+--------+------------+------------+-------------+------------------+--------------+

This is a simple check of your environment.
Before installation, ensure that your machines meet all requirements specified at
https://github.com/kubesphere/kubekey#requirements-and-recommendations

Continue this installation? [yes/no]:
部署完成需要大约10-30分钟左右,具体看网速和机器配置。
部署完成后,您应该会在终端上看到类似于下面的输出。提示部署完成的同时,输出中还会显示用户登陆 KubeSphere 的默认管理员用户和密码。
clusterconfiguration.installer.kubesphere.io/ks-installer created
10:50:36 CST skipped: [ks-master-2]
10:50:36 CST skipped: [ks-master-1]
10:50:36 CST success: [ks-master-0]
#####################################################
###              Welcome to KubeSphere!           ###
#####################################################

Console: http://192.168.9.91:30880
Account: admin
Password: P@88w0rd
NOTES:
  1. After you log into the console, please check the
     monitoring status of service components in
     "Cluster Management". If any service is not
     ready, please wait patiently until all components
     are up and running.
  2. Please change the default password after login.

#####################################################
https://kubesphere.io             2023-05-22 11:02:08
#####################################################
11:02:12 CST skipped: [ks-master-2]
11:02:12 CST skipped: [ks-master-1]
11:02:12 CST success: [ks-master-0]
11:02:12 CST Pipeline[CreateClusterPipeline] execute successfully
Installation is complete.

Please check the result using the command:

	kubectl logs -n kubesphere-system $(kubectl get pod -n kubesphere-system -l 'app in (ks-install, ks-installer)' -o jsonpath='{.items[0].metadata.name}') -f
部署验证
- 验证 KubeSphere 管理控制台
我们打开浏览器访问 master-0 节点的 IP 地址和端口 30880,可以看到 KubeSphere 管理控制台的登录页面。
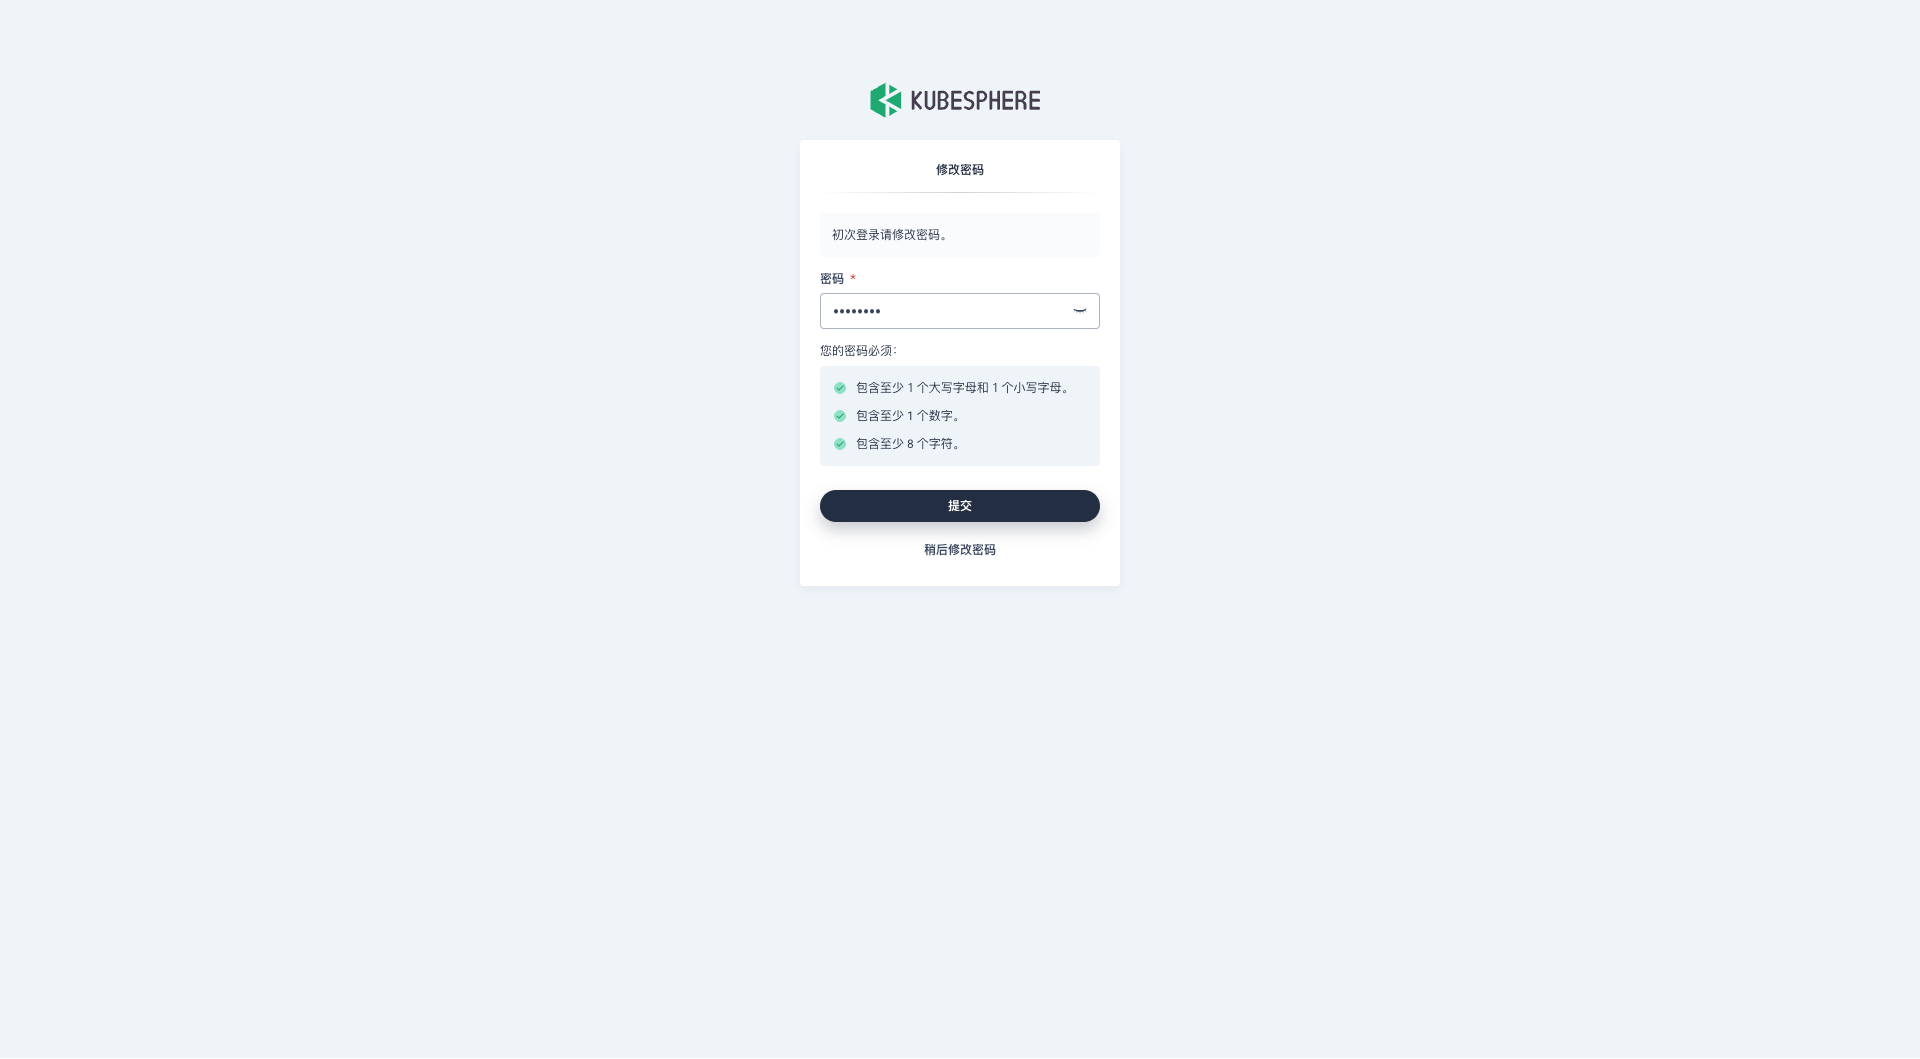
输入默认用户 admin 和默认密码 P@88w0rd,然后点击「登录」。

登录后,系统会要求您更改 KubeSphere 默认用户 admin 的默认密码,输入新的密码并点击「提交」。
提交完成后,系统会跳转到 KubeSphere admin 用户工作台页面,该页面显示了当前 KubeSphere 版本为 v3.3.2,可用的 Kubernetes 集群数量为 1。

接下来,单击左上角的「平台管理」菜单,选择「集群管理」。
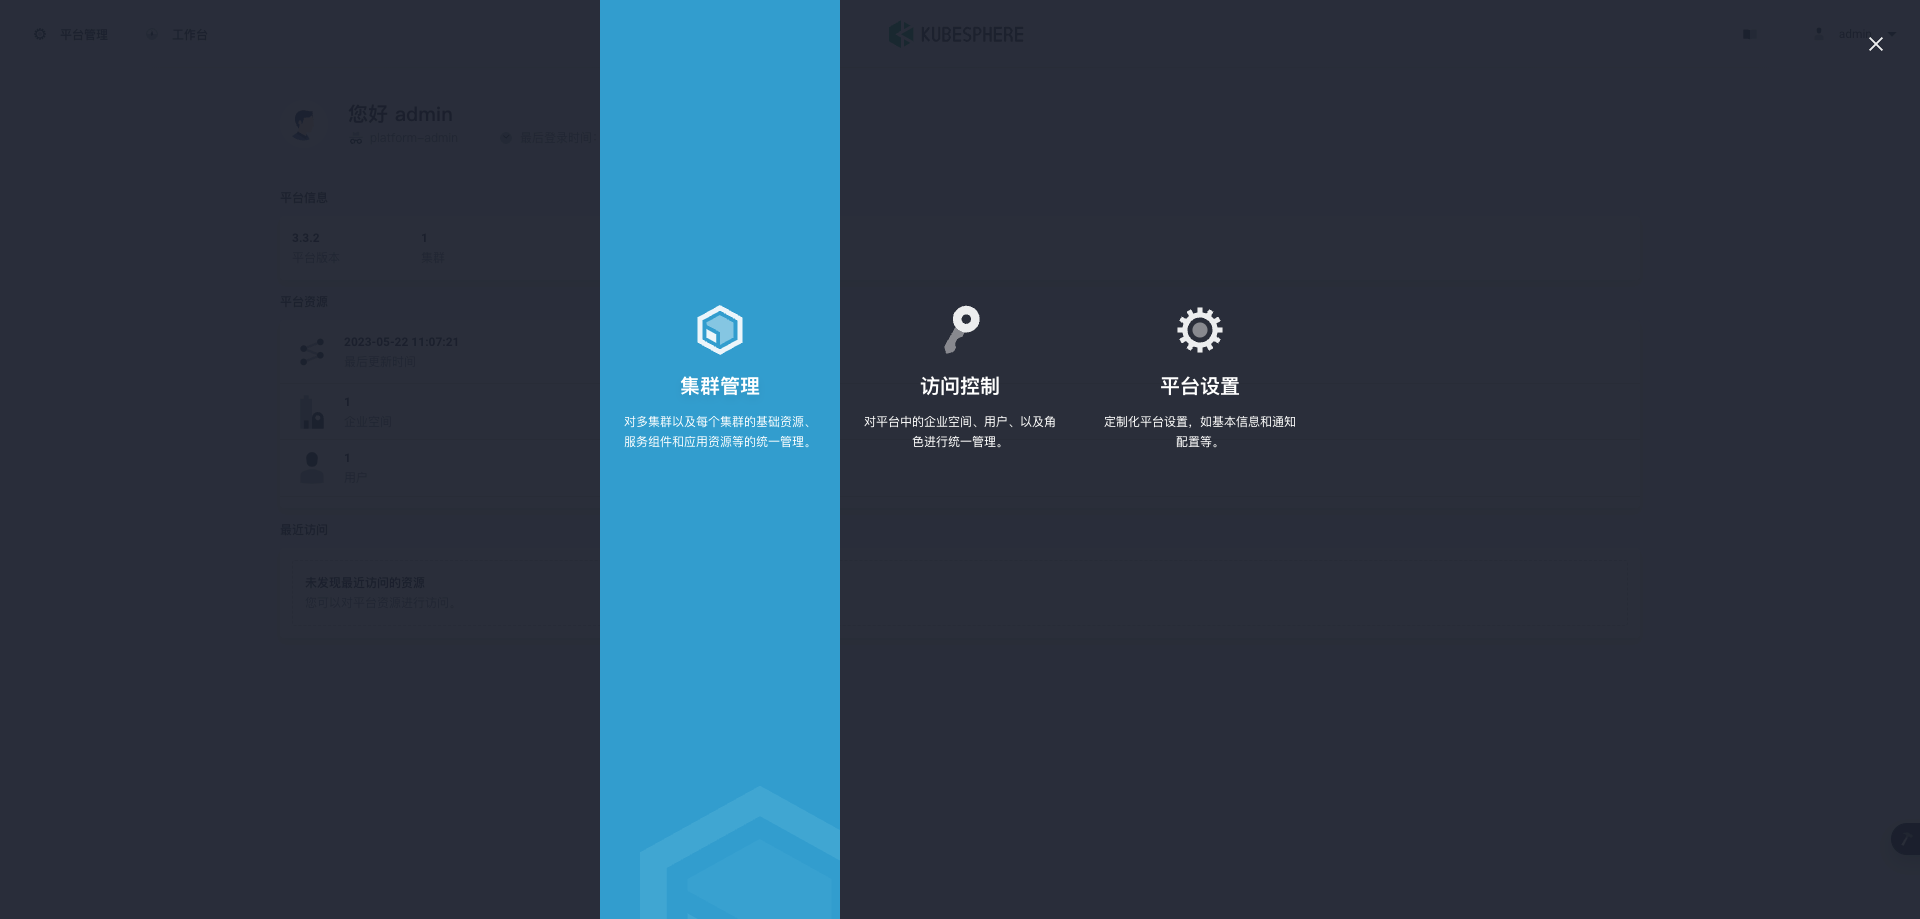
进入集群管理界面,在该页面可以查看集群的基本信息,包括集群资源用量、Kubernetes 状态、节点资源用量 Top、系统组件、工具箱等内容。

单击左侧「节点」菜单,点击「集群节点」可以查看 Kubernetes 集群可用节点的详细信息。

单击左侧「系统组件」菜单,可以查看已安装组件的详细信息。目前集群采用的最小化安装,仅包含 KubeSphere、Kubernetes、监控三个类别的组件。

- 命令行验证集群信息
在 master-0 节点运行 kubectl 命令获取 Kubernetes 集群上的可用节点列表。
kubectl get nodes -o wide
在输出结果中可以看到,当前的 Kubernetes 集群有三个可用节点、节点的内部 IP、节点角色、节点的 Kubernetes 版本号、容器运行时及版本号、操作系统类型及内核版本等信息。
[root@ks-master-0 kubekey]# kubectl get nodes -o wide
NAME          STATUS   ROLES                  AGE   VERSION   INTERNAL-IP    EXTERNAL-IP   OS-IMAGE                    KERNEL-VERSION                        CONTAINER-RUNTIME
ks-master-0   Ready    control-plane,worker   25m   v1.25.5   192.168.9.91   <none>        openEuler 22.03 (LTS-SP1)   5.10.0-136.12.0.86.oe2203sp1.x86_64   containerd://1.6.4
ks-master-1   Ready    control-plane,worker   24m   v1.25.5   192.168.9.92   <none>        openEuler 22.03 (LTS-SP1)   5.10.0-136.12.0.86.oe2203sp1.x86_64   containerd://1.6.4
ks-master-2   Ready    control-plane,worker   24m   v1.25.5   192.168.9.93   <none>        openEuler 22.03 (LTS-SP1)   5.10.0-136.12.0.86.oe2203sp1.x86_64   containerd://1.6.4
输入以下命令获取在 Kubernetes 集群上运行的 Pod 列表。
kubectl get pods --all-namespaces
在输出结果中可以看到, Kubernetes 集群上有多个可用的命名空间 kube-system、kubesphere-control-system、kubesphere-monitoring-system 和 kubesphere-system,所有 pod 都在运行。
[root@ks-master-0 kubekey]# kubectl get pods --all-namespaces
NAMESPACE                      NAME                                           READY   STATUS    RESTARTS   AGE
kube-system                    calico-kube-controllers-75c594996d-p2bzw       1/1     Running   0          24m
kube-system                    calico-node-d8n6f                              1/1     Running   0          24m
kube-system                    calico-node-pfsvg                              1/1     Running   0          24m
kube-system                    calico-node-rlhw2                              1/1     Running   0          24m
kube-system                    coredns-67ddbf998c-glxfn                       1/1     Running   0          25m
kube-system                    coredns-67ddbf998c-ljrxm                       1/1     Running   0          25m
kube-system                    kube-apiserver-ks-master-0                     1/1     Running   0          25m
kube-system                    kube-apiserver-ks-master-1                     1/1     Running   0          24m
kube-system                    kube-apiserver-ks-master-2                     1/1     Running   0          24m
kube-system                    kube-controller-manager-ks-master-0            1/1     Running   0          25m
kube-system                    kube-controller-manager-ks-master-1            1/1     Running   0          24m
kube-system                    kube-controller-manager-ks-master-2            1/1     Running   0          24m
kube-system                    kube-proxy-8fv9q                               1/1     Running   0          24m
kube-system                    kube-proxy-b47p2                               1/1     Running   0          24m
kube-system                    kube-proxy-b9f8l                               1/1     Running   0          24m
kube-system                    kube-scheduler-ks-master-0                     1/1     Running   0          25m
kube-system                    kube-scheduler-ks-master-1                     1/1     Running   0          24m
kube-system                    kube-scheduler-ks-master-2                     1/1     Running   0          24m
kube-system                    nodelocaldns-8bbf2                             1/1     Running   0          24m
kube-system                    nodelocaldns-9kgm2                             1/1     Running   0          25m
kube-system                    nodelocaldns-mrtwr                             1/1     Running   0          24m
kube-system                    openebs-localpv-provisioner-57d95c6875-z9wwq   1/1     Running   0          24m
kube-system                    snapshot-controller-0                          1/1     Running   0          22m
kubesphere-controls-system     default-http-backend-5d5c44d77f-mcngb          1/1     Running   0          19m
kubesphere-controls-system     kubectl-admin-788ff75cd7-k59nr                 1/1     Running   0          13m
kubesphere-monitoring-system   kube-state-metrics-6cc9478499-82hwl            3/3     Running   0          16m
kubesphere-monitoring-system   node-exporter-b22bs                            2/2     Running   0          16m
kubesphere-monitoring-system   node-exporter-qqms9                            2/2     Running   0          16m
kubesphere-monitoring-system   node-exporter-zr9zp                            2/2     Running   0          16m
kubesphere-monitoring-system   prometheus-k8s-0                               2/2     Running   0          16m
kubesphere-monitoring-system   prometheus-k8s-1                               2/2     Running   0          16m
kubesphere-monitoring-system   prometheus-operator-6bd484db88-7qdkk           2/2     Running   0          16m
kubesphere-system              ks-apiserver-6797fc669-tttcb                   1/1     Running   0          19m
kubesphere-system              ks-console-6f9d57b699-ps4l2                    1/1     Running   0          19m
kubesphere-system              ks-controller-manager-6656d4f57d-mfmz7         1/1     Running   0          19m
kubesphere-system              ks-installer-55b8b4c4d9-srgfw                  1/1     Running   0          24m
至此,我们已经部署了具有三个 openEuler 服务器节点的最小化的 Kubernetes 集群和 KubeSphere。我们还通过 KubeSphere 管理控制台和命令行界面查看了集群的状态。
接下来我们将在 Kubernetes 集群上部署一个简单的 Nginx Web 服务器,测试验证Kubernetes 和 KubeSphere 正常可用。
部署测试资源
本示例使用命令行工具在 Kubernetes 集群上部署一个 Nginx Web服务器并利用 KubeSphere 图形化管理控制台查看部署的资源信息。
创建 Nginx Deployment
运行以下命令创建一个部署 Nginx Web 服务器的 Deployment。此示例中,我们将创建具有两个副本基于 nginx:alpine 镜像的 Pod。
kubectl create deployment nginx --image=nginx:alpine --replicas=2
创建 Nginx Service
创建一个新的 Kubernetes 服务,服务名称 nginx,服务类型 Nodeport,对外的服务端口 80。
kubectl create service nodeport nginx --tcp=80:80
验证 Nginx Deployment 和 Pod
运行以下命令查看创建的 Deployment 和 Pod 资源。
kubectl get deployment -o wide
kubectl get pods -o wide
查看结果如下:
[root@ks-master-0 kubekey]# kubectl get deployment -o wide
NAME    READY   UP-TO-DATE   AVAILABLE   AGE   CONTAINERS   IMAGES         SELECTOR
nginx   2/2     2            2           20s   nginx        nginx:alpine   app=nginx

[root@ks-master-0 kubekey]# kubectl get pods -o wide
NAME                     READY   STATUS    RESTARTS   AGE   IP             NODE          NOMINATED NODE   READINESS GATES
nginx-55f494c486-t44l4   1/1     Running   0          35s   10.233.69.7    ks-master-0   <none>           <none>
nginx-55f494c486-x62zs   1/1     Running   0          35s   10.233.102.5   ks-master-2   <none>           <none>
验证 Nginx Service
运行一下命令查看可用的服务列表,在列表中我们可以看到 nginx 服务类型 为 Nodeport,并在 Kubernetes 主机上开放了 30563 端口。
kubectl get svc -o wide
查看结果如下:
[root@ks-master-0 kubekey]# kubectl get svc -o wide
NAME         TYPE        CLUSTER-IP     EXTERNAL-IP   PORT(S)        AGE   SELECTOR
kubernetes   ClusterIP   10.233.0.1     <none>        443/TCP        27m   <none>
nginx        NodePort    10.233.36.81   <none>        80:30563/TCP   37s   app=nginx
访问 Nginx 服务
运行以下命令访问部署的 Nginx 服务,验证服务是否成功部署。
- 验证直接访问 Pod
curl 10.233.69.7

# 访问结果如下
[root@ks-master-0 kubekey]# curl 10.233.69.7
<!DOCTYPE html>
<html>
<head>
<title>Welcome to nginx!</title>
<style>
html { color-scheme: light dark; }
body { width: 35em; margin: 0 auto;
font-family: Tahoma, Verdana, Arial, sans-serif; }
</style>
</head>
<body>
<h1>Welcome to nginx!</h1>
<p>If you see this page, the nginx web server is successfully installed and
working. Further configuration is required.</p>

<p>For online documentation and support please refer to
<a href="http://nginx.org/">nginx.org</a>.<br/>
Commercial support is available at
<a href="http://nginx.com/">nginx.com</a>.</p>

<p><em>Thank you for using nginx.</em></p>
</body>
</html>
- 验证访问 Service
curl 10.233.36.81

# 访问结果同上,略
- 验证访问 Nodeport
curl 192.168.9.91:30563

# 访问结果同上,略
在管理控制台查看
接下来我们回到 KubeSphere 管理控制台,在管理控制台查看已经创建的资源。
说明: KubeSphere 的管理控制台具有友好地、图形化创建 Kubernetes 各种资源的功能,主要是截图太麻烦了,所以本文采用了命令行的方式简单的创建了测试资源。
只是在查看的时候给大家演示一下 KubeSphere 管理控制台的基本功能,实际使用中,大家可以使用图形化方式创建和管理 Kubernetes 资源。
- 登录 KubeSphere 管理控制台,点击「平台管理」,选择「集群管理」。
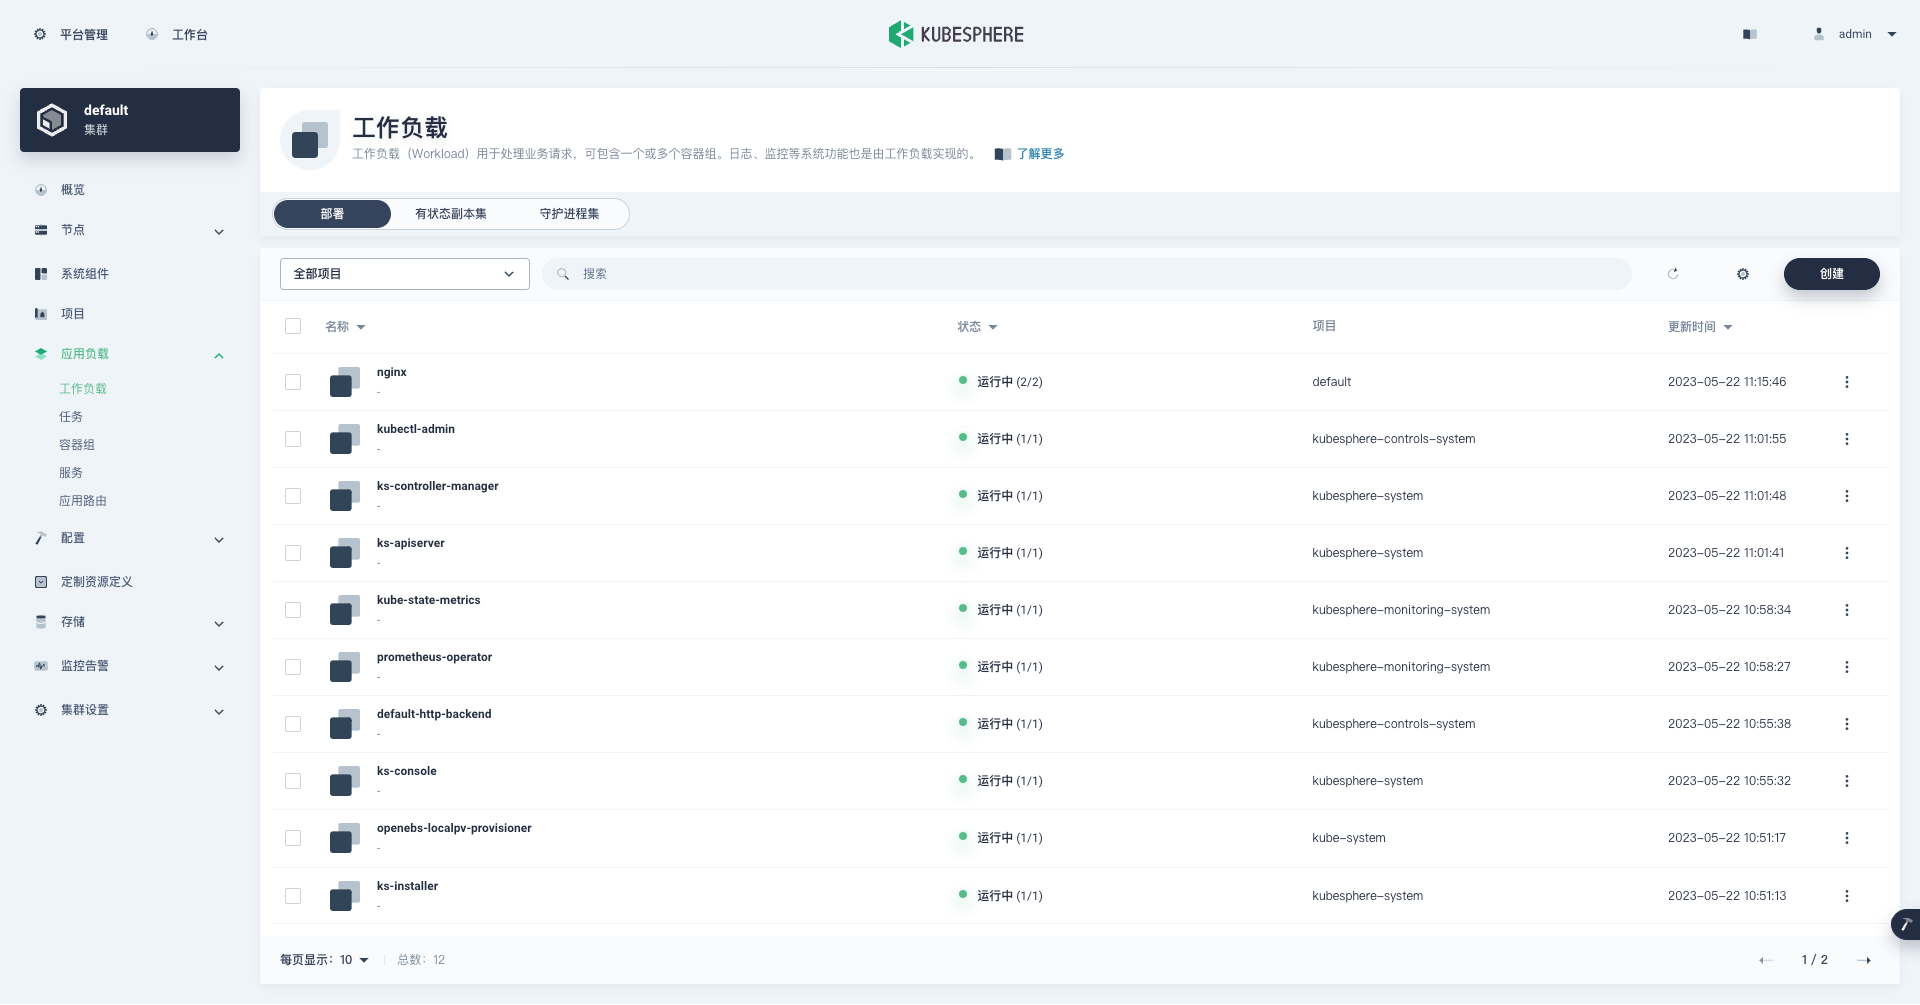
- 单击集群管理页面左侧的「应用负载」,点击「工作负载」。默认会看到所有类型为部署的工作负载。
我们使用的是 admin 账户,因此可以看到所有的工作负载,在搜索框输入 nginx,只显示 nginx 部署工作负载。
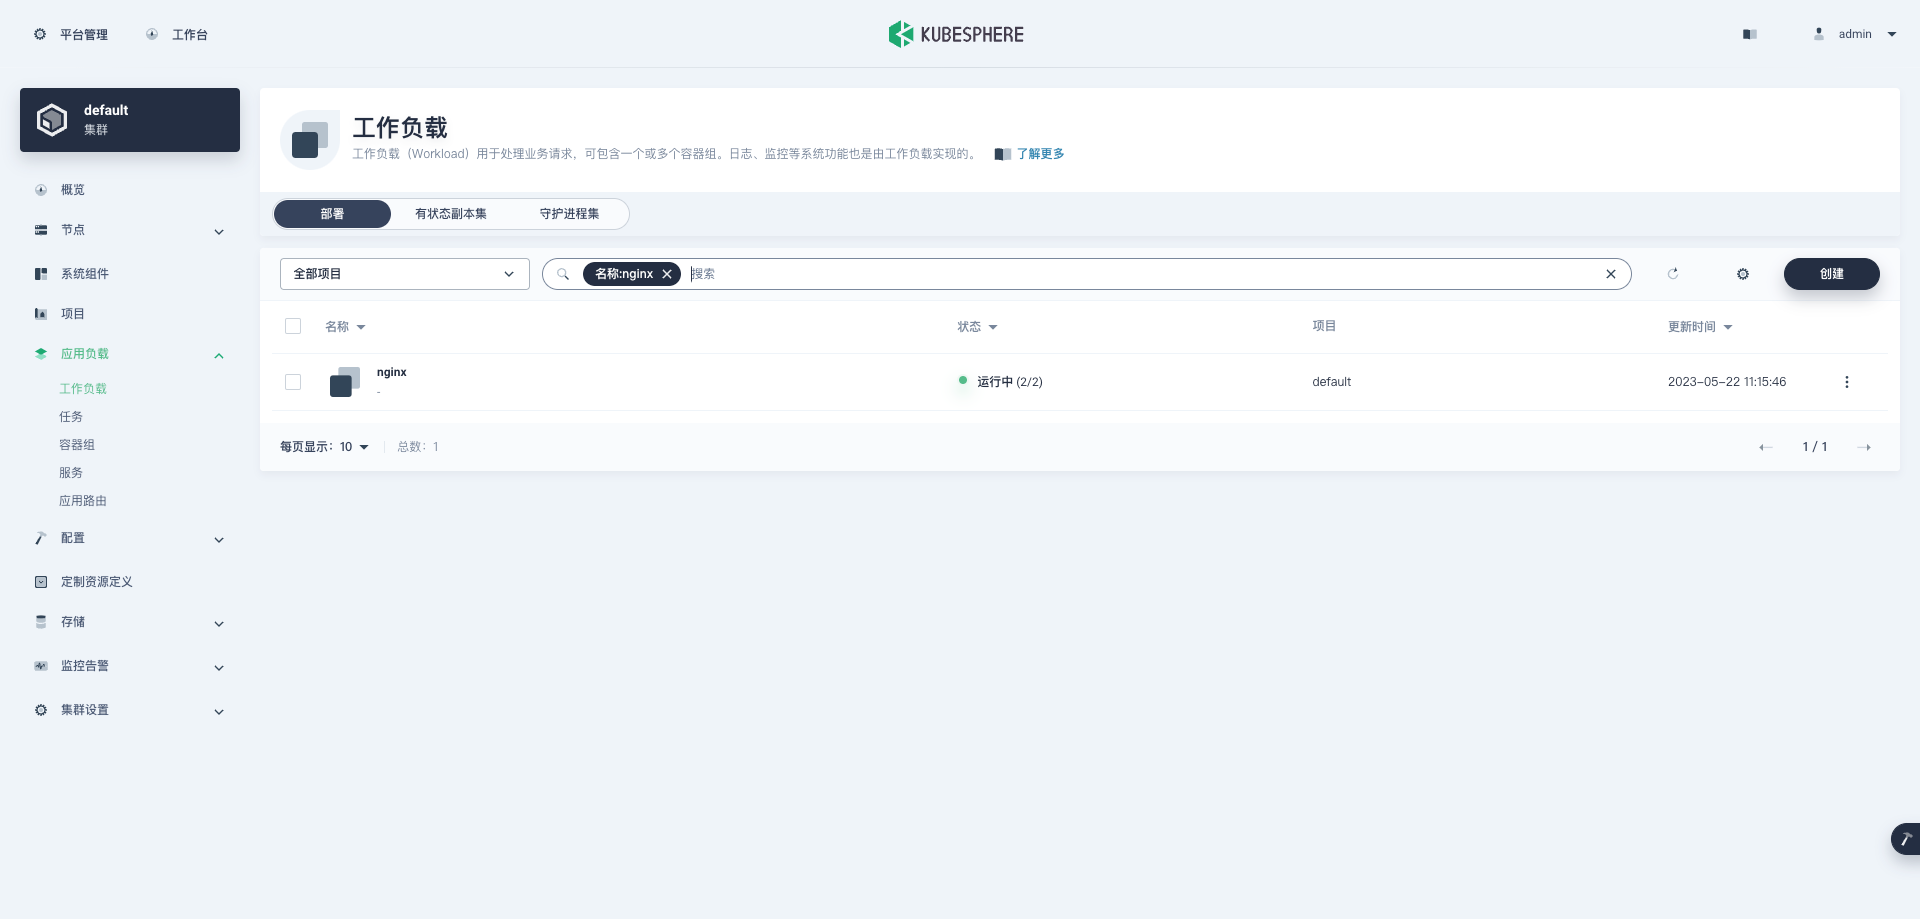
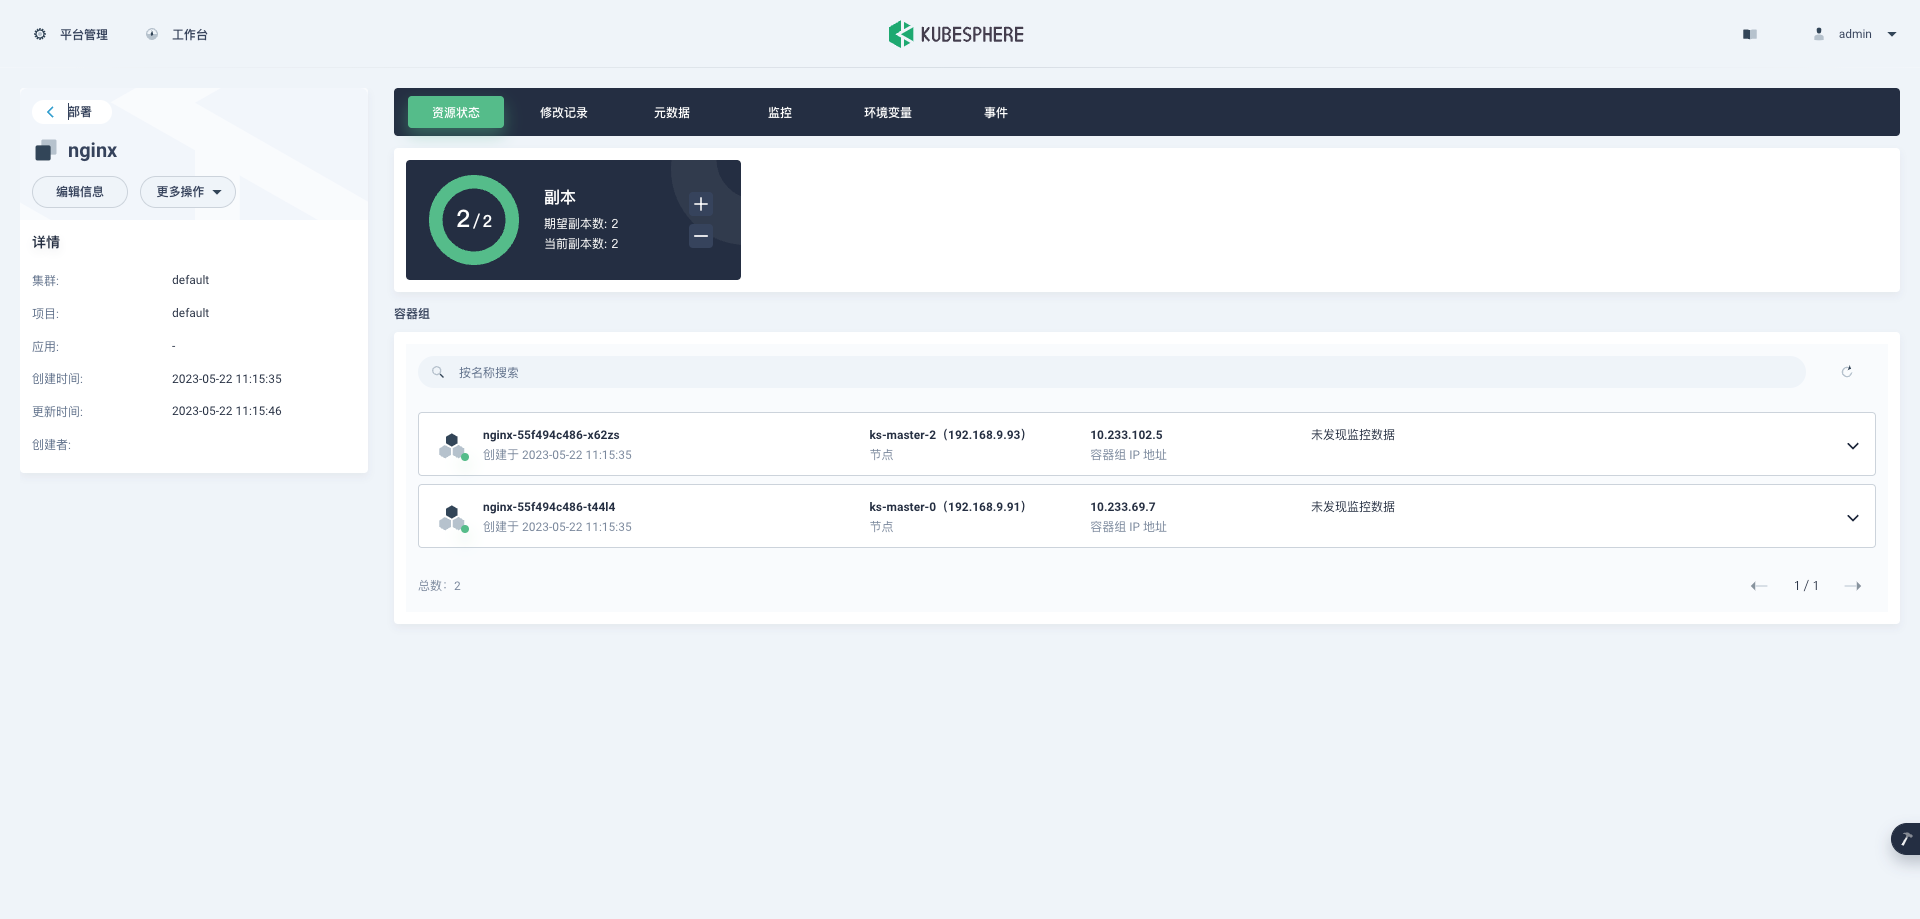
- 单击部署列表中的 nginx,可以查看更详细的信息,并且管理 nginx 部署(Deployment)。
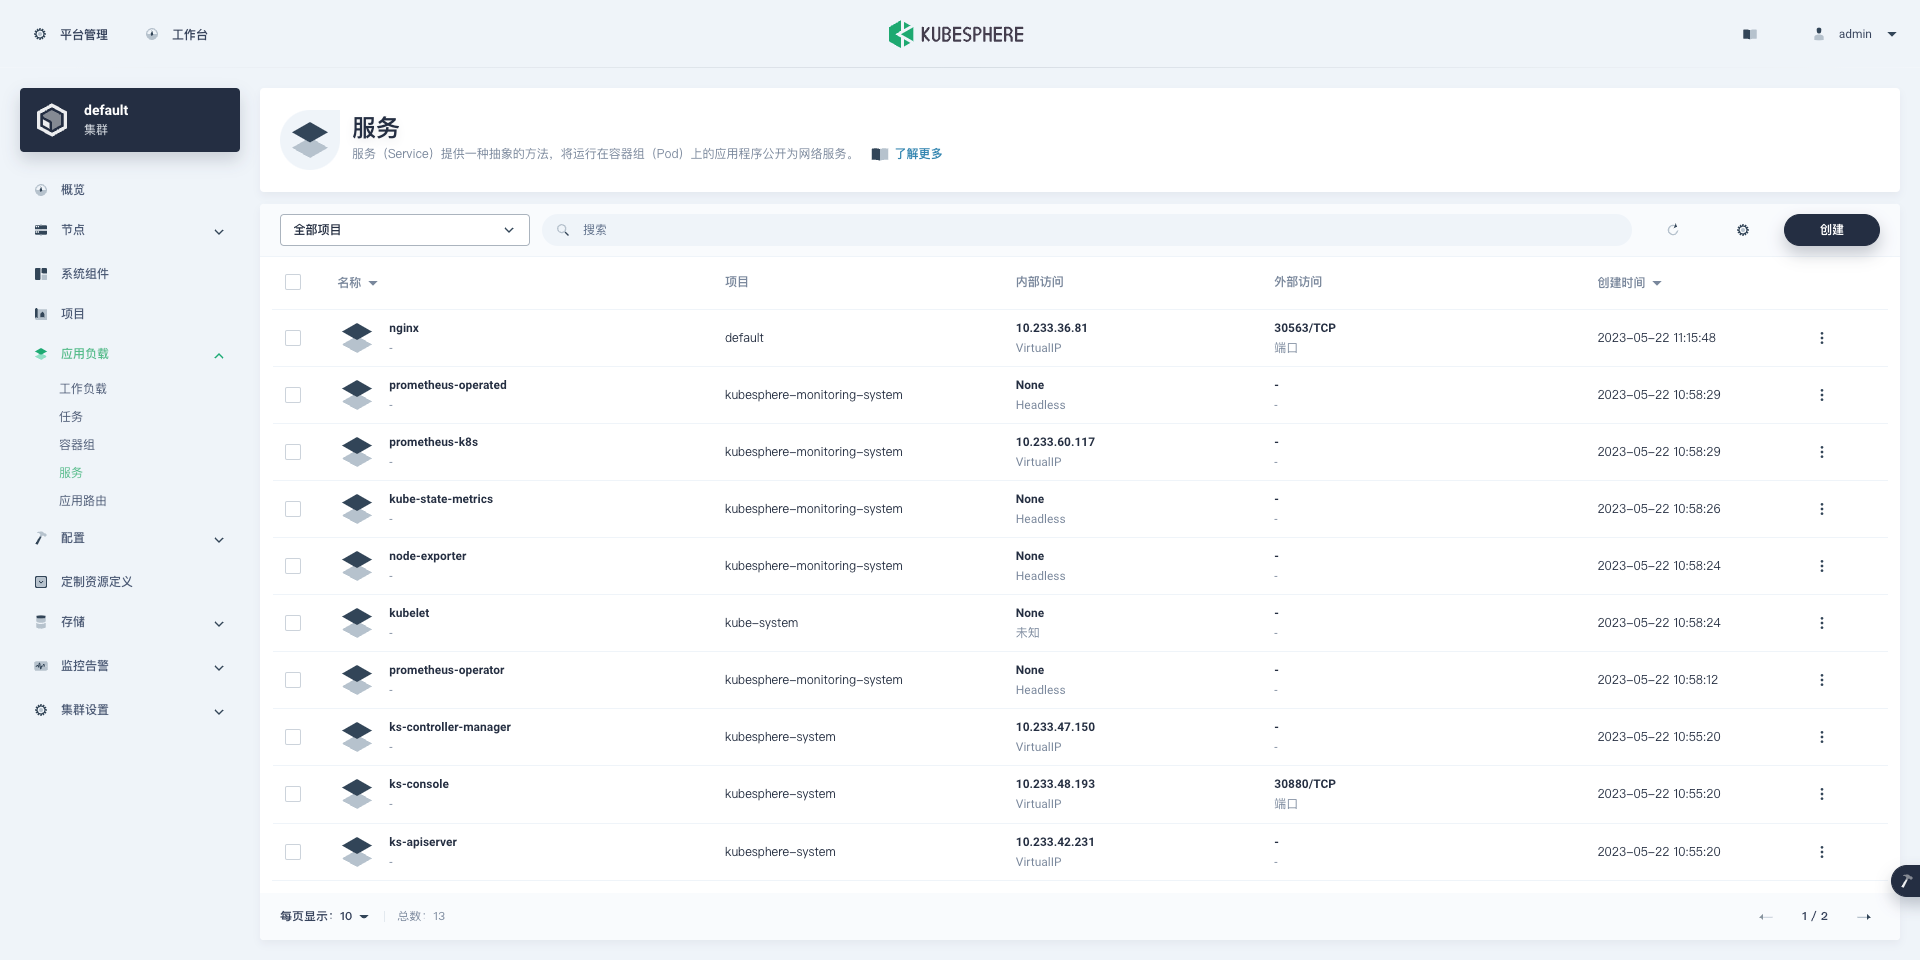
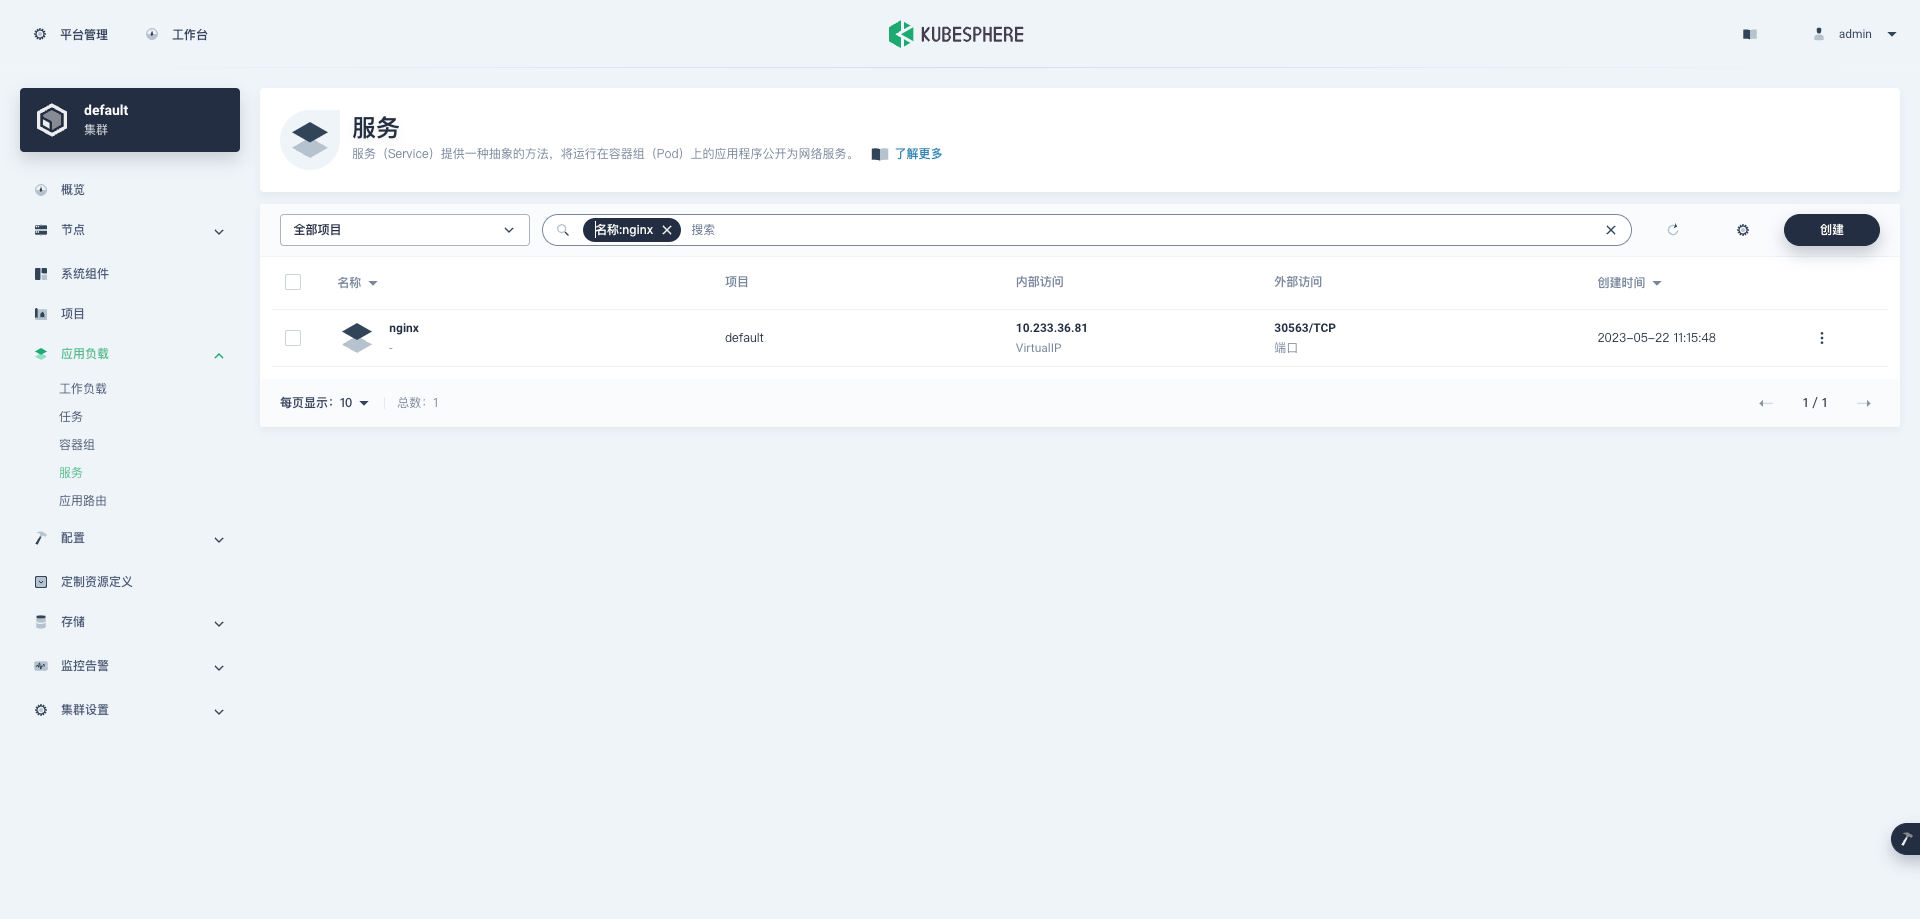
- 回到「平台管理」-「集群管理」页面,单击集群管理页面左侧的「应用负载」,点击「服务」。默认会看到所有类型为服务的工作负载。
我们使用的是 admin 账户,因此可以看到所有的工作负载,在搜索框输入 nginx,只显示 nginx 服务工作负载。
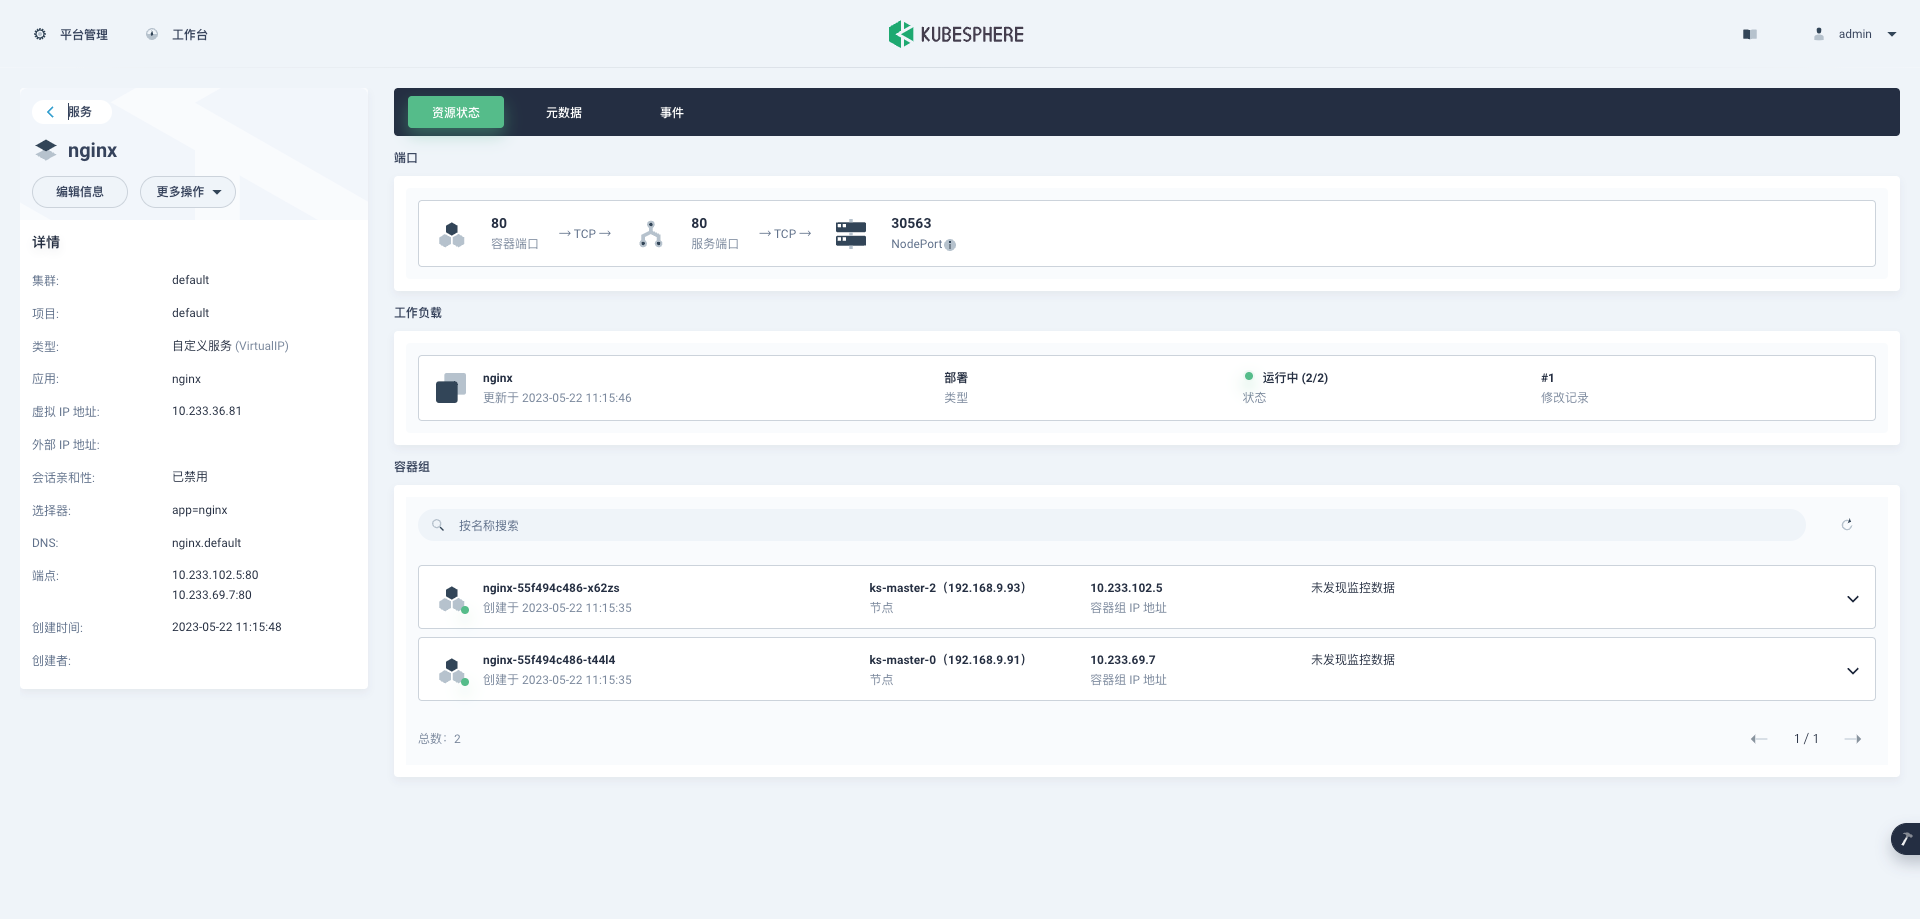
- 单击服务列表中的 nginx,可以查看更详细的信息,并且管理 nginx 服务(Service)。
至此,我们实现了将 Nginx Web 服务器部署到 Kubernetes 集群,并通过 KubeSphere 管理控制台查看、验证了部署的Deployment、Pod、Service的详细信息。
结束语
本文主要介绍了在三台 openEuler 22.03 LTS SP1 服务器上利用 KubeKey 自动化部署 KubeSphere 和 Kubernetes 高可用集群的详细过程。
部署完成后,我们还利用 KubeSphere 管理控制台和 kubectl 命令行,查看并验证了 KubeSphere 和 Kubernetes 集群的状态。
最终我们通过在 Kubenetes 集群上部署 Nginx Web服务器验证了 Kubernetes 集群和 KubeSphere 的可用性,并通过在 KubeSphere 管理控制台查看 Nginx Pod 和 服务状态的操作,了解了 KubeSphere 的基本用法。
目录
