


作者:申红磊,青云科技容器解决方案架构师,开源项目爱好者,KubeSphere Member。
背景
在实际使用中,会有一些用户,在不同场景中经常碰到 OpenLDAP 对接问题:
- 能否对接 LDAP?
- 对接方式都有什么,有界面吗?
- 能否按自己要求来对接指定账户,而非全部账户都能访问?
- 能否批量导入账户?
- 默认角色如何绑定?
在这里可以简单操作一下,以便来抛砖引玉,主要思路为:在 KubeSphere 中直接运行一个 LDAP Server,用 ApacheDirectoryStudio 来验证,然后使用 KubeSphere 进行 LDAP 对接验证。
前置条件
您需要部署一个 K8s 集群,并在集群中安装 KubeSphere。有关详细信息,请参阅在 Linux 上安装和在 Kubernetes 上安装。
KubeSphere 中部署 LDAP
这里通过应用为用户提供完整的业务功能,由一个或多个特定功能的组件组成。来部署 OpenLDAP
部署 LDAP 应用

创建无状态服务(演示使用)
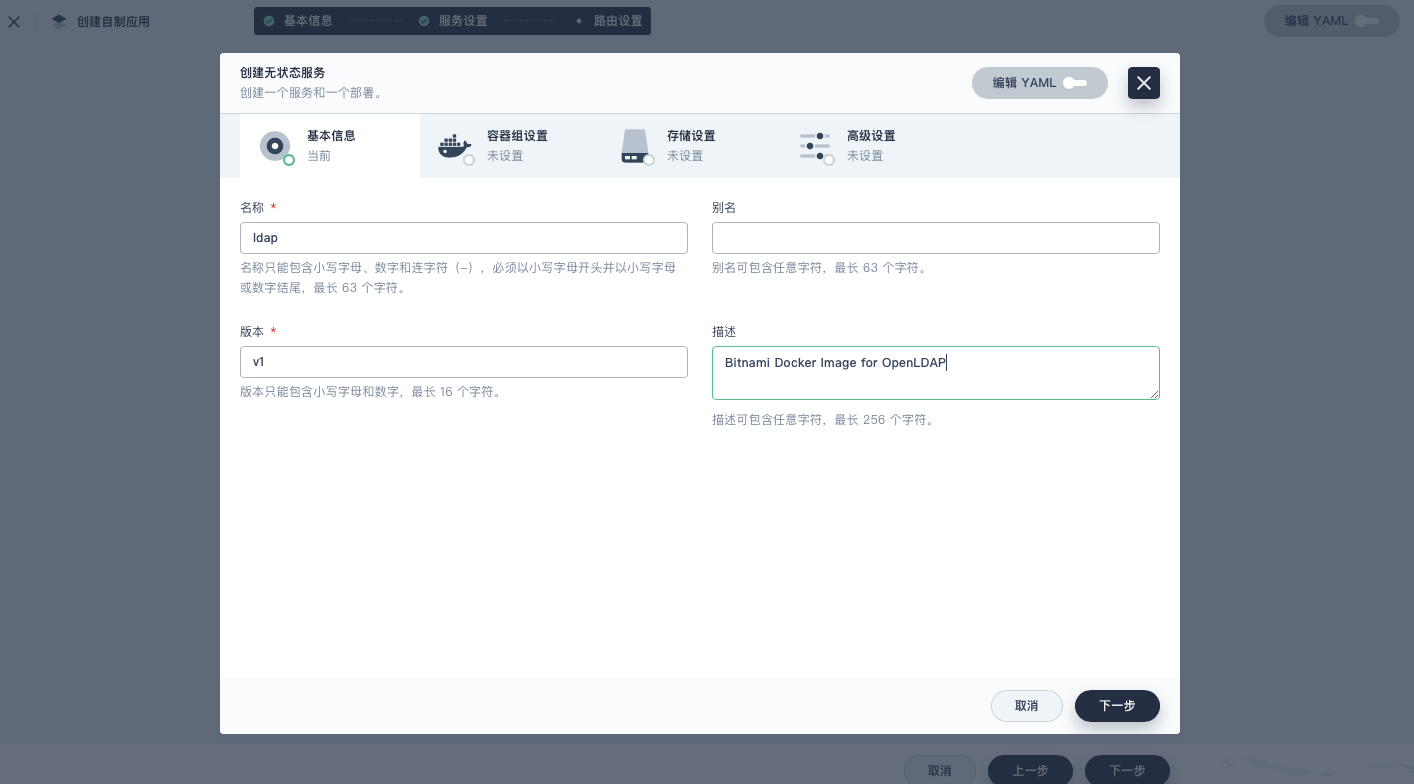
这里使用的镜像为:bitnami/openldap:latest
docker pull bitnami/openldap:latest
# 参考 the OpenLDAP server instance 可以配置 env 在后面使用
$ docker run --detach --rm --name openldap \
  --network my-network \
  --env LDAP_ADMIN_USERNAME=admin \
  --env LDAP_ADMIN_PASSWORD=adminpassword \
  --env LDAP_USERS=customuser \
  --env LDAP_PASSWORDS=custompassword \
  bitnami/openldap:latest
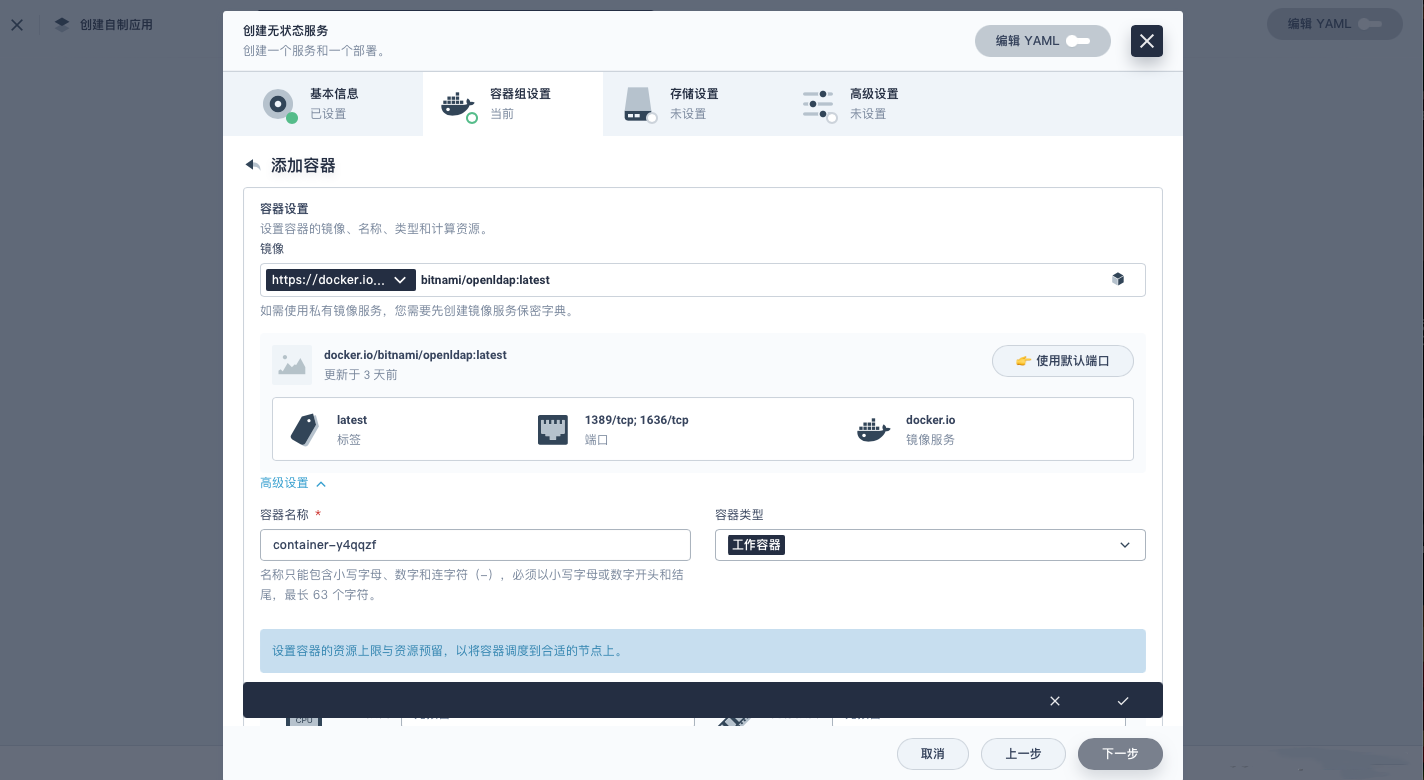
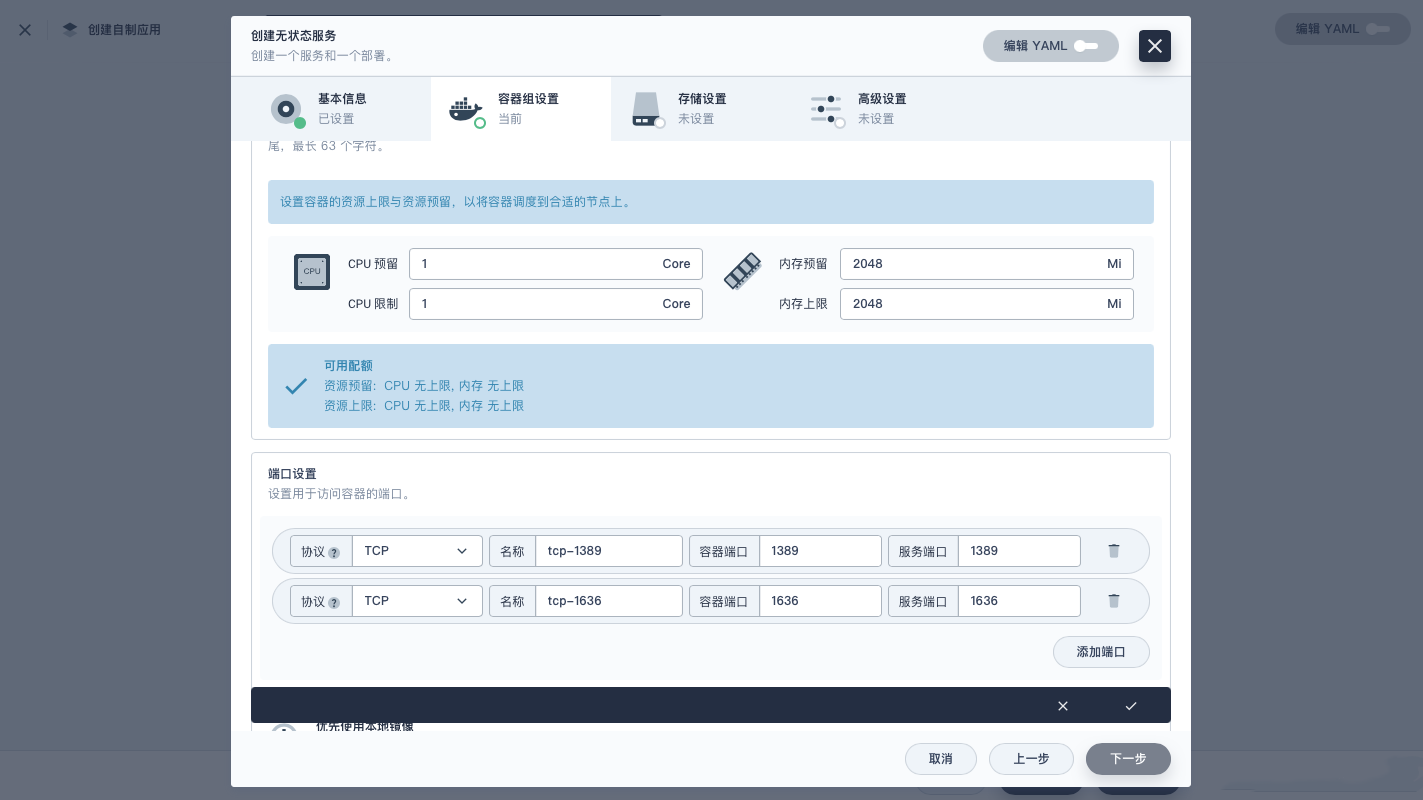
配置 Resources 的 Request 和 Limit ,并使用默认端口:
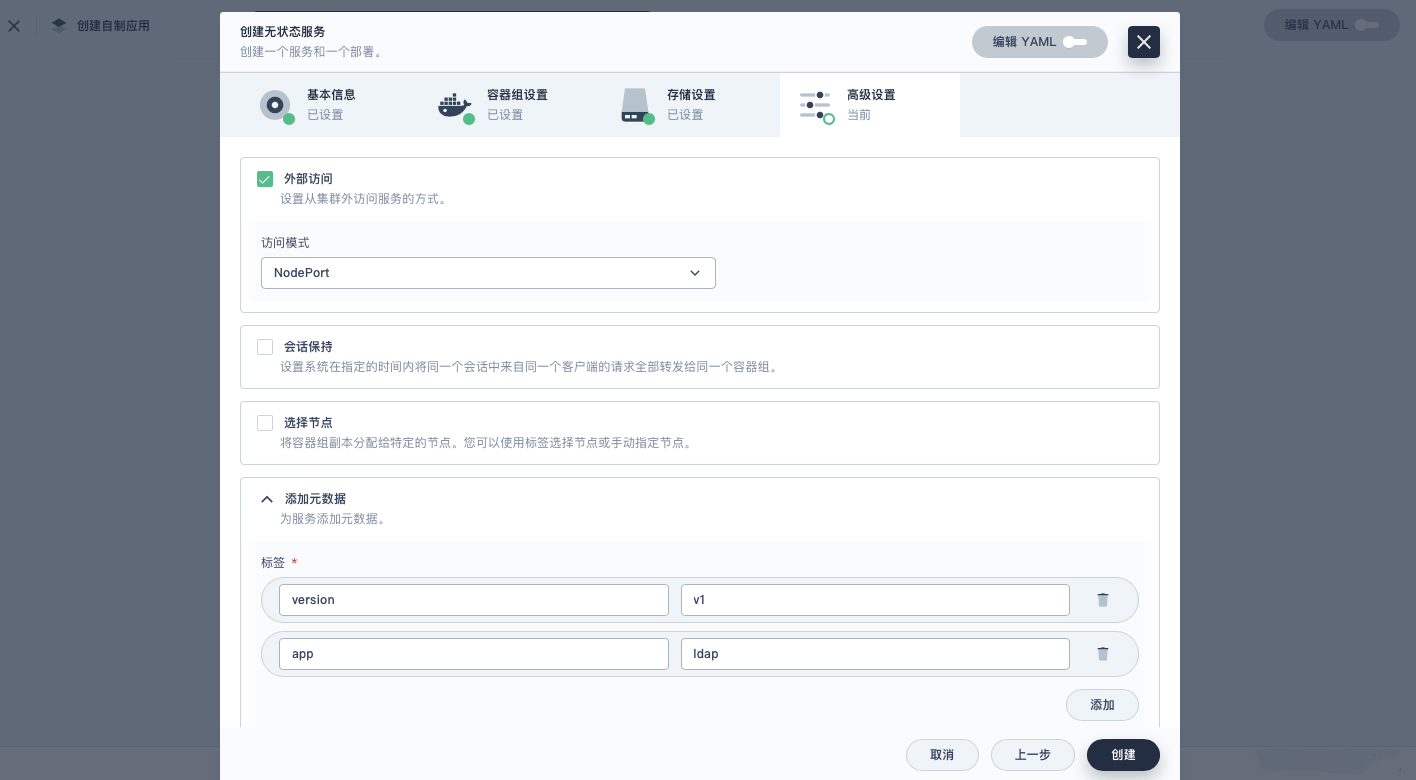
上面所说的环境变量,可以进行批量引用(KubeSphere 很多功能,明亮简洁又好用)。

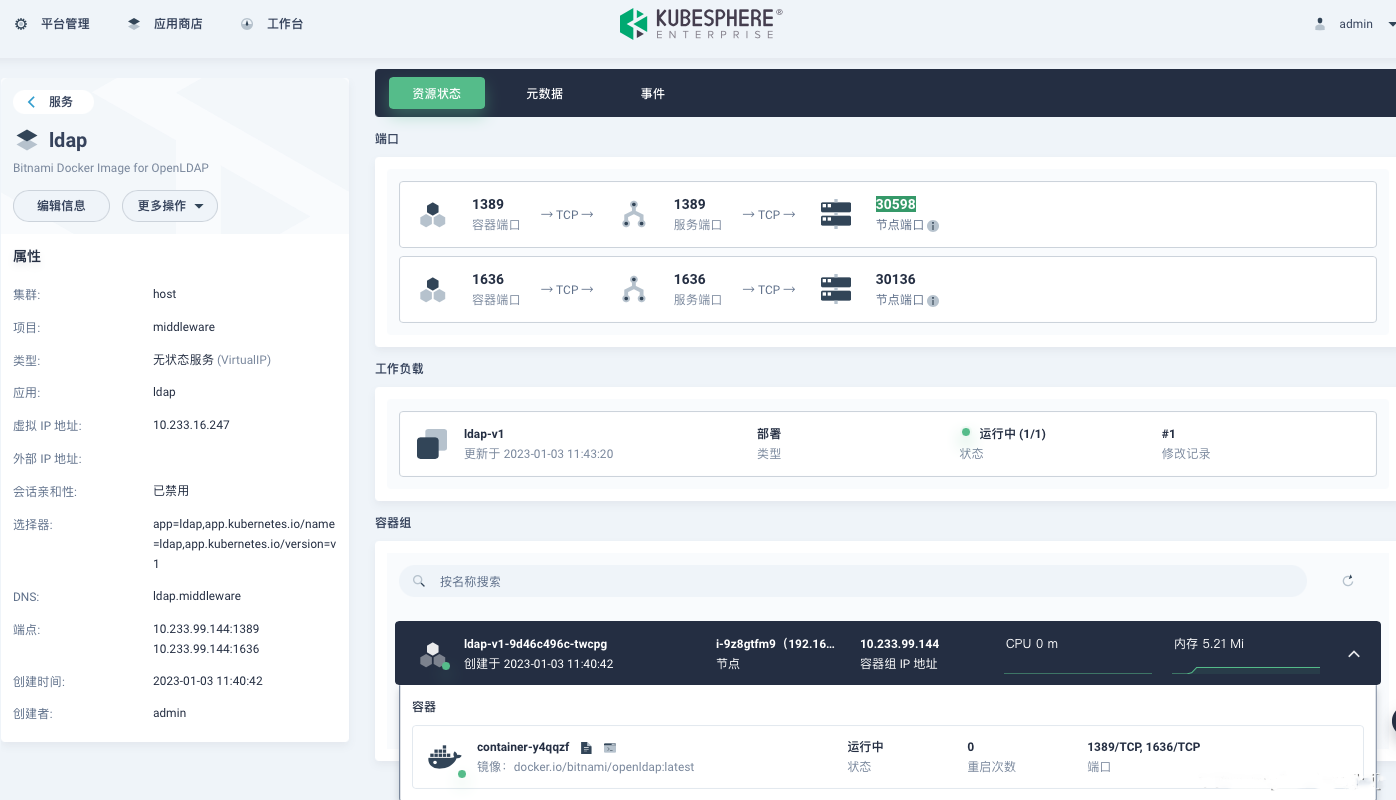
外部访问,这里使用模式为:NodePort。
服务如下,通过 1389 对应的 NodePort 30598 来访问。
ApacheDirectoryStudio 验证 LDAP
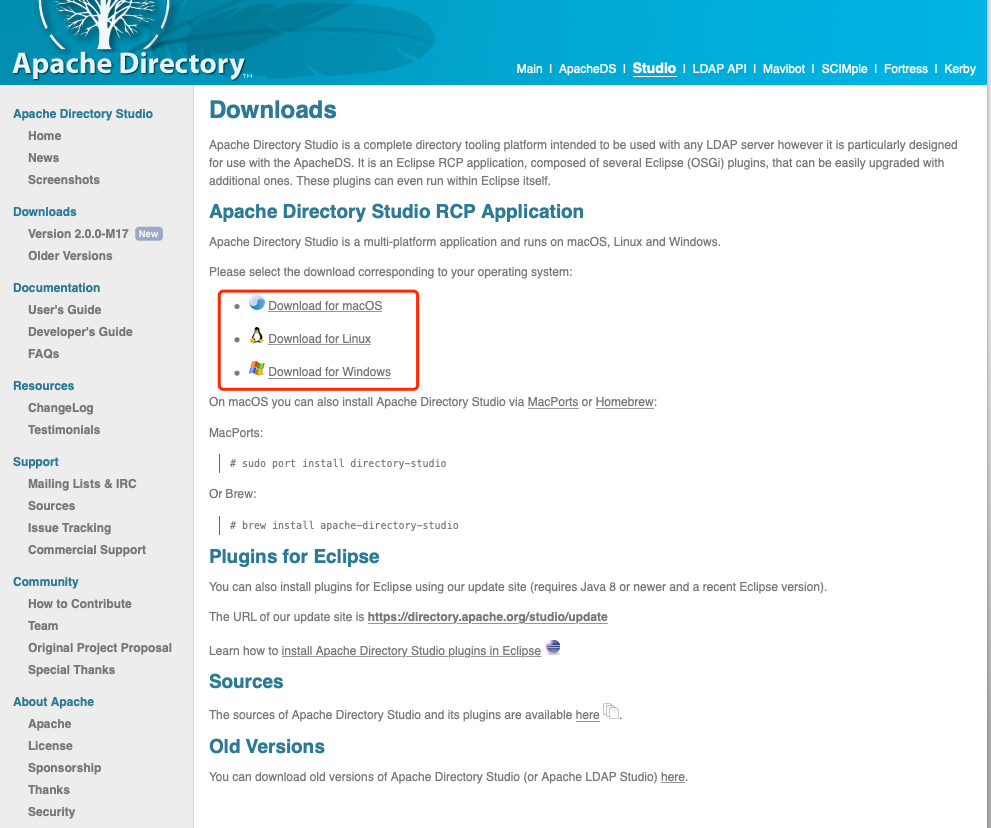
通过 ApacheDirectoryStudio 来直接验证,确认 OpenLDAP server instance 无问题后,再进行 KubeSphere 的对接。首先先下载 Mac 版 ApacheDirectoryStudio。
下载部署 ApacheDirectoryStudio
ApacheDirectoryStudio-2.0.0.v20210717-M17-macosx.cocoa.x86_64.dmg

安装部署后 ApacheDirectoryStudio 如下:
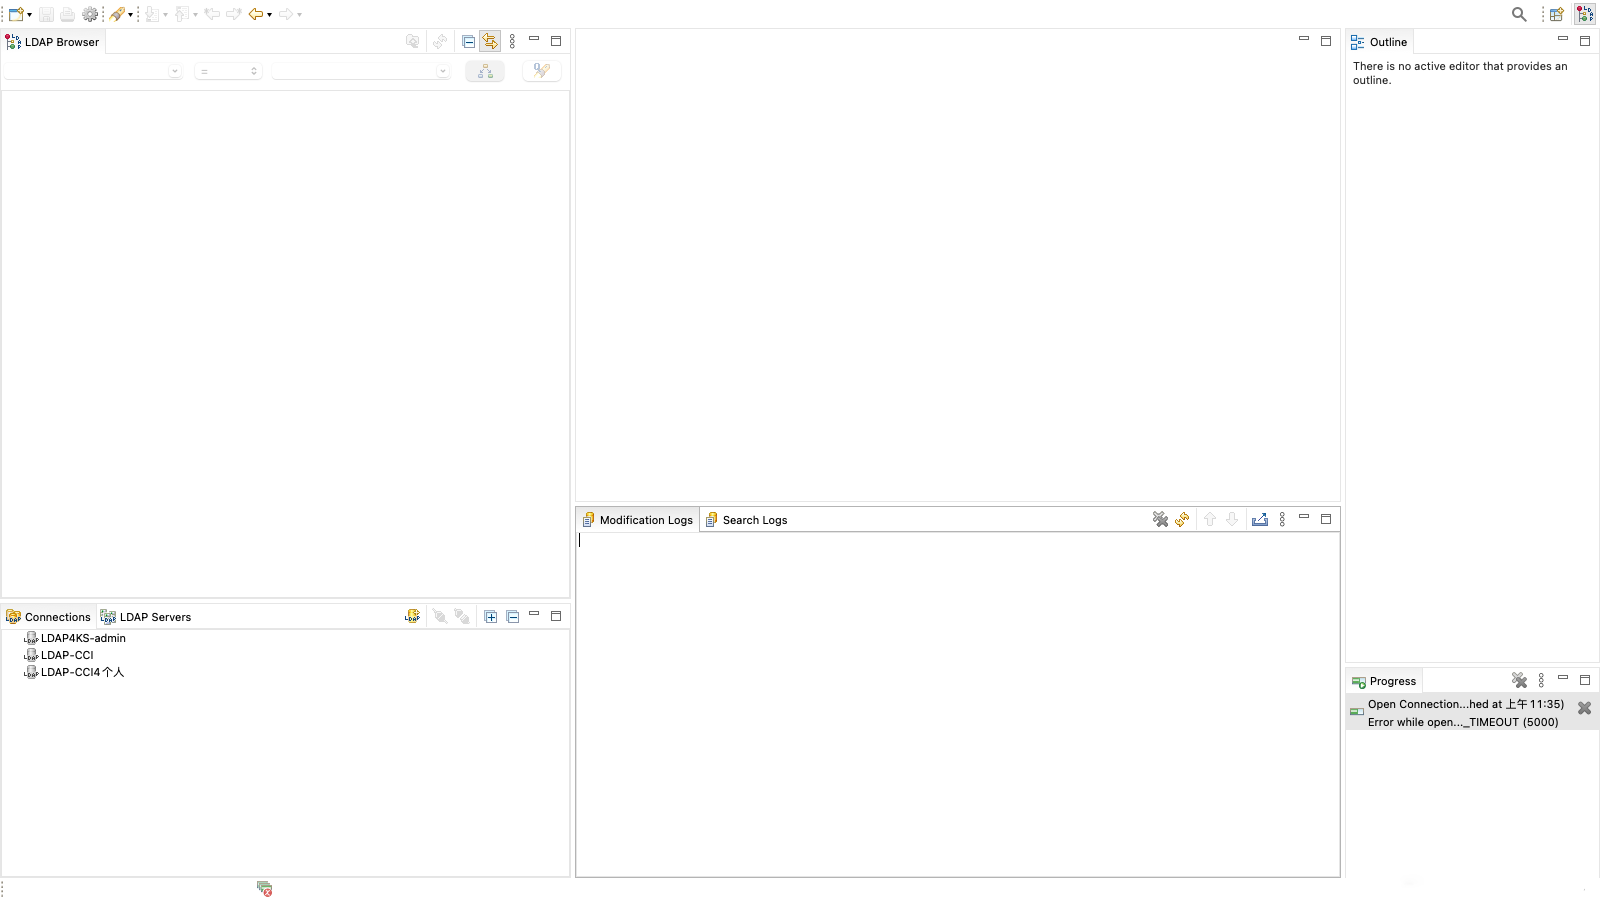
ApacheDirectoryStudio 测试 LDAP
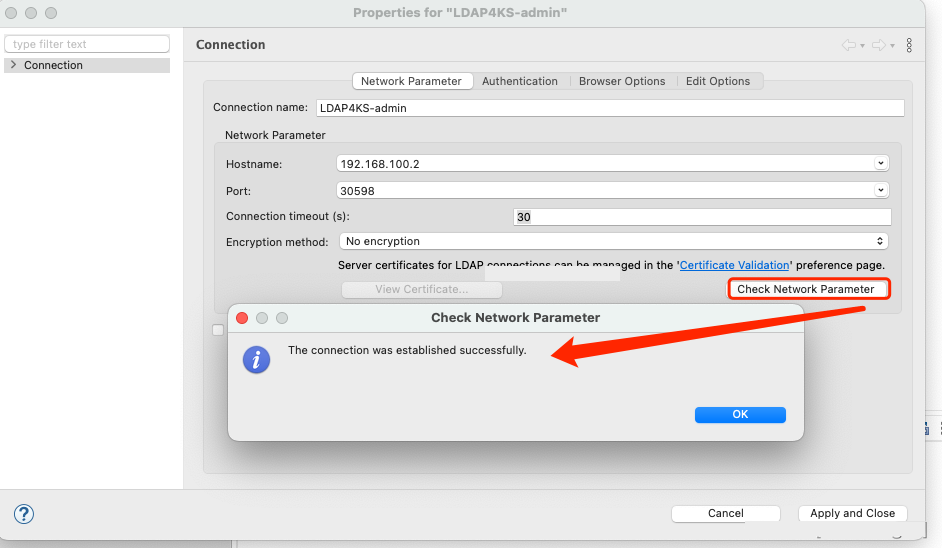
创建 CONNECTIONS:

Connection Name: LDAP4KS-admin

NetWork Parameter
HostName: 192.168.100.2
Port: 30598
Connection timeout(s): 30
Encryption method: no encryption
Authentication:
Authentication Method: Simple authentication
#参考上面时设置的 the OpenLDAP server instance 可以配置 env 在后面使用
Authentication Parameter:
Bind DB or User: cn=admin,dc=example,dc=org
Bind password: adminpassword
在 the OpenLDAP server instance 可以配置 env 在后面使用 --env LDAP_ADMIN_USERNAME=admin
--env LDAP_ADMIN_PASSWORD=adminpassword
--env LDAP_USERS=customuser
--env LDAP_PASSWORDS=custompassword \

Browser Options:
# 这里可以通过 FetchBase DNs 获取 Base DN: dc=example,dc=org
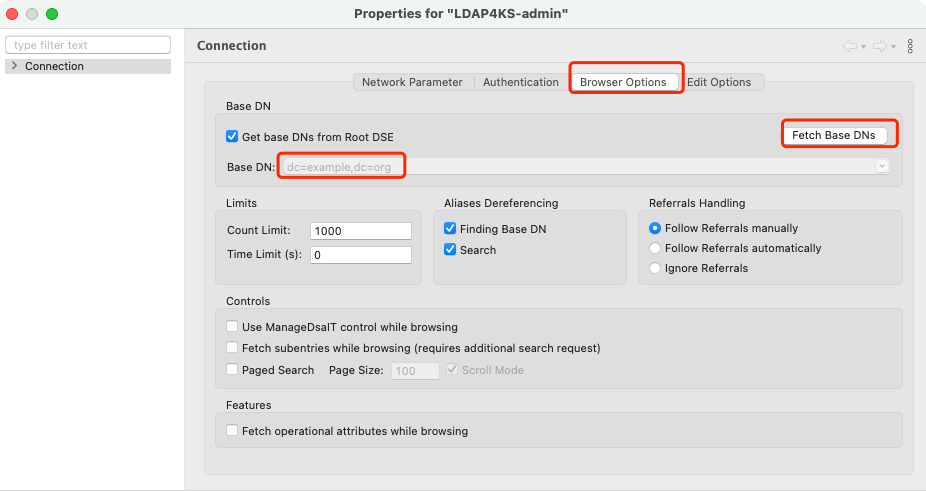
这里有一个小细节,如果对接认证账户不是 admin, 在 ApacheDirectoryStudio 中添加 Entry 时会显示无权限添加,所以 Studio 对接时可以选择使用 admin , 查询对接时可以使用其它账户。
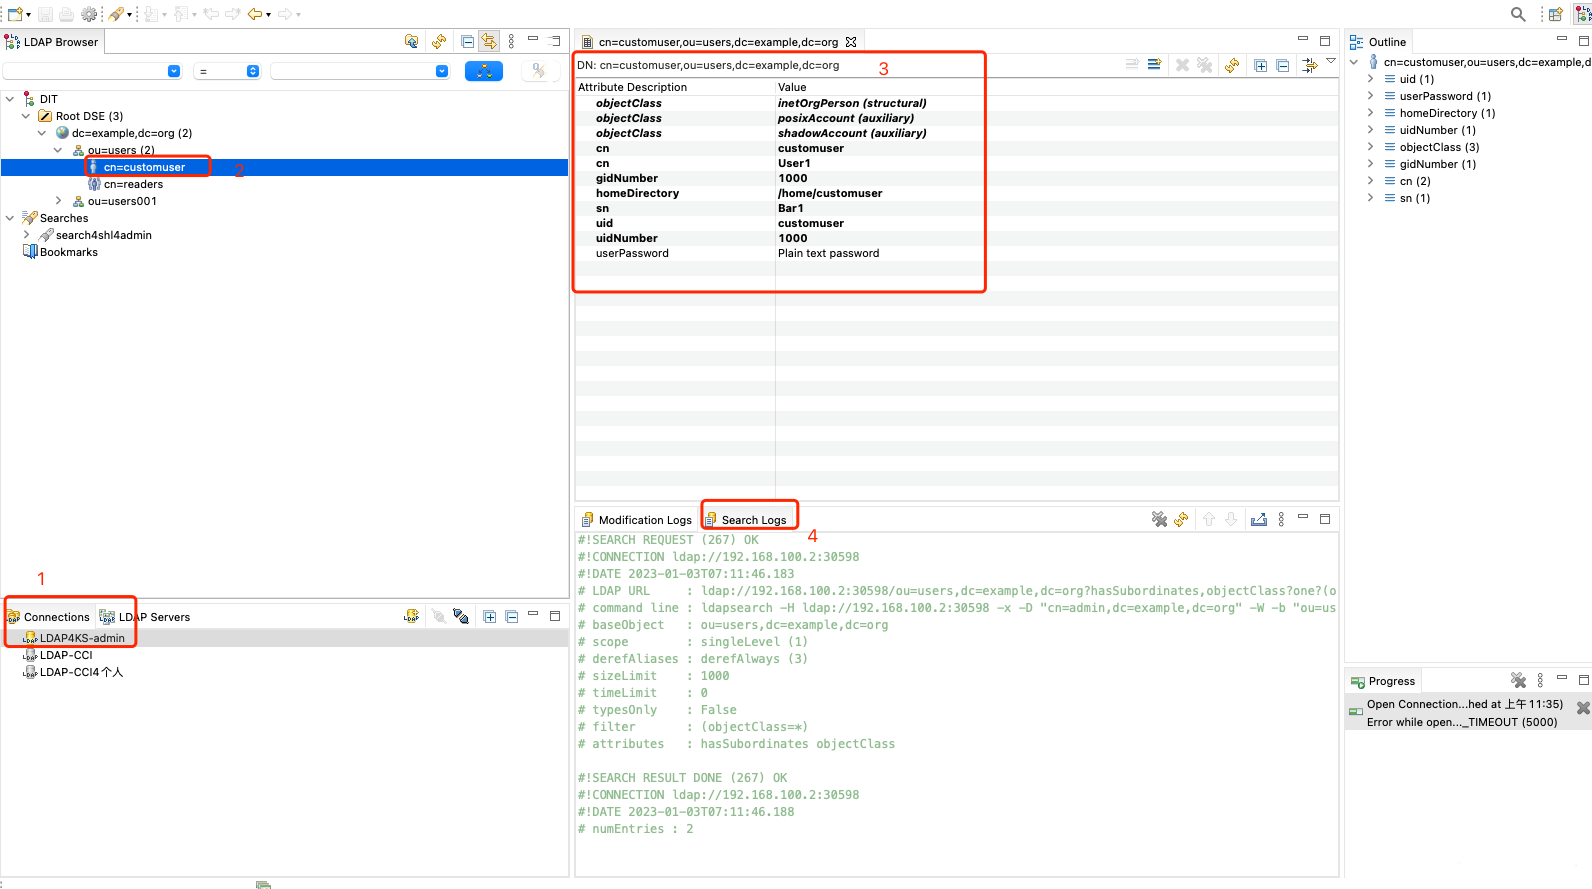
创建 Ldap Search ,KS 对接时可选择使用
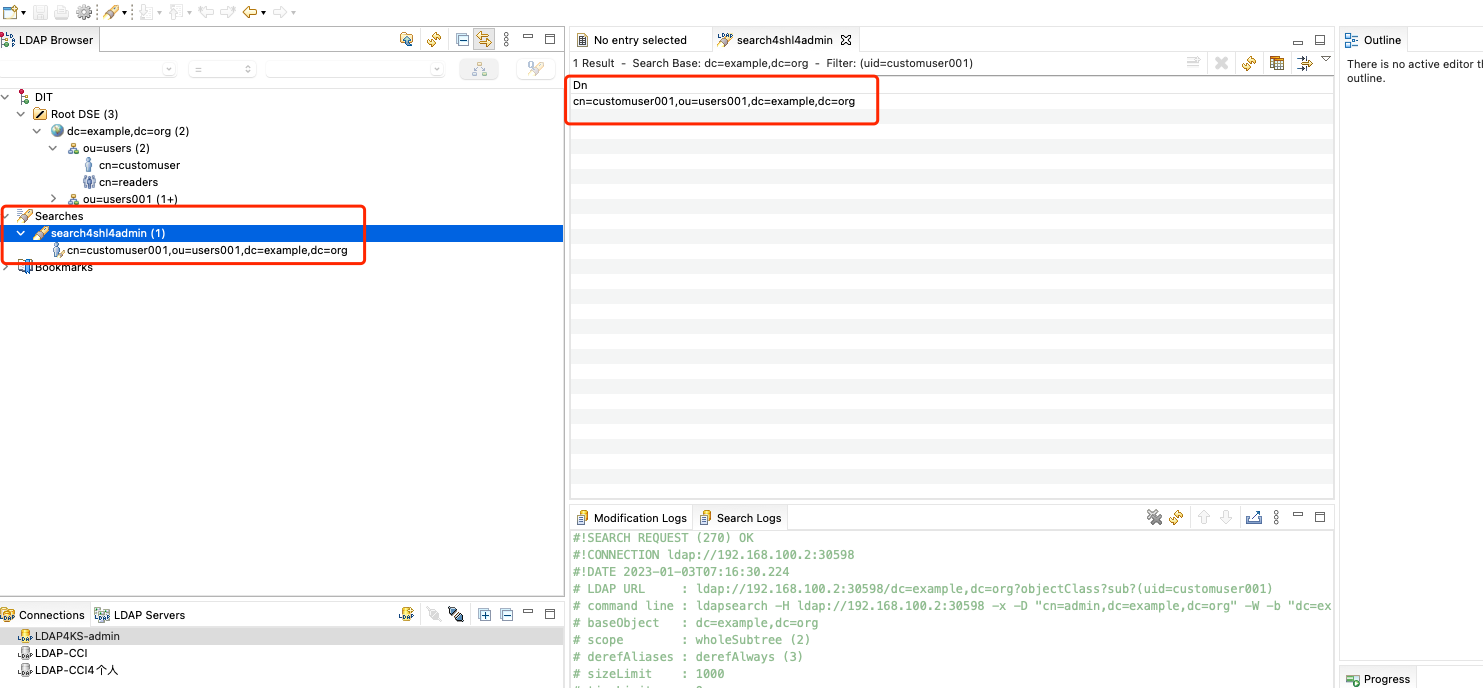
这里举例展示,userSearchFilter 的结果集,可以根据自己业务需求,将符合条件的用户,显示这个 Ldap Search 中,这里只是在 filter 中添加一个条件为:(uid=customuser001)
dc=example,dc=org  -  Filter: (uid=customuser001)
#在 KubeSphere 对接中,这里显示为:
userSearchFilter: (uid=customuser001)
KubeSphere 对接 LDAP
Harbor 的对接界面是酱紫

KubeSphere 的对接方式是酱紫
上述 Harbor 对接 LDAP 界面功能,这里同样可以实现。
暂时没有界面,CRD ClusterConfiguration 中的 ks-installer:
kubectl -n kubesphere-system edit cc ks-installer
spec:
  alerting:
    enabled: true
  auditing:
    enabled: true
  authentication:
    jwtSecret: ""
    maximumClockSkew: 10s
    multipleLogin: true
    oauthOptions:
      accessTokenInactivityTimeout: 30m
      accessTokenMaxAge: 1h
      identityProviders:
      - mappingMethod: auto
        name: LDAP
        provider:
          host: ldap.middleware.svc:1389 #这里我填写的为 KS 集群内部访问方式
          loginAttribute: uid
          mailAttribute: mail
          managerDN: cn=admin,dc=example,dc=org
          managerPassword: adminpassword
          userSearchBase: dc=example,dc=org
          userSearchFilter: (uid=customuser001) #这里配置userSearchFilter可根业务灵活配置
        type: LDAPIdentityProvider
排错或者查看日志情况:
#在 cc 里配置好,等待 ks-installer 自动更新;或者手动重启 ks-apiserver
#编辑ks-installer
kubectl edit cc -n kubesphere-system ks-installer
#重启ks-installer
kubectl rollout restart -n kubesphere-system deploy ks-installer
#重启ks-apiserver
kubectl rollout restart -n kubesphere-system deploy ks-apiserver
#查看ks-apiserver日志
kubectl -n kubesphere-system logs ks-apiserver-xxxxxxxxx
KubeSphere 配置验证
http://192.168.100.2:30880/kapis/config.kubesphere.io/v1alpha2/configs/oauth
验证配置内容已经正确更新:

如果 mappingMethod 设置为 lookup,可以运行以下命令并添加标签来进行帐户关联。如果 mappingMethod 是 auto 可以跳过这个部分。

kubectl edit user <KubeSphere username>

labels:
  iam.kubesphere.io/identify-provider: <LDAP service name>
  iam.kubesphere.io/origin-uid: <LDAP username>
测试使用 OpenLDAP
首先我在 OpenLDAP 中 ldap search 结果显示只有一个用户 customuser001。
那么就用 customuser001 这个用户来尝试登录试试:
#这个用户是我在 studio 中通过界面添加的一个新用户,customuser001,密码为:custompassword001
customuser001
custompassword001

切换回管理员,查看账户同步内容:
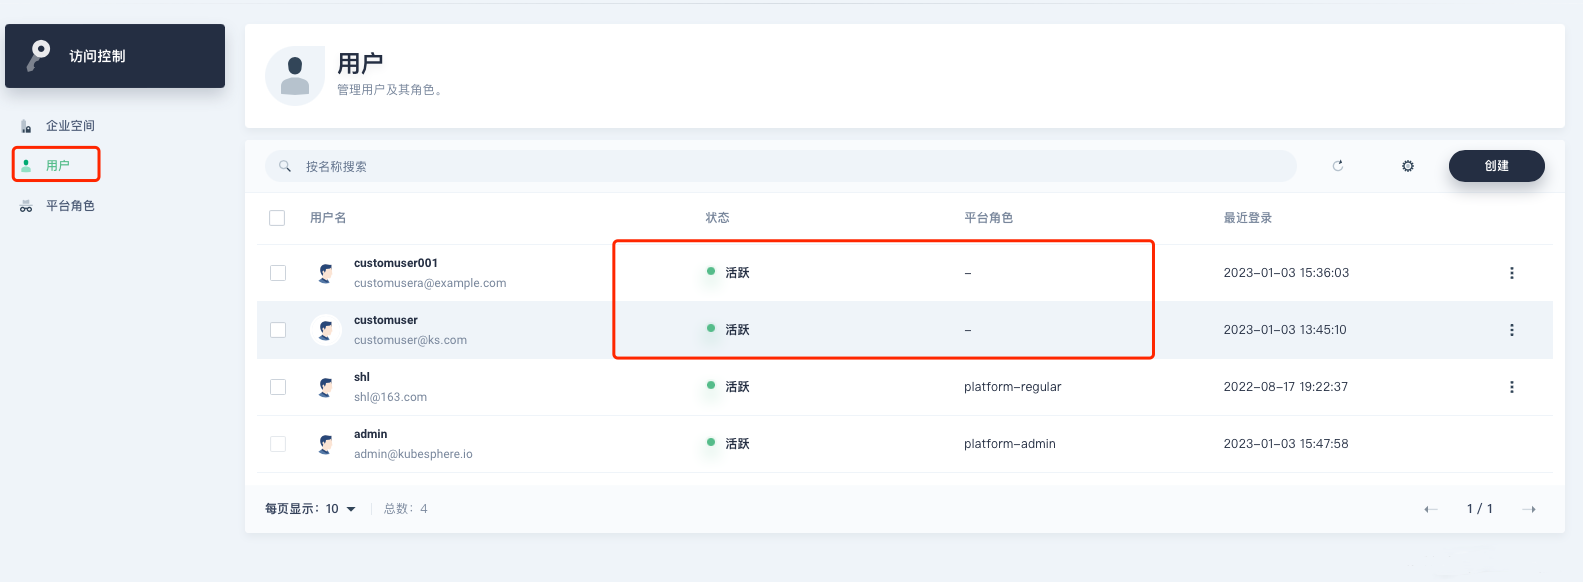
目前来看,默认同步的账户可以登录,但是没有赋予角色,需要再人为分配下或者设置成默认角色进行导入。
批量导出导入用户数据到 KubeSphere
这里只提供一下思路,批量脚本可自行编写:
#可以在 KubeSphere 中提前导入第三方(eg.ldap)账户并关联平台角色、企业空间
cat << EOF | kubectl apply -f -
apiVersion: iam.kubesphere.io/v1alpha2
kind: User
metadata:
  labels:
    iam.kubesphere.io/identify-provider: <IDENTITY_PROVIDER_NAME> #这里指配置名称为:ldap
    iam.kubesphere.io/origin-uid: <UID> #第三方账户的 UID
  name: <USERNAME> # 关联的 KubeSphere 账户名称
spec:
  email: <EMAIL> # 关联的 KubeSphere 账户email
EOF
导入账号到 KubeSphere
#eg.账户数据如下
identify-provider:ldap
origin-uid:customuser002
email:custompasswordaa@ks.com

cat << EOF | kubectl apply -f -
apiVersion: iam.kubesphere.io/v1alpha2
kind: User
metadata:
  labels:
    iam.kubesphere.io/identify-provider: ldap
    iam.kubesphere.io/origin-uid: customuser002
  name: customuser002
spec:
  email: custompasswordaa@ks.com
EOF

root@i-9z8gtfm9:/home/ubuntu# kubectl get user
NAME            EMAIL                     STATUS
admin           admin@kubesphere.io       Active
customuser      customuser@ks.com         Active
customuser001   customusera@example.com   Active
customuser002   custompasswordaa@ks.com   Active
shl             shl@163.com               Active
为导入账号关联平台角色
这里将用户 customuser001 关联成 platform-regular 角色:
cat << EOF | kubectl apply -f -
apiVersion: iam.kubesphere.io/v1alpha2
kind: GlobalRoleBinding
metadata:
  labels:
    iam.kubesphere.io/user-ref: customuser001
  name: customuser001-platform-regular
roleRef:
  apiGroup: iam.kubesphere.io
  kind: GlobalRole
  name: platform-regular #查询平台已有的角色
subjects:
- apiGroup: rbac.authorization.k8s.io
  kind: User
  name: customuser001
EOF
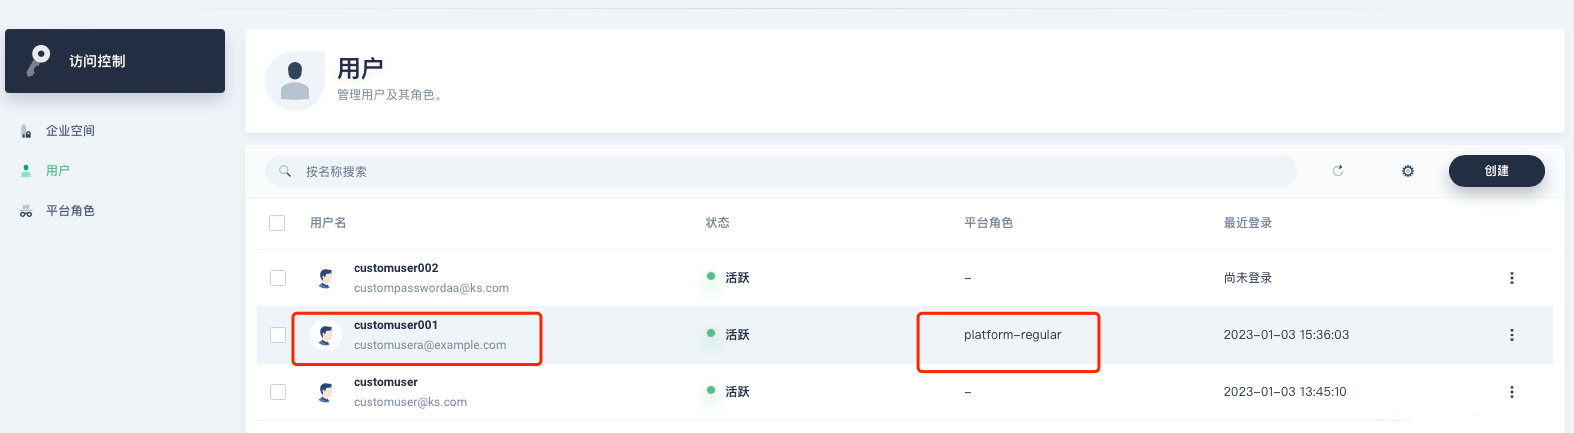
执行后,查询结果:
root@i-9z8gtfm9:/home/ubuntu# kubectl get globalrolebinding
NAME                             AGE
admin                            139d
anonymous                        139d
authenticated                    139d
customuser001-platform-regular   93s
pre-registration                 139d
shl-platform-regular             139d
root@i-9z8gtfm9:/home/ubuntu# kubectl get globalrolebinding customuser001-platform-regular -oyaml
apiVersion: iam.kubesphere.io/v1alpha2
kind: GlobalRoleBinding
metadata:
  annotations:
    kubectl.kubernetes.io/last-applied-configuration: |
      {"apiVersion":"iam.kubesphere.io/v1alpha2","kind":"GlobalRoleBinding","metadata":{"annotations":{},"labels":{"iam.kubesphere.io/user-ref":"customuser001"},"name":"customuser001-platform-regular"},"roleRef":{"apiGroup":"iam.kubesphere.io","kind":"GlobalRole","name":"platform-regular"},"subjects":[{"apiGroup":"rbac.authorization.k8s.io","kind":"User","name":"customuser001"}]}
  creationTimestamp: "2023-01-03T08:34:23Z"
  generation: 1
  labels:
    iam.kubesphere.io/user-ref: customuser001
    kubefed.io/managed: "false"
  name: customuser001-platform-regular
  resourceVersion: "3436734"
  uid: 9d7a18a6-b4c9-40f8-8186-7029575e5d2d
roleRef:
  apiGroup: iam.kubesphere.io
  kind: GlobalRole
  name: platform-regular
subjects:
- apiGroup: rbac.authorization.k8s.io
  kind: User
  name: customuser001
已有企业空间 / 创建企业空间
#这里注意多集群的企业空间差异
cat << EOF | kubectl apply -f -
apiVersion: tenant.kubesphere.io/v1alpha2
kind: WorkspaceTemplate
metadata:
  name: app
spec:
  # placement: {}
  placement:
    clusters:
    - name: <CLUSTER_NAME>
  template:
    spec:
      manager: <USERNAME>
EOF
将用户关联企业空间角色
cat << EOF | kubectl apply -f -
apiVersion: iam.kubesphere.io/v1alpha2
kind: WorkspaceRoleBinding
metadata:
  labels:
    iam.kubesphere.io/user-ref: <USERNAME>
    kubesphere.io/workspace: <WORKSPACE_NAME>
  name: <USERNAME>-<WORKSPACE_ROLE_NAME>
roleRef:
  apiGroup: iam.kubesphere.io
  kind: WorkspaceRole
  name: <WORKSPACE_ROLE_NAME>
subjects:
- apiGroup: rbac.authorization.k8s.io
  kind: User
  name: <USERNAME>
EOF
将用户和上述方法进行批量化脚本即可
# 更为高级灵活的使用方法,可以升级为定期、定时、触发式、差异化增量/全量同步账户信息
