


大家好,我是老Z!
上篇文章实现了 MySQL 数据库在基于 KubeSphere 部署的 K8s 集群上的安装部署,部署方式采用了图形化界面这种形式。本文将会介绍如何使用 GitOps 来部署 MySQL,部署过程涉及的所有 YAML 文件都会使用 Git 进行版本管理,并存放在 Git 仓库中。因此,本文还会涉及 GitOps 的基础操作。
原生 K8s 使用 GitOps 部署 MySQL
上篇文章我们完成了通过 KubeSphere 部署单实例 MySQL,那么原生的 K8s 又该如何操作?GitOps 又是什么、又该如何实现?
什么是 GitOps
- GitOps 是一套使用 Git 来管理基础架构和应用配置的实践,而 Git 指的是一个开源版控制系统。
- GitOps 在运行过程中以 Git 为声明性基础架构和应用的单一事实来源。
- GitOps 使用 Git 拉取请求来自动管理基础架构的置备和部署。
- Git 存储库包含系统的全部状态,因此系统状态的修改痕迹既可查看也可审计。
- GitOps 经常被用作 K8s 和云原生应用开发的运维模式,并且可以实现对 K8s 的持续部署。
- GitOps 是一种持续交付的方式。它的核心思想是将应用系统的声明性基础架构和应用程序存放在 Git 版本库中。
准备资源配置清单-思路梳理
我们知道玩 K8s 的必备技能就是要手写资源配置清单,一般使用 YAML 格式的文件来创建我们预期的资源配置。
此时我们也要手写 MySQL 的资源配置清单?我很慌,参数我记不全啊。
NO!NO!NO!投机取巧的时刻到了,前面卖的关子在这揭开了。
前面我们已经通过 KubeSphere 的图形界面创建了 MySQL 的资源配置,而且 KubeSphere 一个很棒的功能就是可以直接在线编辑资源的 YAML 文件。
我们可以在创建资源的时候,直接编辑 YAML 文件创建资源。也可以通过编辑 YAML 的方式修改已有的资源。
当然啊,你不用图形界面,直接在 K8s 底层用命令行的方式去获取 YAML 格式的输出,再编辑,也是可以的。
梳理一下 MySQL 涉及的资源配置清单包含的资源。
- StatefulSet(有状态副本集)
- Service(服务)
- 集群内部(Headless)
- 集群外部(自定义服务)
- ConfigMap
- Secret
接下来我们就分别获取这些资源配置清单。
准备资源配置清单
ConfigMap
配置->配置字典,找到 mysql-cnf,点击右侧的三个竖点,点击编辑 YAML。
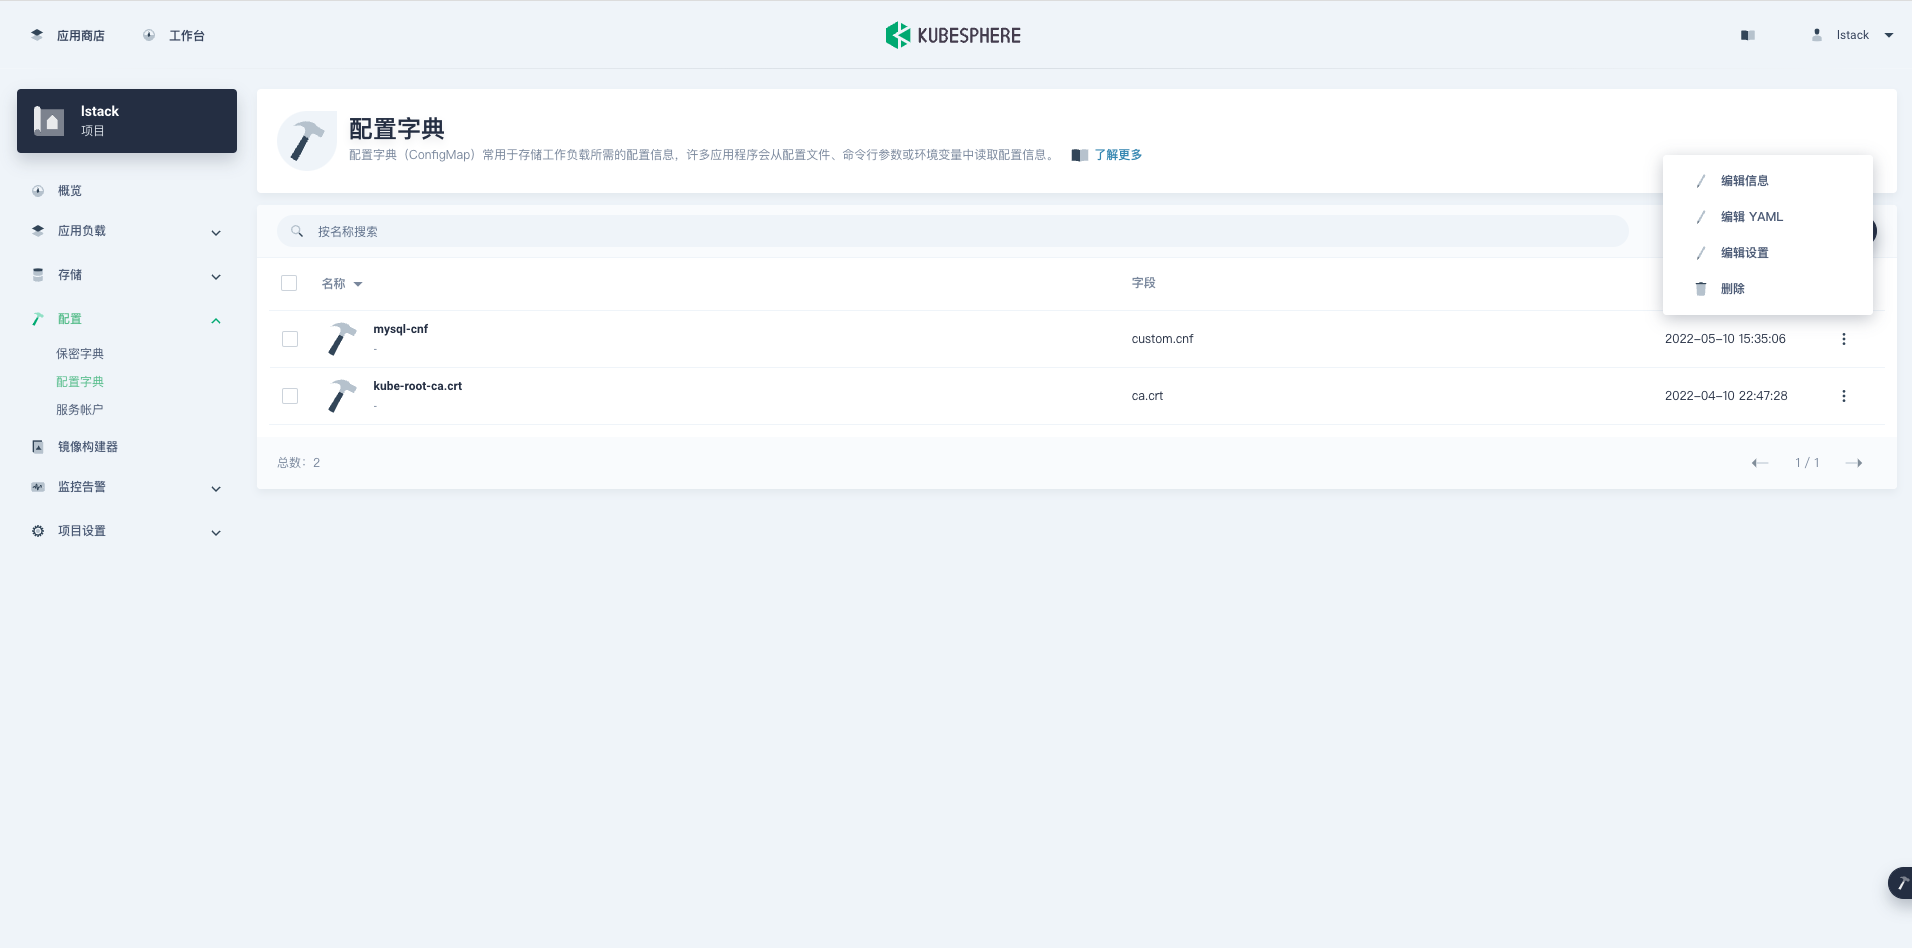
打开编辑 YAML 页面,可以直接复制所有内容,也可以点击右上角的下载图标,下载文件 (也可以利用上传图标上传文件)。
获取的现网配置不能完全的拿来就用,需要修改,把系统自动添加的一些元数据信息清理掉。
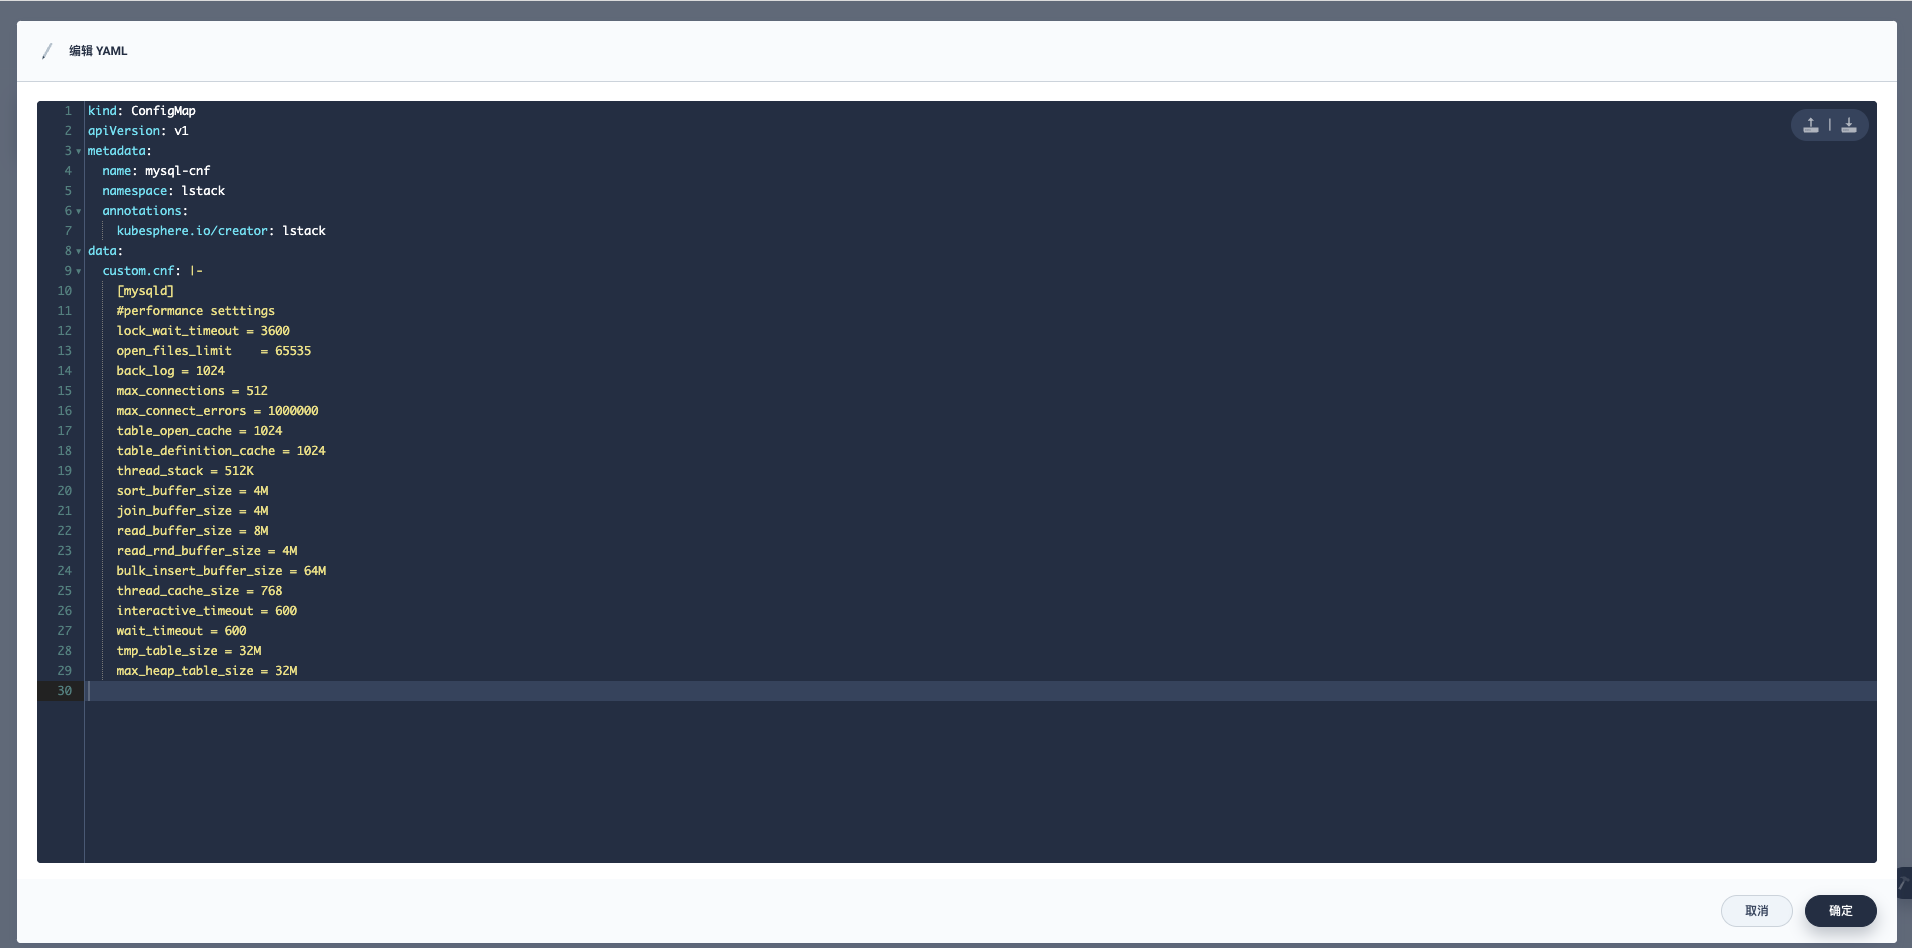
现网的 mysql-cfm.yaml。
kind: ConfigMap
apiVersion: v1
metadata:
  name: mysql-cnf
  namespace: lstack
  annotations:
    kubesphere.io/creator: lstack
data:
  custom.cnf: |-
    [mysqld]
    #performance setttings
    lock_wait_timeout = 3600
    open_files_limit    = 65535
    back_log = 1024
    max_connections = 512
    max_connect_errors = 1000000
    table_open_cache = 1024
    table_definition_cache = 1024
    thread_stack = 512K
    sort_buffer_size = 4M
    join_buffer_size = 4M
    read_buffer_size = 8M
    read_rnd_buffer_size = 4M
    bulk_insert_buffer_size = 64M
    thread_cache_size = 768
    interactive_timeout = 600
    wait_timeout = 600
    tmp_table_size = 32M
    max_heap_table_size = 32M
修改后的 mysql-cfm.yaml。
kind: ConfigMap
apiVersion: v1
metadata:
  name: mysql-cnf
  namespace: lstack
data:
  custom.cnf: |-
    [mysqld]
    #performance setttings
    lock_wait_timeout = 3600
    open_files_limit    = 65535
    back_log = 1024
    max_connections = 512
    max_connect_errors = 1000000
    table_open_cache = 1024
    table_definition_cache = 1024
    thread_stack = 512K
    sort_buffer_size = 4M
    join_buffer_size = 4M
    read_buffer_size = 8M
    read_rnd_buffer_size = 4M
    bulk_insert_buffer_size = 64M
    thread_cache_size = 768
    interactive_timeout = 600
    wait_timeout = 600
    tmp_table_size = 32M
    max_heap_table_size = 32M
Secret
配置->保密字典,找到 mysql-secret,点击右侧的三个竖点,点击编辑 YAML。
现网的 mysql-secret.yaml。
kind: Secret
apiVersion: v1
metadata:
  name: mysql-secret
  namespace: lstack
  annotations:
    kubesphere.io/creator: lstack
data:
  MYSQL_ROOT_PASSWORD: UEA4OHcwcmQ=
type: Opaque
修改后的 mysql-secret.yaml。
kind: Secret
apiVersion: v1
metadata:
  name: mysql-secret
  namespace: lstack
data:
  MYSQL_ROOT_PASSWORD: UEA4OHcwcmQ=
type: Opaque
这里要说一句,Secret 里的值是用 base64 方式加密的,所以这里的 MYSQL_ROOT_PASSWORD,要用实际的密码用 base64 的方式加密。
base64 解密。
[root@ks-k8s-master-0 ~]# echo "UEA4OHcwcmQ=" | base64 -d
P@88w0rd
base 加密。
[root@ks-k8s-master-0 ~]# echo -n "P@88w0rd" | base64
UEA4OHcwcmQ=
StatefulSet
应用负载->工作负载->有状态副本集,找到 mysql,点击右侧的三个竖点,点击编辑 YAML。
现网的 mysql-sts.yaml。
kind: StatefulSet
apiVersion: apps/v1
metadata:
  name: mysql
  namespace: lstack
  labels:
    app: mysql
  annotations:
    kubesphere.io/creator: lstack
spec:
  replicas: 1
  selector:
    matchLabels:
      app: mysql
  template:
    metadata:
      creationTimestamp: null
      labels:
        app: mysql
      annotations:
        logging.kubesphere.io/logsidecar-config: '{}'
    spec:
      volumes:
        - name: host-time
          hostPath:
            path: /etc/localtime
            type: ''
        - name: volume-rca2zx
          configMap:
            name: mysql-cnf
            items:
              - key: custom.cnf
                path: custom.cnf
            defaultMode: 420
      containers:
        - name: lstack-mysql
          image: 'mysql:5.7.38'
          ports:
            - name: tcp-mysql
              containerPort: 3306
              protocol: TCP
          env:
            - name: MYSQL_ROOT_PASSWORD
              valueFrom:
                secretKeyRef:
                  name: mysql-secret
                  key: MYSQL_ROOT_PASSWORD
          resources:
            limits:
              cpu: '2'
              memory: 4000Mi
            requests:
              cpu: 500m
              memory: 500Mi
          volumeMounts:
            - name: host-time
              mountPath: /etc/localtime
            - name: data
              mountPath: /var/lib/mysql
            - name: volume-rca2zx
              readOnly: true
              mountPath: /etc/mysql/conf.d/custom.cnf
              subPath: custom.cnf
          terminationMessagePath: /dev/termination-log
          terminationMessagePolicy: File
          imagePullPolicy: IfNotPresent
      restartPolicy: Always
      terminationGracePeriodSeconds: 30
      dnsPolicy: ClusterFirst
      serviceAccountName: default
      serviceAccount: default
      securityContext: {}
      schedulerName: default-scheduler
  volumeClaimTemplates:
    - kind: PersistentVolumeClaim
      apiVersion: v1
      metadata:
        name: data
        namespace: lstack
        creationTimestamp: null
      spec:
        accessModes:
          - ReadWriteOnce
        resources:
          requests:
            storage: 5Gi
        storageClassName: glusterfs
        volumeMode: Filesystem
      status:
        phase: Pending
  serviceName: mysql-1dpr
  podManagementPolicy: OrderedReady
  updateStrategy:
    type: RollingUpdate
    rollingUpdate:
      partition: 0
  revisionHistoryLimit: 10
修改后的 mysql-sts.yaml。
kind: StatefulSet
apiVersion: apps/v1
metadata:
  name: mysql
  namespace: lstack
  labels:
    app: mysql
spec:
  replicas: 1
  selector:
    matchLabels:
      app: mysql
  template:
    metadata:
      labels:
        app: mysql
    spec:
      volumes:
        - name: host-time
          hostPath:
            path: /etc/localtime
            type: ''
        - name: volume-cnf
          configMap:
            name: mysql-cnf
            items:
              - key: custom.cnf
                path: custom.cnf
            defaultMode: 420
      containers:
        - name: lstack-mysql
          image: 'mysql:5.7.38'
          ports:
            - name: tcp-mysql
              containerPort: 3306
              protocol: TCP
          env:
            - name: MYSQL_ROOT_PASSWORD
              valueFrom:
                secretKeyRef:
                  name: mysql-secret
                  key: MYSQL_ROOT_PASSWORD
          resources:
            limits:
              cpu: '2'
              memory: 4000Mi
            requests:
              cpu: 500m
              memory: 500Mi
          volumeMounts:
            - name: host-time
              mountPath: /etc/localtime
            - name: data
              mountPath: /var/lib/mysql
            - name: volume-cnf
              mountPath: /etc/mysql/conf.d/custom.cnf
              subPath: custom.cnf
  volumeClaimTemplates:
    - metadata:
        name: data
        namespace: lstack
      spec:
        accessModes:
          - ReadWriteOnce
        resources:
          requests:
            storage: 5Gi
        storageClassName: glusterfs
  serviceName: mysql-headless
Service
先创建 Headless 服务,应用负载->服务->,找到 mysql-xxxx(mysql),点击右侧的三个竖点,点击编辑 YAML。
现网的 mysql-headless.yaml。
kind: Service
apiVersion: v1
metadata:
  name: mysql-1dpr
  namespace: lstack
  labels:
    app: mysql
  annotations:
    kubesphere.io/alias-name: mysql
    kubesphere.io/creator: lstack
    kubesphere.io/serviceType: statefulservice
spec:
  ports:
    - name: tcp-mysql
      protocol: TCP
      port: 3306
      targetPort: 3306
  selector:
    app: mysql
  clusterIP: None
  clusterIPs:
    - None
  type: ClusterIP
  sessionAffinity: None
  ipFamilies:
    - IPv4
  ipFamilyPolicy: SingleStack
修改后的 mysql-headless.yaml。
kind: Service
apiVersion: v1
metadata:
  name: mysql-headless
  namespace: lstack
  labels:
    app: mysql
spec:
  ports:
    - name: tcp-mysql
      protocol: TCP
      port: 3306
      targetPort: 3306
  selector:
    app: mysql
  clusterIP: None
  type: ClusterIP
再看看自定义的 mysql-external 服务 ,应用负载->服务->,找到 mysql-external,点击右侧的三个竖点,点击编辑 YAML。
现网的 mysql-external.yaml。
kind: Service
apiVersion: v1
metadata:
  name: mysql-external
  namespace: lstack
  labels:
    app: mysql-external
  annotations:
    kubesphere.io/creator: lstack
spec:
  ports:
    - name: tcp-mysql-external
      protocol: TCP
      port: 3306
      targetPort: 3306
      nodePort: 32529
  selector:
    app: mysql
  clusterIP: 10.233.36.71
  clusterIPs:
    - 10.233.36.71
  type: NodePort
  sessionAffinity: None
  externalTrafficPolicy: Cluster
  ipFamilies:
    - IPv4
  ipFamilyPolicy: SingleStack
这里有一点要说明 nodePort 这个参数,如果 K8s 集群可控,建议规划一套服务端口使用规范,每个需要 nodePort 的服务都指定固定的端口,这样有利于运维的标准化。
修改后的 mysql-external.yaml(注意 nodePort 参数没有指定)。
kind: Service
apiVersion: v1
metadata:
  name: mysql-external
  namespace: lstack
  labels:
    app: mysql-external
spec:
  ports:
    - name: tcp-mysql-external
      protocol: TCP
      port: 3306
      targetPort: 3306
  selector:
    app: mysql
  type: NodePort
将 MySQL 资源配置清单提交到 Git 仓库。
通过上面的操作,我们获取了 MySQL 的资源配置清单。
本人强迫症,喜欢分类存放,所以我用了 4 个文件,mysql-headless.yaml 跟 mysql-sts.yaml 合并在一个文件当然你也可以放到一个配置文件里。
- mysql-external.yaml
- mysql-sts.yaml
- mysql-secret.yaml
- mysql-cfm.yaml
将资源配置清单提交到 Git 仓库
选择 GitHub 作为主仓库,Gitee 作为同步仓库 (人工)。
本系列文档所有 k8s 的资源配置清单文件使用了一个公共仓库,生产环境建议每种服务创建一个配置仓库,有利于更精细化的版本控制。
本文为了演示主备仓库的使用,所有选择了 Github 和 Gitee 两种 Git 服务,实际使用中为了更好的使用体验建议选择 Gitee。
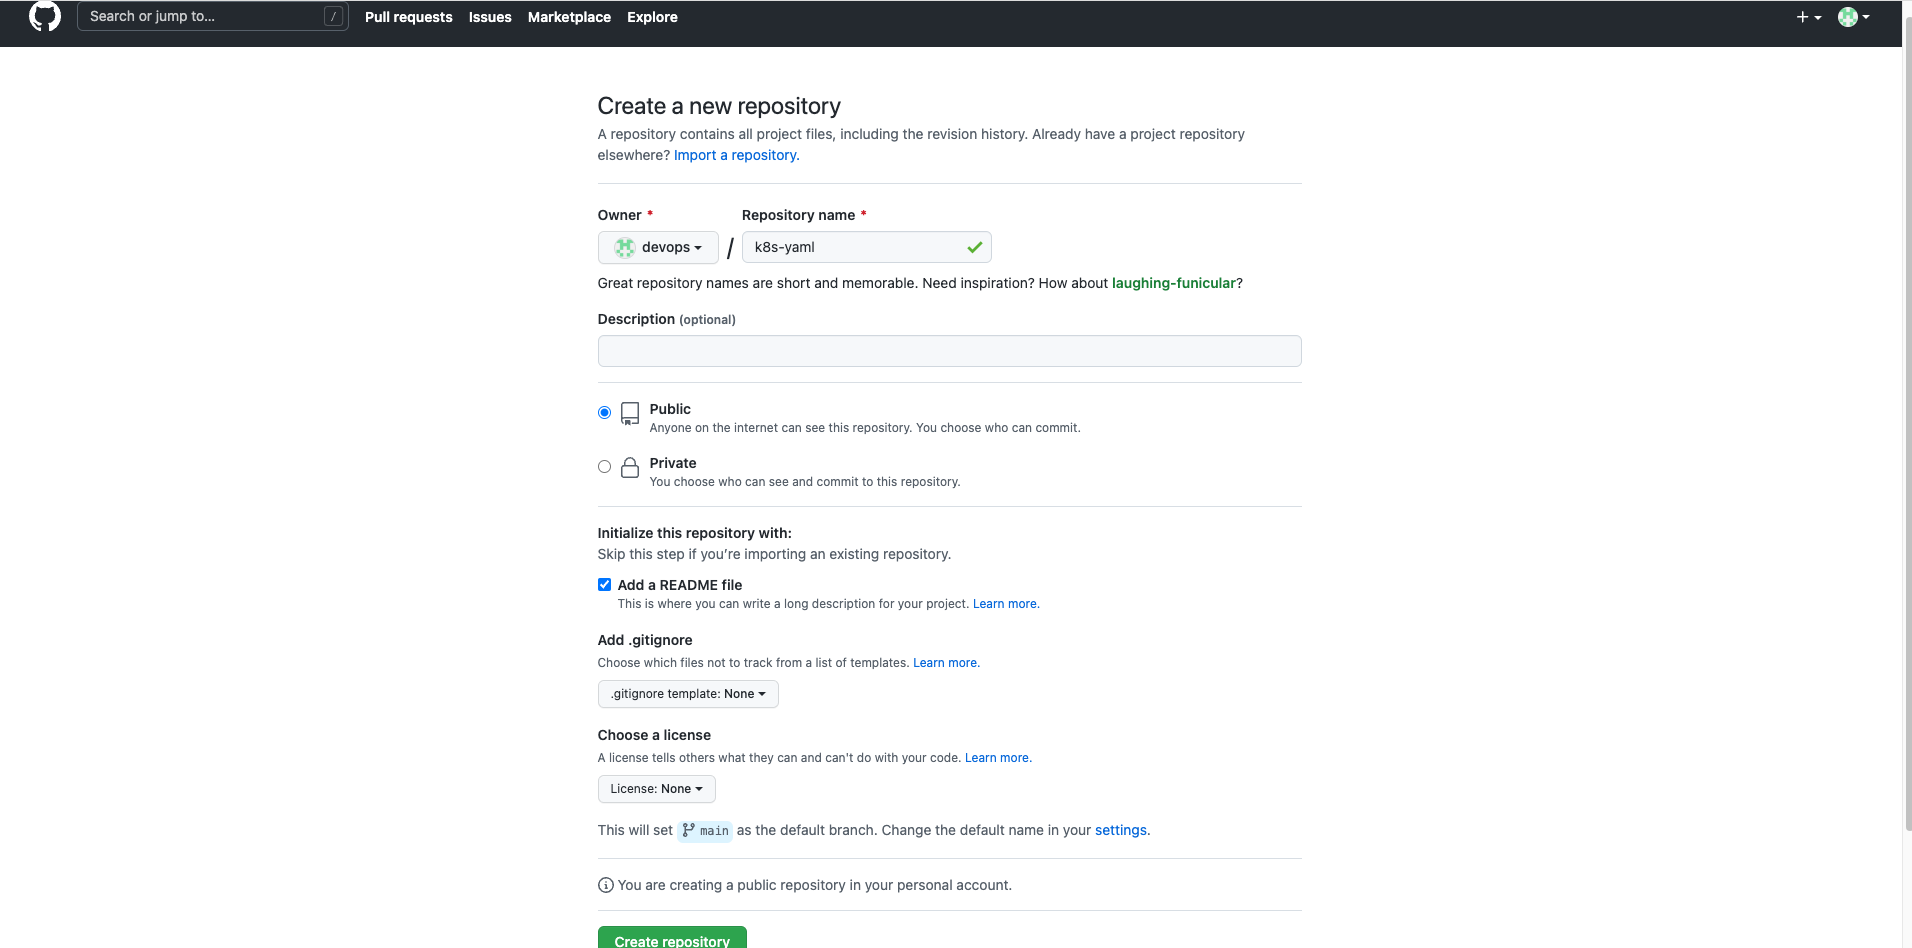
在 GitHub 新建一个仓库,仓库名称**k8s-yaml,添加一个 README 文件初始化仓库,点击Create repository**,确认创建。
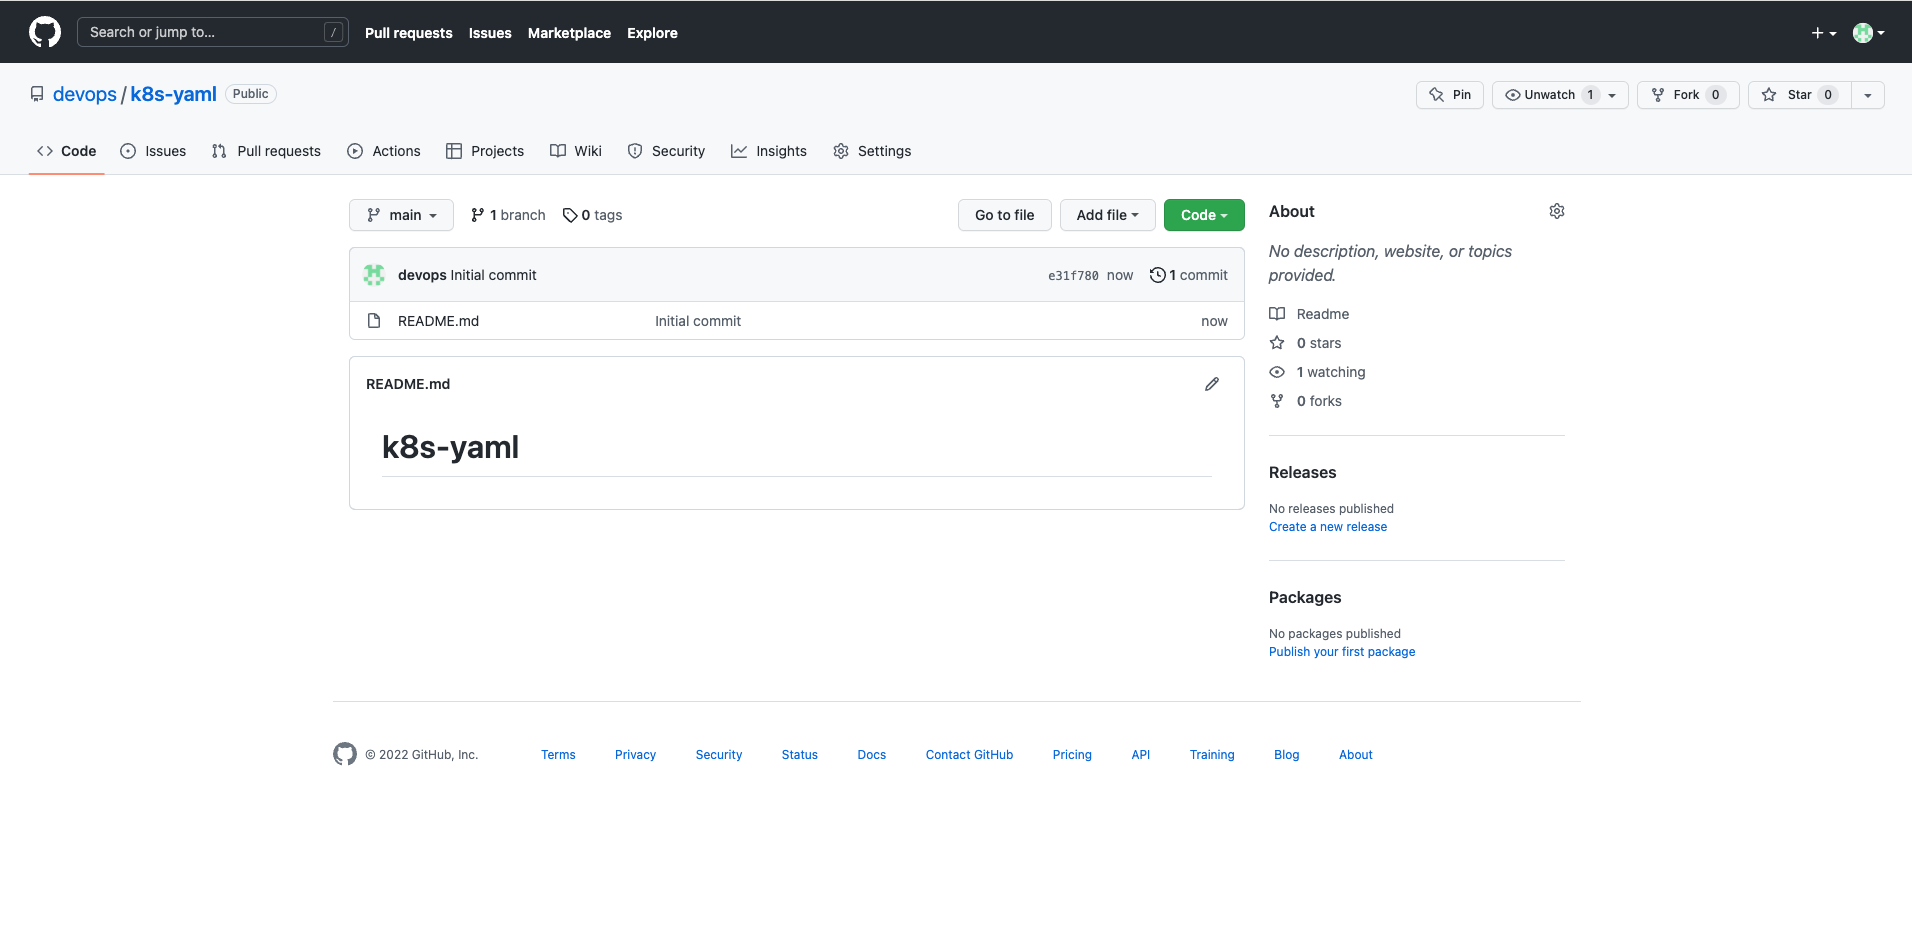
将代码仓库 Clone 回本地。
$ git clone git@github.com:devops/k8s-yaml.git
$ ls k8s-yaml
README.md
新创建一个文件夹,用自己喜欢的文本编辑器 (推荐 vscode) 编辑 MySQL 的资源配置清单,并将文件放入新创建的文件夹。
为了以后的扩展性,这里创建了一个 single 命名的二级目录,存放单实例的资源配置清单文件。
$ mkdir -p k8s-yaml/mysql/single
$ ls -l k8s-yaml/mysql/single
total 32
-rw-r--r--  1 z  staff   646  5 11 19:23 mysql-cfm.yaml
-rw-r--r--  1 z  staff   266  5 11 19:31 mysql-external.yaml
-rw-r--r--  1 z  staff   134  5 11 19:23 mysql-secret.yaml
-rw-r--r--  1 z  staff  1911  5 11 19:31 mysql-sts.yaml
将编辑好的资源配置文件清单,提交到 GitHub。
$ cd k8s-yaml
$ git add .
$ git commit -am '添加MySQL single资源配置清单'
$ git push
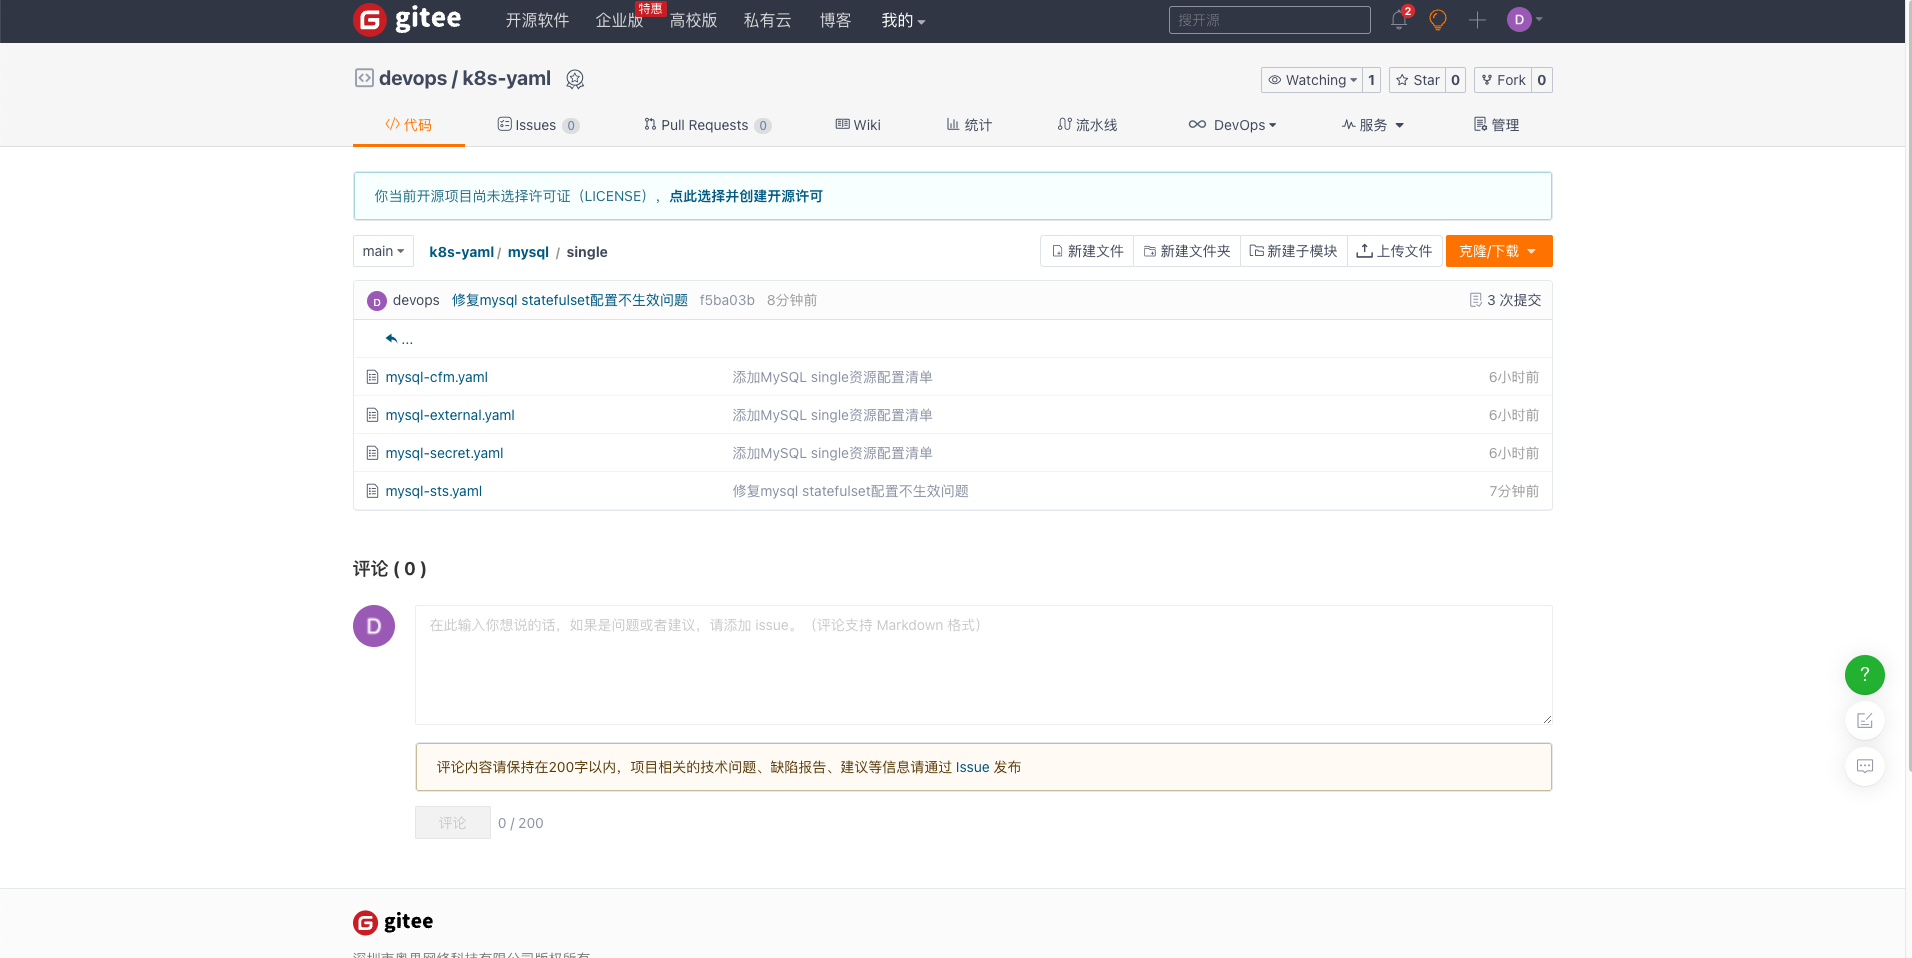
在 GitHub 上查看,确认代码是否提交。

接下来将资源配置清单同步到 Gitee 备份仓库。
- 本文采用了手工推送同步的方式 (个人习惯)
- Gitee 也支持自动同步 GitHub 的仓库 (更便捷)
在 Gitee 新建一个仓库,仓库名称**k8s-yaml,类型默认私有**,点击创建。
创建完成后可去仓库设置中修改为开源。

创建完成后,因为我们创建的时候,没选择初始化仓库的配置,所以,默认会显示一个帮助页面,告诉你该如何提交代码到仓库。
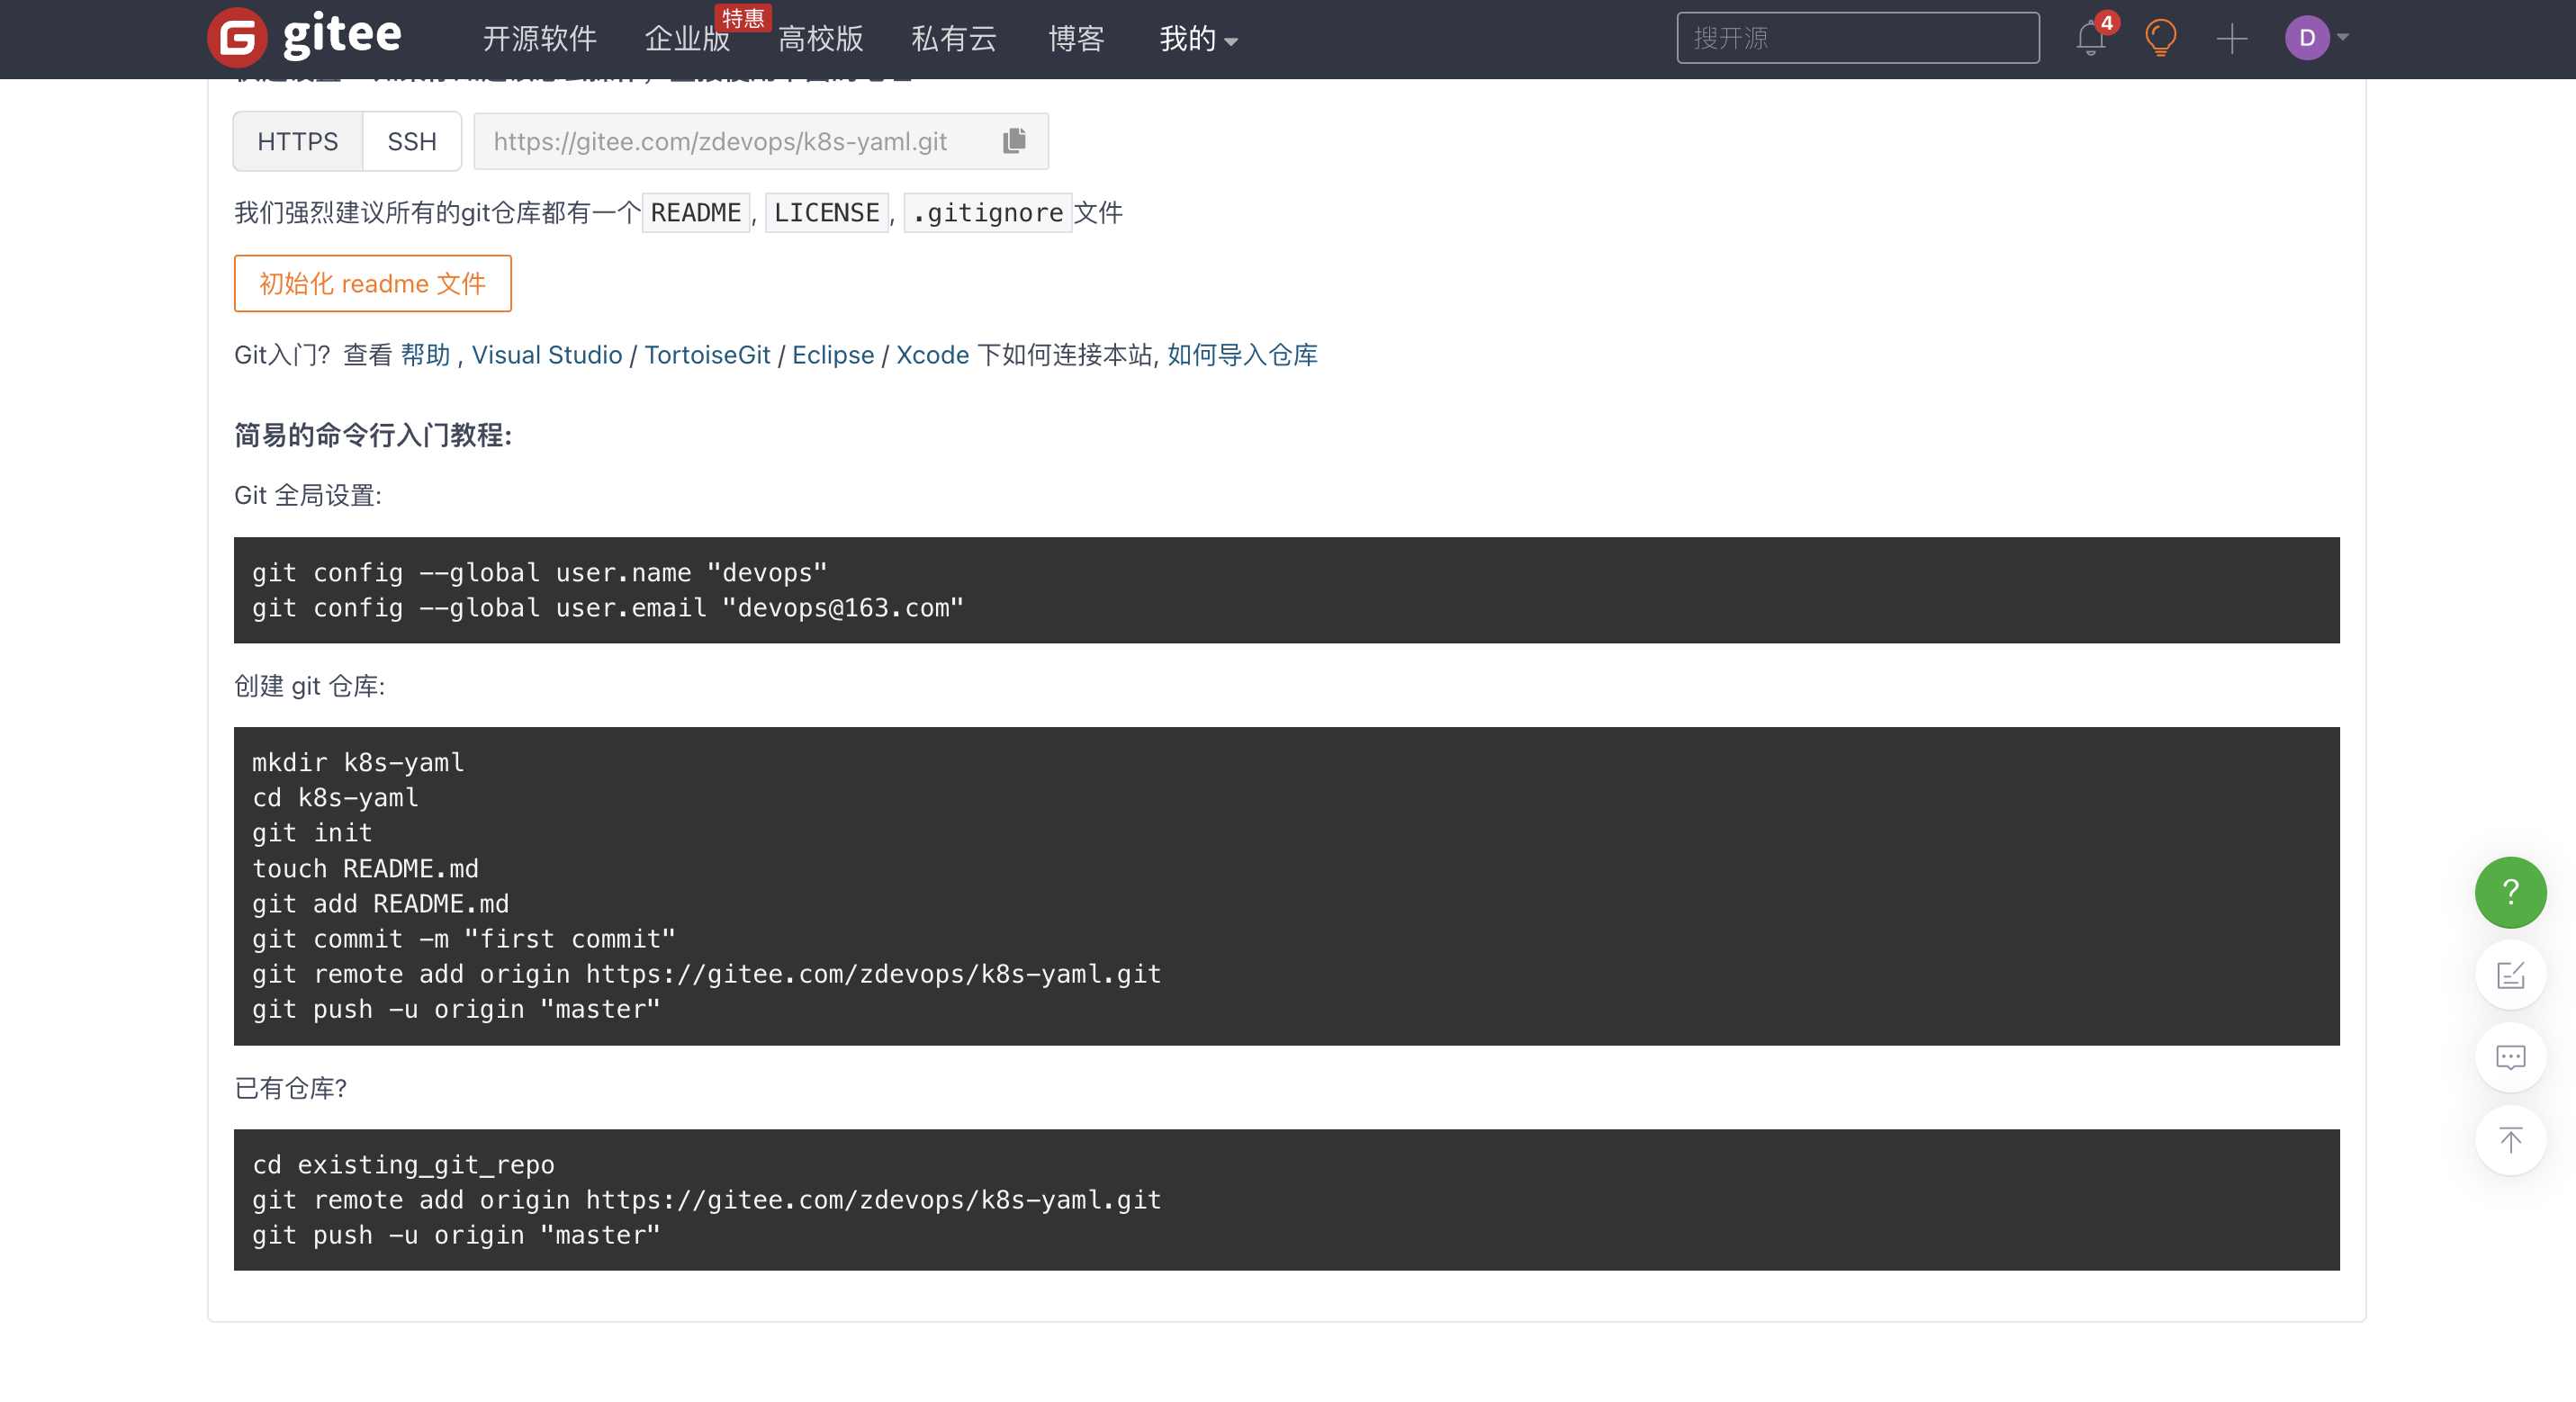
因为,我们已经有了代码仓库,所以我们选择已有仓库的配置方法,将已有代码提交到 Gitee。
根据帮助提示操作,要注意 origin 我们要换成 gitee。
$ git remote add gitee https://gitee.com/zdevops/k8s-yaml.git
$ git push -u gitee
在 Gitee 上查看,确认代码是否提交。

修改 Gitee 仓库为开源 (可选)。
Gitee 仓库->管理->仓库设置->基本信息,最后面是否开源,选择开源,仓库公开须知,三个都勾选,点击保存。
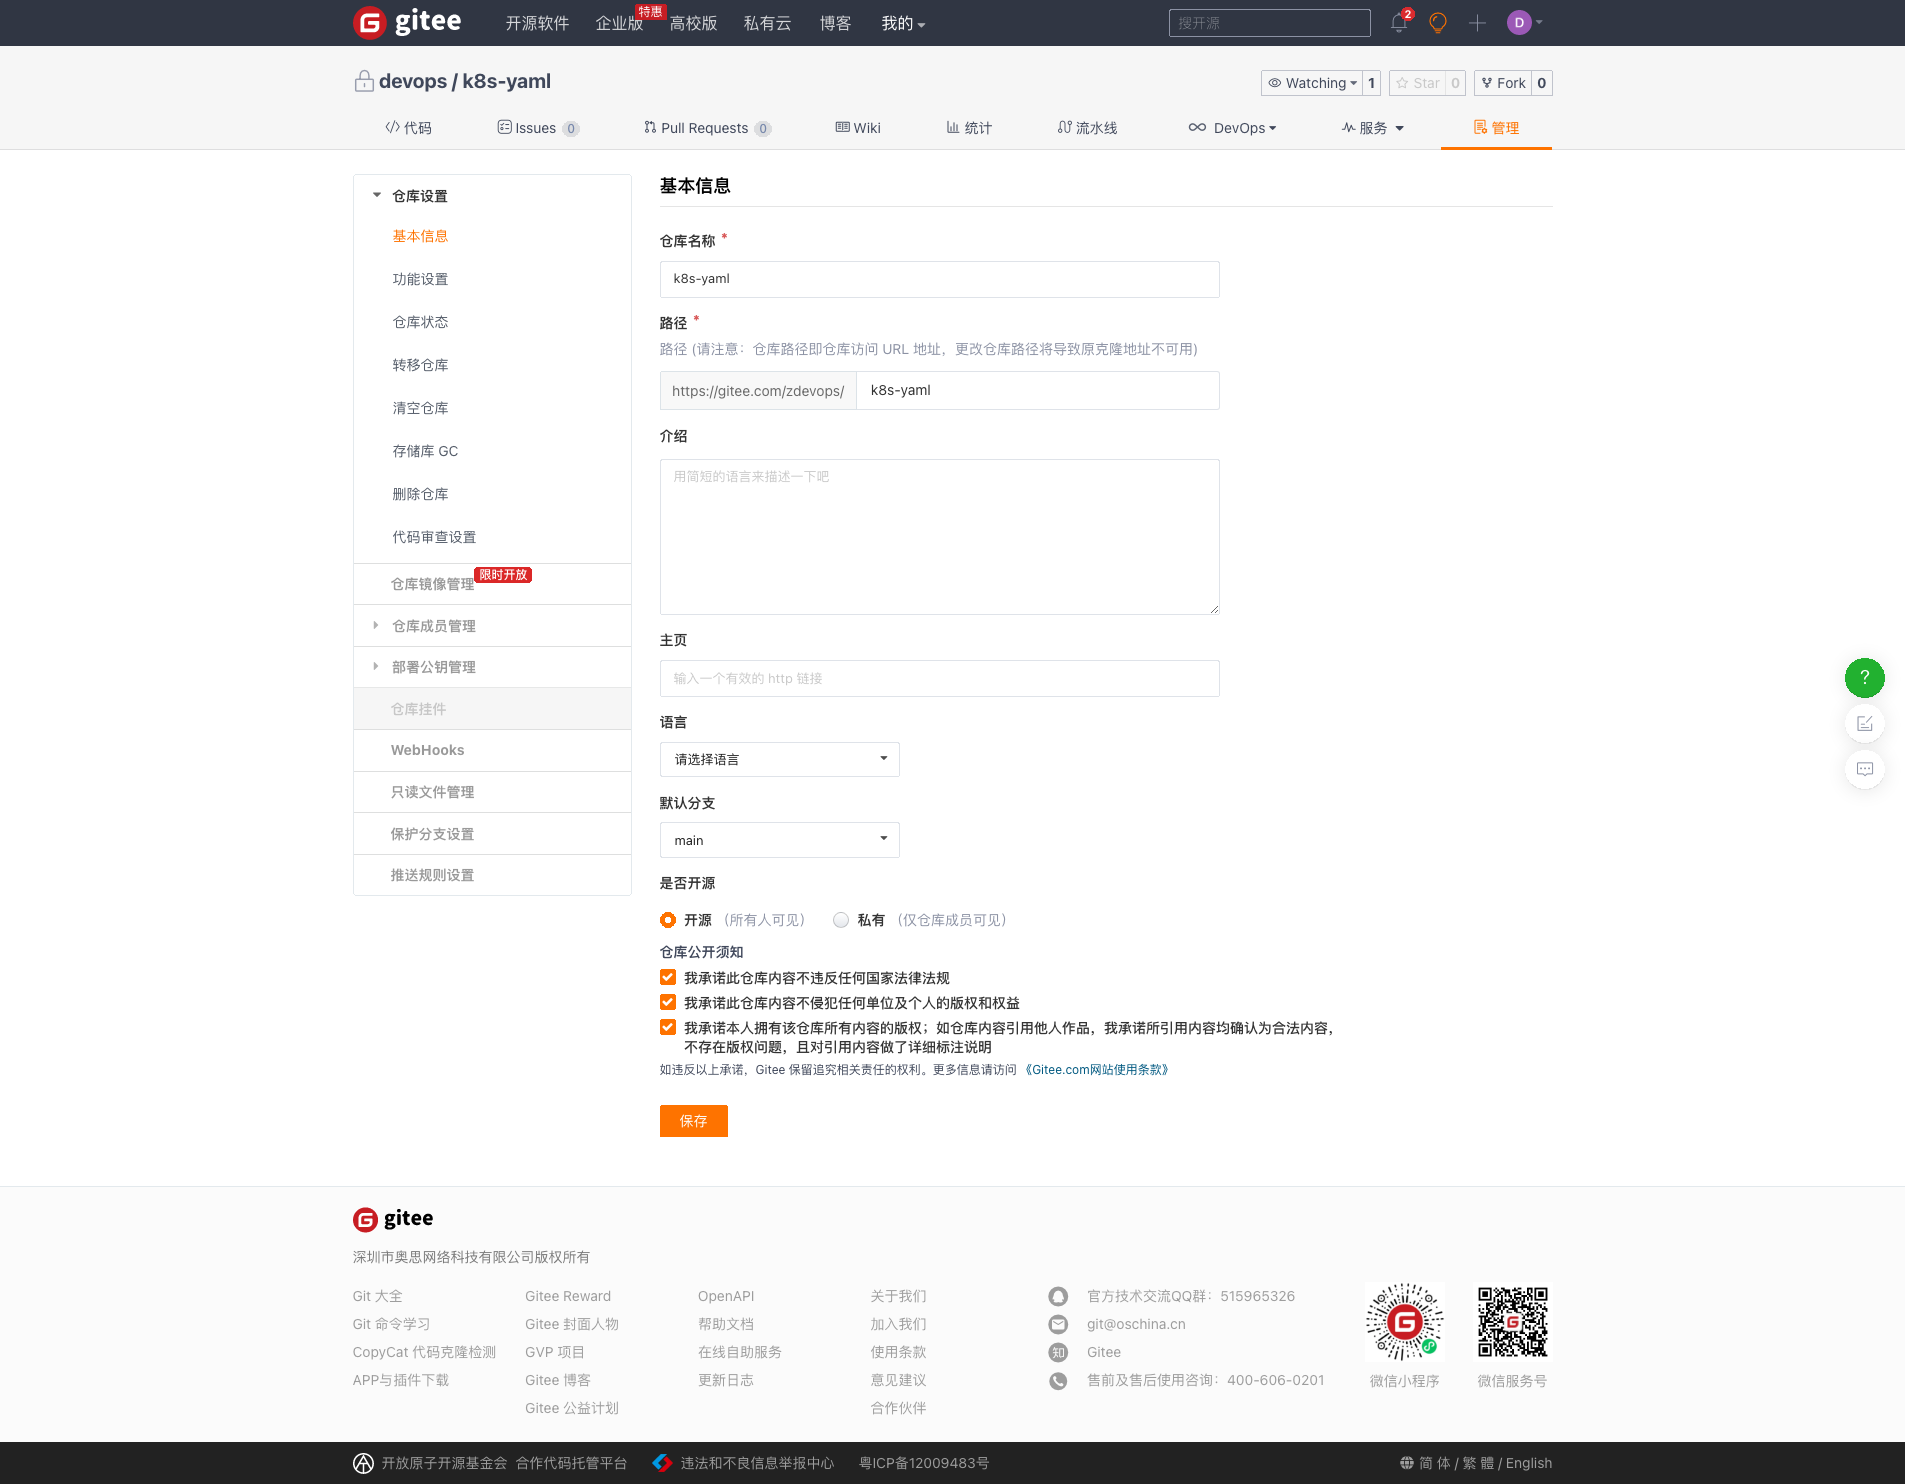
修改后,你的代码仓库就是开源,所有人可见的了。
GitOps 初体验-在 K8s 集群上部署 MySQL
MySQL 资源配置清单已经存放到了 Git 在线仓库,接下来开启我们的 GitOps 体验之旅。
登录 k8s 的 master 节点,执行后面的操作任务。
生产环境建议打造独立的运维管理节点进行整个集群的管理 , 可以参考《基于 KubeSphere 玩转 k8s-运维管理节点打造手记》
安装 Git。
$ yum install git -y
创建 devops 目录,我选择 /opt 目录作为 devops 的根目录。
$ mkdir /opt/devops
$ cd /opt/devops/
从 Gitee 下载 k8s-yaml 仓库的代码。
$ git clone https://gitee.com/zdevops/k8s-yaml.git
$ ls k8s-yaml/
mysql  README.md
由于是同一个测试环境,先清理掉现有的 MySQL 服务。
$ kubectl get secrets -n lstack
NAME                  TYPE                                  DATA   AGE
default-token-x2gzv   kubernetes.io/service-account-token   3      31d
mysql-secret          Opaque                                1      2d20h

$ kubectl get configmaps -n lstack
NAME               DATA   AGE
kube-root-ca.crt   1      31d
mysql-cnf          1      47h

$ kubectl get service -n lstack
NAME                                                     TYPE        CLUSTER-IP      EXTERNAL-IP   PORT(S)          AGE
glusterfs-dynamic-afe88cf4-86b1-4215-833a-534c5f779a22   ClusterIP   10.233.13.188   <none>        1/TCP            2d
mysql-1dpr                                               ClusterIP   None            <none>        3306/TCP         2d
mysql-external                                           NodePort    10.233.36.71    <none>        3306:32529/TCP   47h

$ kubectl get statefulsets -n lstack
NAME    READY   AGE
mysql   1/1     2d

# 清理
$ kubectl delete statefulsets mysql -n lstack
statefulset.apps "mysql" deleted
$ kubectl delete service mysql-external -n lstack
service "mysql-external" deleted
$ kubectl delete service mysql-1dpr -n lstack
service "mysql-1dpr" deleted
$ kubectl delete secrets mysql-secret -n lstack
secret "mysql-secret" deleted
$ kubectl delete configmaps mysql-cnf -n lstack
configmap "mysql-cnf" deleted
利用资源配置清单一键部署 MySQL。
$ cd /opt/devops/k8s-yaml/
$ ls
mysql  README.md

$ kubectl apply -f mysql/single/
验证结果,发现 StatefulSet 没有创建,分析问题。
$ kubectl get statefulsets -n lstack
No resources found in lstack namespace.

# 一开始我以为我遗漏了配置文件,ls看一眼,发现文件都在
$ ls
mysql  README.md
$ cd mysql/
$ ls
single
$ cd single/
$ ls
mysql-cfm.yaml  mysql-external.yaml  mysql-secret.yaml  mysql-sts.yaml

# 确认一下文件内容,发现文件也有内容
$ vi mysql-sts.yaml

# 再次执行,发现了端倪,为啥只有service/mysql-headless 的资源配置,没有statefulset
$ kubectl apply -f mysql-sts.yaml
service/mysql-headless unchanged

# 再次确认,发现编辑文件的时候遗漏了一点,当一个配置文件有多种资源定义时,不同资源的配置直接需要用"---"分隔。修改配置文件再次执行,发现执行成功。
$ vi mysql-sts.yaml
$ cd ..

$ kubectl apply -f single/

$ kubectl get statefulsets -n lstack -o wide
NAME    READY   AGE   CONTAINERS     IMAGES
mysql   1/1     31s   lstack-mysql   mysql:5.7.38
$ kubectl get pods -n lstack -o wide
NAME      READY   STATUS    RESTARTS   AGE   IP              NODE              NOMINATED NODE   READINESS GATES
mysql-0   1/1     Running   0          35s   10.233.116.59   ks-k8s-master-2   <none>           <none>
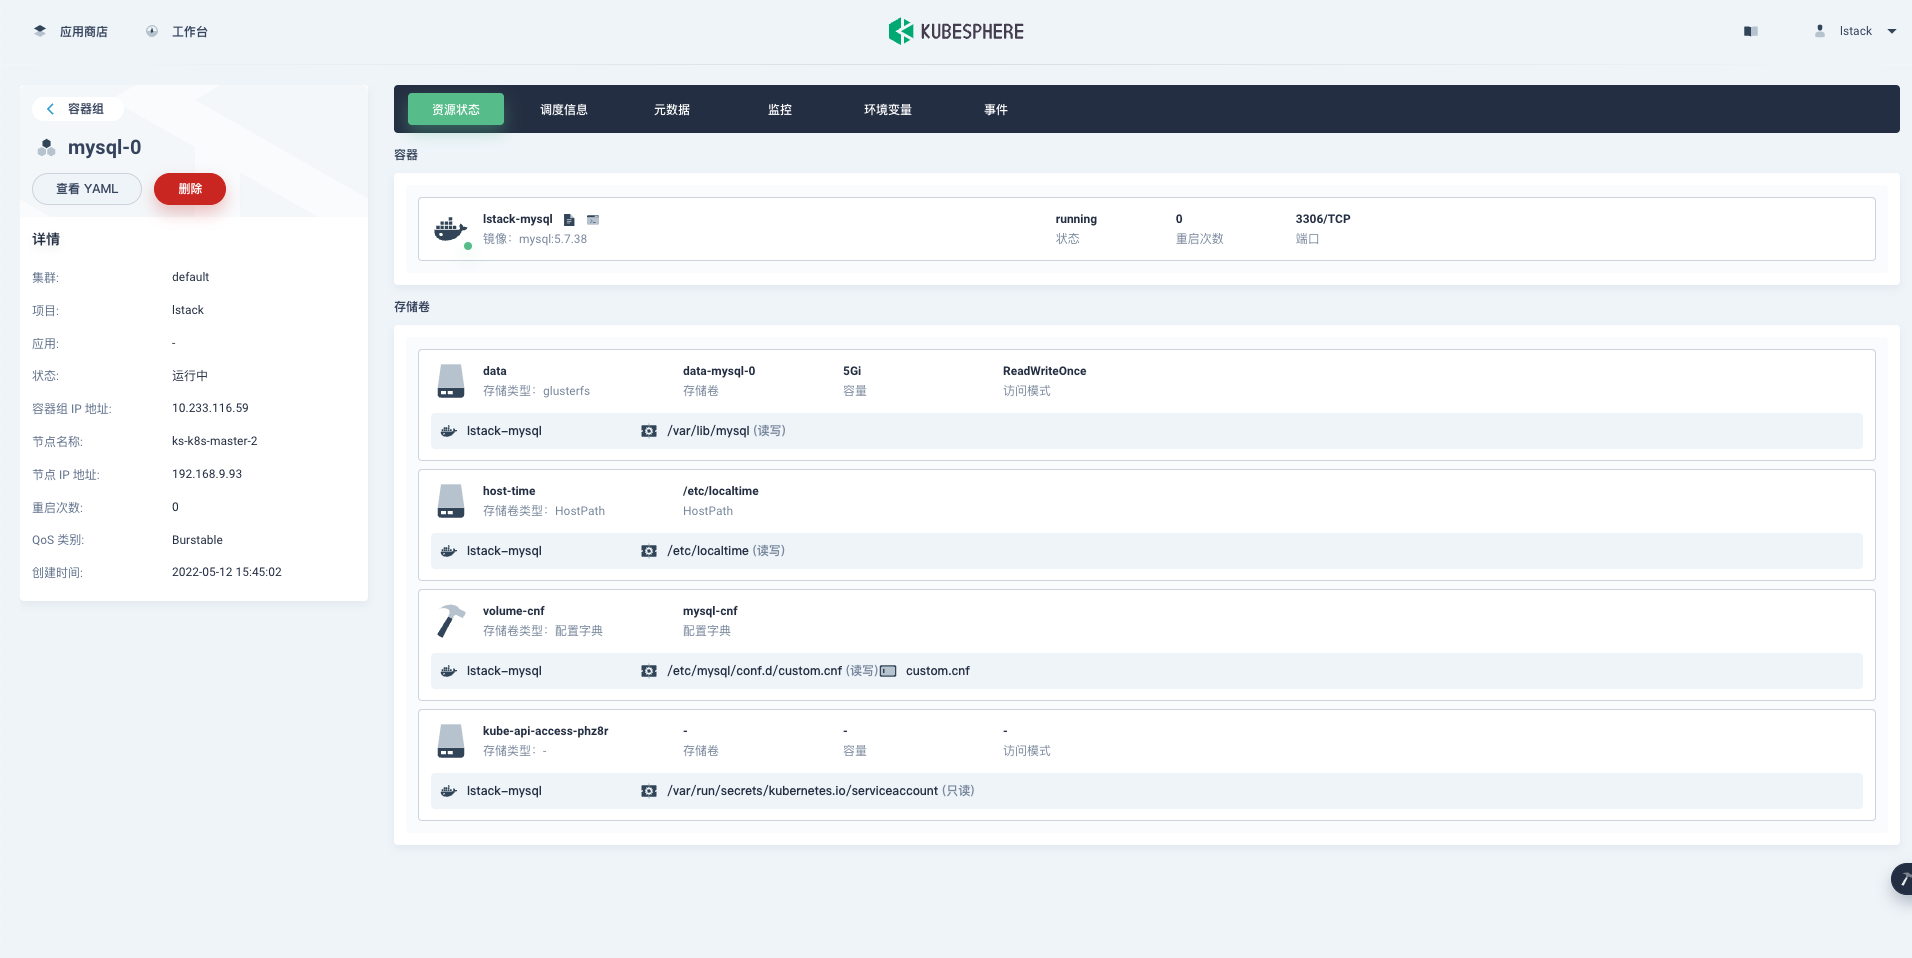
回到我们的 KubeSphere 的管理控制台,发现 mysql 的工作负载也能在界面中显示,这也验证了在原生 k8s 上的操作也会直接反应到 KubeSphere 的管理控制台。
二次体验 GitOps
正好借着上面出现的问题,二次体验一下 GitOps。我们直接在部署服务器上修改了 mysql-sts.yaml,且修改后的结果验证成功。
为了演示 GitOps 的更多场景,直接在部署服务器上修改,然后提交到在线代码仓库。
实际工作中我都是在自己的办公电脑上修改,提交到在线代码仓库,然后部署服务器拉取更新代码。
修改后的 mysql-sts.yaml,由于篇幅问题这里只演示关键部分,StatefulSet 的完整配置见 Gitee 仓库或是前文。
---
kind: StatefulSet
apiVersion: apps/v1
metadata:
  name: mysql
  namespace: lstack
  labels:
    app: mysql
...

---
kind: Service
apiVersion: v1
metadata:
  name: mysql-headless
  namespace: lstack
  labels:
    app: mysql
spec:
  ports:
    - name: tcp-mysql
      protocol: TCP
      port: 3306
      targetPort: 3306
  selector:
    app: mysql
  clusterIP: None
  type: ClusterIP
提交修改后的代码到代码仓库。
# 修改后查看git仓库的变化
$ git diff
diff --git a/mysql/single/mysql-sts.yaml b/mysql/single/mysql-sts.yaml
index f775920..1eded9c 100644
--- a/mysql/single/mysql-sts.yaml
+++ b/mysql/single/mysql-sts.yaml
@@ -1,3 +1,4 @@
+---
 kind: StatefulSet
 apiVersion: apps/v1
 metadata:
@@ -68,6 +69,7 @@ spec:
         storageClassName: glusterfs
   serviceName: mysql-headless

+---
 kind: Service
 apiVersion: v1
 metadata:

# 本地提交代码变更
$ git commit -am '修复mysql statefulset配置不生效问题'

# push到在线代码仓库,有一个warning可以忽略,也可以按提示执行
$ git push
查看 Gitee 在线代码仓库是否有变更。
在个人的办公电脑上,同步更新后的代码。
# 更新代码
$ git pull

# 同步更新后的代码到Github
$ git push -u origin
查看 GitHub 在线代码仓库是否有变更。

再次体验 GitOps
模拟一个业务场景,再次体验一下 GitOps。
MySQL 上线运行后,由于业务量上涨,初始配置参数中的 max_connections 太小了,需要增大。
配置参数调整完成后,更新线上配置,并重启服务 (生产环境数据库不要轻易重启,这种需求可以用临时修改解决)。
这里只是模拟一个简单的例子,带大家体验 GitOps,实际使用中所有的配置文件都建议使用 Git 进行版本控制。
编辑本地 Git 仓库 MySQL 资源配置清单中的 mysql-cfm.yaml 文件,修改 max_connections,从 512 变成 1024。
提交修改到 Git 在线仓库。
# 提交本地修改
$ git commit -am '修改mysql-cnf中max_connections的值'

# 提交到Github
$ git push

# 同步到Gitee
$ git push -u gitee
登录运维管理节点,更新 Git 代码,并重新运行。
$ git pull

$ kubectl apply -f mysql/single/

# 查看ConfigMap的变化
$ kubectl get configmaps mysql-cnf -n lstack -o yaml
apiVersion: v1
data:
  custom.cnf: |-
    [mysqld]
    #performance setttings
    lock_wait_timeout = 3600
    open_files_limit    = 65535
    back_log = 1024
    max_connections = 1024
    max_connect_errors = 1000000
    table_open_cache = 1024
    table_definition_cache = 1024
    thread_stack = 512K
    sort_buffer_size = 4M
    join_buffer_size = 4M
    read_buffer_size = 8M
    read_rnd_buffer_size = 4M
    bulk_insert_buffer_size = 64M
    thread_cache_size = 768
    interactive_timeout = 600
    wait_timeout = 600
    tmp_table_size = 32M
    max_heap_table_size = 32M
kind: ConfigMap
metadata:
  annotations:
    kubectl.kubernetes.io/last-applied-configuration: |
      {"apiVersion":"v1","data":{"custom.cnf":"[mysqld]\n#performance setttings\nlock_wait_timeout = 3600\nopen_files_limit    = 65535\nback_log = 1024\nmax_connections = 1024\nmax_connect_errors = 1000000\ntable_open_cache = 1024\ntable_definition_cache = 1024\nthread_stack = 512K\nsort_buffer_size = 4M\njoin_buffer_size = 4M\nread_buffer_size = 8M\nread_rnd_buffer_size = 4M\nbulk_insert_buffer_size = 64M\nthread_cache_size = 768\ninteractive_timeout = 600\nwait_timeout = 600\ntmp_table_size = 32M\nmax_heap_table_size = 32M"},"kind":"ConfigMap","metadata":{"annotations":{},"name":"mysql-cnf","namespace":"lstack"}}
  creationTimestamp: "2022-05-12T07:20:07Z"
  name: mysql-cnf
  namespace: lstack
  resourceVersion: "8928391"
  uid: 1b7322cf-f11e-445d-a2ba-b42a90ade469

# 重启mysql pod使配置生效
$ kubectl delete -f mysql/single/mysql-sts.yaml

$ kubectl apply -f mysql/single/mysql-sts.yaml

# 查看mysql容器内部配置是否更新
$ kubectl exec  mysql-0  -n lstack -- cat /etc/mysql/conf.d/custom.cnf
[mysqld]
#performance setttings
lock_wait_timeout = 3600
open_files_limit    = 65535
back_log = 1024
max_connections = 1024
max_connect_errors = 1000000
table_open_cache = 1024
table_definition_cache = 1024
thread_stack = 512K
sort_buffer_size = 4M
join_buffer_size = 4M
read_buffer_size = 8M
read_rnd_buffer_size = 4M
bulk_insert_buffer_size = 64M
thread_cache_size = 768
interactive_timeout = 600
wait_timeout = 600
tmp_table_size = 32M
切记! 上面的例子只是让大家体验 GitOps,生产环境不要轻易重启数据库服务器,除非你知道自己在干什么。
现在经过验证,我们的 MySQL 的配置可用且比较稳定,我们把这个好的状态记录下来,避免以后修改变更弄坏了,再找不回原来正确的配置。
在我们的个人电脑上给当前的 Git 代码打个 Tag,记录当前的状态 (也可以通过在线仓库的管理界面操作)。
# 打tag -a tag名字 -m tag描述
$ git tag -a v0.1  -m 'mysql version v0.1'

# 查看现有tag
$ git tag -l
v0.1

# 查看tag详细信息
$ git show v0.1
tag v0.1
Tagger: devops <devops@163.com>
Date:   Thu May 12 18:15:34 2022 +0800

mysql version v0.1

commit 180f97ac96da504a0b46eb4871ef423f64fde093 (HEAD -> main, tag: v0.1, origin/main, origin/HEAD, gitee/main)
Author: devops <devops@163.com>
Date:   Thu May 12 17:48:18 2022 +0800

    修改mysql-cnf中max_connections的值

diff --git a/mysql/single/mysql-cfm.yaml b/mysql/single/mysql-cfm.yaml
index e24d96d..50d1778 100644
--- a/mysql/single/mysql-cfm.yaml
+++ b/mysql/single/mysql-cfm.yaml
@@ -10,7 +10,7 @@ data:
     lock_wait_timeout = 3600
     open_files_limit    = 65535
     back_log = 1024
-    max_connections = 512
+    max_connections = 1024
     max_connect_errors = 1000000
     table_open_cache = 1024
     table_definition_cache = 1024

# 将tag推送到远程服务器
$ git push -u origin --tags
$ git push -u gitee --tags

# 线上服务器验证(图略)
运维管理服务器更新代码,并切换到指定 tag(注意!使用 Git 一定要养成每次操作前 git pull 这种习惯)。
## 更新代码
$ git pull

## 切换到v0.1
$ git checkout -b v0.1
通过上面的几波操作,我们可以看到,我们所有的配置变更都采用了 Git 管理,完整的记录了配置的全生命周期管理,通过给仓库打分支或是 tag,可以方便我们切换到任意已记录状态。
高可用部署 MySQL(预留占坑)
暂时没有高可用部署的需求,因此不涉及高可用模式的 MySQL 的部署,但是有一些思考留着占坑。
目前的做法
- 不给自己找麻烦,有高可用需求直接买云服务商的 RDS。
- 实在需要自己搭建,在 K8s 集群之外部署主从。
以后可能的方向
- K8s 上的 MySQL 主从部署
- Operator
- Helm
遗留问题
此部分内容也是运维 MySQL 必备的技能,有些内容我也没有经验无法分享,有些内容会在 << 基于 KubeSphere 的 K8s 生产实践之路 >> 系列文档中介绍。
- MySQL 数据库备份
- MySQL 高可用部署
- MySQL 安全加固
- MySQL 调优
MySQL 性能 (基准) 测试
运维一定要做到对自己的运维环境心中有数,MySQL 上线前一定要进行性能 (基准测试),有助于了解我们的数据库服务器能达到的理想状态。本次介绍的只是皮毛,只是告诉大家一些基本入门的知识,更细节、更深入的内容请参考其他更专业的文档。
性能 (基准) 测试工具安装
工具选型 (sysbench)
- 云厂商展示自家数据库产品性能都用这个工具
- 据说很多 DBA 也喜欢用
sysbench 工具安装
- 安装工具
# 导入软件源
$ curl -s https://packagecloud.io/install/repositories/akopytov/sysbench/script.rpm.sh | sudo bash

# 安装sysbench
$ yum install sysbench -y
- 验证-执行命令查看版本
$ sysbench --version
sysbench 1.0.20
性能 (基准) 测试
测试方案
测试参数
指标 值 线程数 8/16/32 单表数据量 100000 表数量 16 性能指标
指标 说明 TPS Transactions Per Second ,即数据库每秒执行的事务数,以 commit 成功次数为准。 QPS Queries Per Second ,即数据库每秒执行的 SQL 数(含 insert、select、update、delete 等)。 RT Response Time ,响应时间。包括平均响应时间、最小响应时间、最大响应时间、每个响应时间的查询占比。比较需要重点关注的是,前 95-99% 的最大响应时间。因为它决定了大多数情况下的短板。 Concurrency Threads 并发量,每秒可处理的查询请求的数量。
准备测试数据
使用我们在 k8s 上创建的数据库,涉及数据库操作命令,需要终端登录到容器内运行。
提前创建测试用数据库 sbtest,并赋予 root 从任意 IP 远程管理所有数据库的权限。
生产环境千万不要这么搞,一定要遵循最小化原则!
# bash
root@mysql-0:/# mysql -u root -p
Enter password:
Welcome to the MySQL monitor.  Commands end with ; or \g.
Your MySQL connection id is 4
Server version: 5.7.38 MySQL Community Server (GPL)

Copyright (c) 2000, 2022, Oracle and/or its affiliates.

Oracle is a registered trademark of Oracle Corporation and/or its
affiliates. Other names may be trademarks of their respective
owners.

Type 'help;' or '\h' for help. Type '\c' to clear the current input statement.

mysql> create database sbtest;
Query OK, 1 row affected (0.02 sec)

mysql> grant all privileges on *.* to 'root'@'%' identified by 'P@88w0rd' with grant option;
Query OK, 0 rows affected, 1 warning (0.02 sec)
- 测试数据库是否能连接
# 安装mysql客户端,下面的示例是在k8s节点上安装的,由于系统是最小化安装,所有会安装很多依赖。实际测试可以起一个mysql的pod或是用其他的mysql客户端工具。

$ yum install mysql -y

# 测试MySQL服务连通性 -h 是k8s节点的IP -P 是mysql外部服务的端口号

$ mysql -h 192.168.9.91 -P 32529 -u root -p
Enter password:
Welcome to the MariaDB monitor.  Commands end with ; or \g.
Your MySQL connection id is 5
Server version: 5.7.38 MySQL Community Server (GPL)

Copyright (c) 2000, 2018, Oracle, MariaDB Corporation Ab and others.

Type 'help;' or '\h' for help. Type '\c' to clear the current input statement.

MySQL [(none)]>
- 准备测试数据
$ sysbench --db-driver=mysql --mysql-host=192.168.9.91 --mysql-port=32529 --mysql-user=root --mysql-password=P@88w0rd --mysql-db=sbtest --table-size=100000 --tables=16 --threads=8 --events=999999999 --report-interval=10 --time=100 /usr/share/sysbench/oltp_common.lua prepare
sysbench 1.0.20 (using bundled LuaJIT 2.1.0-beta2)

Initializing worker threads...

Creating table 'sbtest6'...
Creating table 'sbtest2'...
Creating table 'sbtest8'...
Creating table 'sbtest3'...
Creating table 'sbtest7'...
Creating table 'sbtest5'...
Creating table 'sbtest1'...
Creating table 'sbtest4'...
Inserting 100000 records into 'sbtest3'
Inserting 100000 records into 'sbtest6'
Inserting 100000 records into 'sbtest1'
Inserting 100000 records into 'sbtest4'
Inserting 100000 records into 'sbtest7'
Inserting 100000 records into 'sbtest5'
Inserting 100000 records into 'sbtest2'
Inserting 100000 records into 'sbtest8'
Creating a secondary index on 'sbtest3'...
Creating table 'sbtest11'...
Inserting 100000 records into 'sbtest11'
Creating a secondary index on 'sbtest5'...
Creating a secondary index on 'sbtest1'...
Creating a secondary index on 'sbtest6'...
Creating a secondary index on 'sbtest4'...
Creating a secondary index on 'sbtest7'...
Creating a secondary index on 'sbtest2'...
Creating a secondary index on 'sbtest8'...
Creating table 'sbtest13'...
Inserting 100000 records into 'sbtest13'
Creating table 'sbtest9'...
Inserting 100000 records into 'sbtest9'
Creating table 'sbtest14'...
Creating table 'sbtest12'...
Inserting 100000 records into 'sbtest14'
Inserting 100000 records into 'sbtest12'
Creating table 'sbtest15'...
Inserting 100000 records into 'sbtest15'
Creating table 'sbtest16'...
Creating table 'sbtest10'...
Inserting 100000 records into 'sbtest16'
Inserting 100000 records into 'sbtest10'
Creating a secondary index on 'sbtest11'...
Creating a secondary index on 'sbtest13'...
Creating a secondary index on 'sbtest9'...
Creating a secondary index on 'sbtest12'...
Creating a secondary index on 'sbtest14'...
Creating a secondary index on 'sbtest15'...
Creating a secondary index on 'sbtest10'...
Creating a secondary index on 'sbtest16'...
- 执行测试-8 线程测试
$ sysbench --db-driver=mysql --mysql-host=192.168.9.91 --mysql-port=32529 --mysql-user=root --mysql-password=P@88w0rd --mysql-db=sbtest --table-size=100000 --tables=16 --threads=8 --events=999999999 --report-interval=10 --time=100  /usr/share/sysbench/oltp_read_write.lua run
sysbench 1.0.20 (using bundled LuaJIT 2.1.0-beta2)

Running the test with following options:
Number of threads: 8
Report intermediate results every 10 second(s)
Initializing random number generator from current time

Initializing worker threads...

Threads started!

[ 10s ] thds: 8 tps: 88.46 qps: 1782.38 (r/w/o: 1249.19/355.46/177.73) lat (ms,95%): 267.41 err/s: 0.00 reconn/s: 0.00
[ 20s ] thds: 8 tps: 84.31 qps: 1678.47 (r/w/o: 1173.42/336.43/168.62) lat (ms,95%): 277.21 err/s: 0.00 reconn/s: 0.00
[ 30s ] thds: 8 tps: 70.20 qps: 1413.82 (r/w/o: 990.21/283.20/140.40) lat (ms,95%): 369.77 err/s: 0.00 reconn/s: 0.00
[ 40s ] thds: 8 tps: 47.30 qps: 946.00 (r/w/o: 662.20/189.20/94.60) lat (ms,95%): 484.44 err/s: 0.00 reconn/s: 0.00
[ 50s ] thds: 8 tps: 43.80 qps: 875.99 (r/w/o: 613.19/175.20/87.60) lat (ms,95%): 484.44 err/s: 0.00 reconn/s: 0.00
[ 60s ] thds: 8 tps: 60.70 qps: 1213.08 (r/w/o: 849.69/242.00/121.40) lat (ms,95%): 411.96 err/s: 0.00 reconn/s: 0.00
[ 70s ] thds: 8 tps: 53.90 qps: 1078.22 (r/w/o: 754.42/216.00/107.80) lat (ms,95%): 376.49 err/s: 0.00 reconn/s: 0.00
[ 80s ] thds: 8 tps: 56.49 qps: 1127.98 (r/w/o: 790.11/224.88/112.99) lat (ms,95%): 397.39 err/s: 0.00 reconn/s: 0.00
[ 90s ] thds: 8 tps: 50.60 qps: 1014.59 (r/w/o: 709.56/203.82/101.21) lat (ms,95%): 434.83 err/s: 0.00 reconn/s: 0.00
[ 100s ] thds: 8 tps: 54.70 qps: 1093.12 (r/w/o: 765.22/218.50/109.40) lat (ms,95%): 390.30 err/s: 0.00 reconn/s: 0.00
SQL statistics:
    queries performed:
        read:                            85582
        write:                           24452
        other:                           12226
        total:                           122260
    transactions:                        6113   (61.10 per sec.)
    queries:                             122260 (1221.96 per sec.)
    ignored errors:                      0      (0.00 per sec.)
    reconnects:                          0      (0.00 per sec.)

General statistics:
    total time:                          100.0494s
    total number of events:              6113

Latency (ms):
         min:                                   35.63
         avg:                                  130.89
         max:                                  951.86
         95th percentile:                      390.30
         sum:                               800129.59

Threads fairness:
    events (avg/stddev):           764.1250/4.14
    execution time (avg/stddev):   100.0162/0.01
- 执行测试-16 线程测试
$ sysbench --db-driver=mysql --mysql-host=192.168.9.91 --mysql-port=32529 --mysql-user=root --mysql-password=P@88w0rd --mysql-db=sbtest --table-size=100000 --tables=16 --threads=16 --events=999999999 --report-interval=10 --time=100  /usr/share/sysbench/oltp_read_write.lua run
sysbench 1.0.20 (using bundled LuaJIT 2.1.0-beta2)

Running the test with following options:
Number of threads: 16
Report intermediate results every 10 second(s)
Initializing random number generator from current time

Initializing worker threads...

Threads started!

[ 10s ] thds: 16 tps: 114.41 qps: 2310.22 (r/w/o: 1621.18/458.63/230.41) lat (ms,95%): 369.77 err/s: 0.00 reconn/s: 0.00
[ 20s ] thds: 16 tps: 106.35 qps: 2111.86 (r/w/o: 1474.74/424.41/212.71) lat (ms,95%): 383.33 err/s: 0.00 reconn/s: 0.00
[ 30s ] thds: 16 tps: 80.40 qps: 1612.01 (r/w/o: 1129.21/322.00/160.80) lat (ms,95%): 623.33 err/s: 0.00 reconn/s: 0.00
[ 40s ] thds: 16 tps: 63.40 qps: 1266.80 (r/w/o: 886.80/253.20/126.80) lat (ms,95%): 539.71 err/s: 0.00 reconn/s: 0.00
[ 50s ] thds: 16 tps: 57.20 qps: 1145.91 (r/w/o: 802.74/228.78/114.39) lat (ms,95%): 549.52 err/s: 0.00 reconn/s: 0.00
[ 60s ] thds: 16 tps: 69.91 qps: 1408.31 (r/w/o: 987.57/280.92/139.81) lat (ms,95%): 511.33 err/s: 0.00 reconn/s: 0.00
[ 70s ] thds: 16 tps: 78.00 qps: 1547.22 (r/w/o: 1080.51/310.70/156.00) lat (ms,95%): 484.44 err/s: 0.00 reconn/s: 0.00
[ 80s ] thds: 16 tps: 79.50 qps: 1599.87 (r/w/o: 1122.58/318.29/159.00) lat (ms,95%): 520.62 err/s: 0.00 reconn/s: 0.00
[ 90s ] thds: 16 tps: 67.80 qps: 1354.83 (r/w/o: 947.62/271.61/135.60) lat (ms,95%): 539.71 err/s: 0.00 reconn/s: 0.00
[ 100s ] thds: 16 tps: 73.90 qps: 1474.10 (r/w/o: 1030.80/295.50/147.80) lat (ms,95%): 502.20 err/s: 0.00 reconn/s: 0.00
SQL statistics:
    queries performed:
        read:                            110950
        write:                           31700
        other:                           15850
        total:                           158500
    transactions:                        7925   (79.00 per sec.)
    queries:                             158500 (1580.05 per sec.)
    ignored errors:                      0      (0.00 per sec.)
    reconnects:                          0      (0.00 per sec.)

General statistics:
    total time:                          100.3103s
    total number of events:              7925

Latency (ms):
         min:                                   41.24
         avg:                                  202.44
         max:                                 1198.81
         95th percentile:                      511.33
         sum:                              1604328.52

Threads fairness:
    events (avg/stddev):           495.3125/4.03
    execution time (avg/stddev):   100.2705/0.03
- 执行测试-32 线程测试
$ sysbench --db-driver=mysql --mysql-host=192.168.9.91 --mysql-port=32529 --mysql-user=root --mysql-password=P@88w0rd --mysql-db=sbtest --table-size=100000 --tables=16 --threads=32 --events=999999999 --report-interval=10 --time=100  /usr/share/sysbench/oltp_read_write.lua run
sysbench 1.0.20 (using bundled LuaJIT 2.1.0-beta2)

Running the test with following options:
Number of threads: 32
Report intermediate results every 10 second(s)
Initializing random number generator from current time

Initializing worker threads...

Threads started!

[ 10s ] thds: 32 tps: 140.10 qps: 2825.04 (r/w/o: 1981.25/560.39/283.39) lat (ms,95%): 450.77 err/s: 0.00 reconn/s: 0.00
[ 20s ] thds: 32 tps: 124.41 qps: 2515.49 (r/w/o: 1763.43/503.24/248.82) lat (ms,95%): 549.52 err/s: 0.00 reconn/s: 0.00
[ 30s ] thds: 32 tps: 95.90 qps: 1887.10 (r/w/o: 1316.70/378.60/191.80) lat (ms,95%): 733.00 err/s: 0.00 reconn/s: 0.00
[ 40s ] thds: 32 tps: 81.80 qps: 1656.59 (r/w/o: 1164.89/328.10/163.60) lat (ms,95%): 707.07 err/s: 0.00 reconn/s: 0.00
[ 50s ] thds: 32 tps: 82.60 qps: 1638.41 (r/w/o: 1143.51/329.70/165.20) lat (ms,95%): 657.93 err/s: 0.00 reconn/s: 0.00
[ 60s ] thds: 32 tps: 94.34 qps: 1905.84 (r/w/o: 1336.62/380.65/188.58) lat (ms,95%): 623.33 err/s: 0.00 reconn/s: 0.00
[ 70s ] thds: 32 tps: 87.86 qps: 1739.86 (r/w/o: 1215.31/348.73/175.82) lat (ms,95%): 634.66 err/s: 0.00 reconn/s: 0.00
[ 80s ] thds: 32 tps: 84.40 qps: 1705.48 (r/w/o: 1196.49/340.20/168.80) lat (ms,95%): 759.88 err/s: 0.00 reconn/s: 0.00
[ 90s ] thds: 32 tps: 80.50 qps: 1580.71 (r/w/o: 1101.70/318.00/161.00) lat (ms,95%): 612.21 err/s: 0.00 reconn/s: 0.00
[ 100s ] thds: 32 tps: 81.40 qps: 1661.90 (r/w/o: 1167.00/332.10/162.80) lat (ms,95%): 707.07 err/s: 0.00 reconn/s: 0.00
SQL statistics:
    queries performed:
        read:                            133924
        write:                           38264
        other:                           19132
        total:                           191320
    transactions:                        9566   (95.33 per sec.)
    queries:                             191320 (1906.56 per sec.)
    ignored errors:                      0      (0.00 per sec.)
    reconnects:                          0      (0.00 per sec.)

General statistics:
    total time:                          100.3457s
    total number of events:              9566

Latency (ms):
         min:                                   51.94
         avg:                                  335.14
         max:                                 1405.78
         95th percentile:                      657.93
         sum:                              3205913.85

Threads fairness:
    events (avg/stddev):           298.9375/5.15
    execution time (avg/stddev):   100.1848/0.14
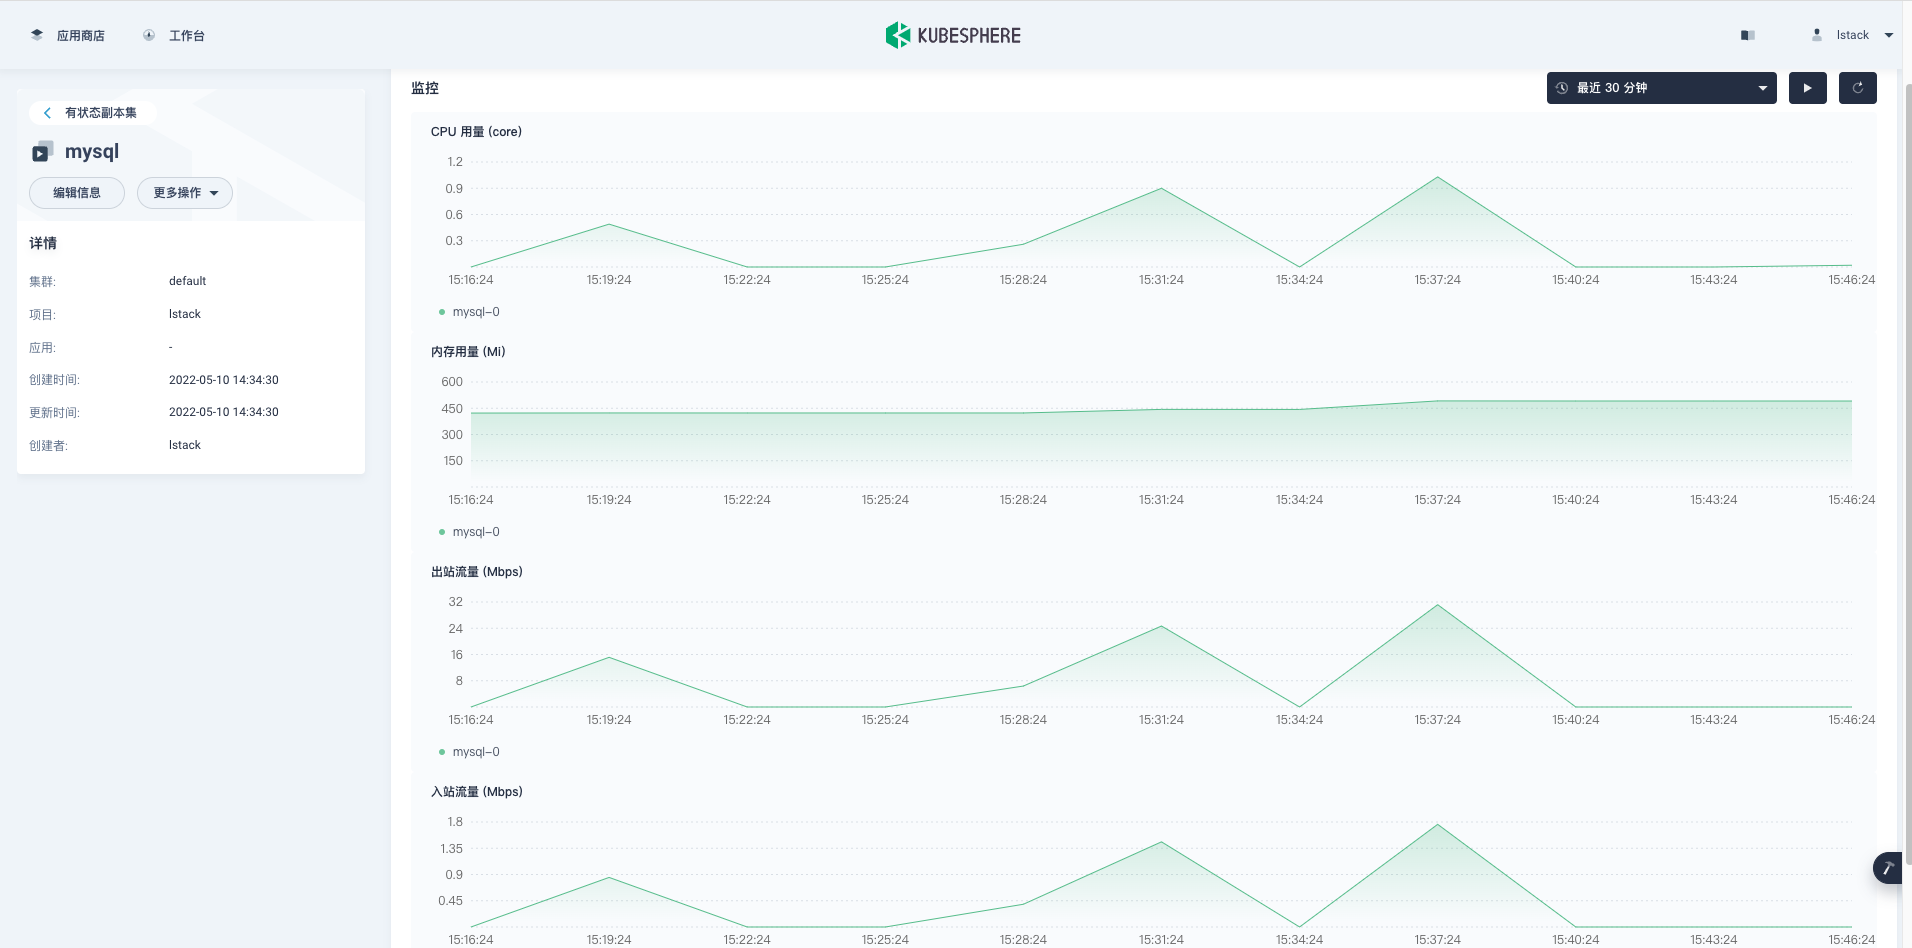
MySQL 容器性能监控图。
清理测试数据 (为了保证数据更精准,建议每次测试前都清理数据,准备数据,测试)。
$ sysbench --db-driver=mysql --mysql-host=192.168.9.91 --mysql-port=32529 --mysql-user=root --mysql-password=P@88w0rd --mysql-db=sbtest --table-size=100000 --tables=16 --threads=32 --events=999999999 --report-interval=10 --time=100  /usr/share/sysbench/oltp_read_write.lua cleanup
sysbench 1.0.20 (using bundled LuaJIT 2.1.0-beta2)

Dropping table 'sbtest1'...
Dropping table 'sbtest2'...
Dropping table 'sbtest3'...
Dropping table 'sbtest4'...
Dropping table 'sbtest5'...
Dropping table 'sbtest6'...
Dropping table 'sbtest7'...
Dropping table 'sbtest8'...
Dropping table 'sbtest9'...
Dropping table 'sbtest10'...
Dropping table 'sbtest11'...
Dropping table 'sbtest12'...
Dropping table 'sbtest13'...
Dropping table 'sbtest14'...
Dropping table 'sbtest15'...
Dropping table 'sbtest16'...
测试结果
结果汇总对比。
| 压测线程数量 | TPS | QPS | 延迟 |
|---|---|---|---|
| 8 | 61 | 1221 | 130 |
| 16 | 79 | 1580 | 202 |
| 32 | 95 | 1906 | 335 |
建议根据测试结果,调优!
总结
本文详细介绍了 Git 常用操作、如何将代码在多个在线代码仓库中存储并保持同步,还介绍了 GitOps 的基本概念并演示了如何用 GitOps 理念在原生 K8s 上部署 MySQL 服务。最后,演示了 MySQL 常用性能测试工具 sysbench 的安装和基础使用。
我多年的一些运维经验和运维思路贯穿了全文。
