


现状
目前大多数用户,在使用 KubeSphere 微服务治理功能时,仅仅停留在部署 Bookinfo,“体验”一把微服务治理的功能而已。如果要完全使用微服务,仍然无法上手;更不知如何将传统服务改造成微服务。
本文将告诉你,如何将一个传统应用转化成微服务,从而来享受 Service Mesh 的各种功能,如灰度发布、服务治理、流量拓扑、Tracing 等功能。
介绍
KubeSphere 微服务使用 Application CRD,将相关联的资源抽象成了一个具体的应用,使用 Istio Application 功能,实现微服务流量治理、灰度发布、Tracing 等功能。屏蔽了 Istio 复杂的 Destination Rule 及 Virtual Service 概念,能根据流量治理设置及灰度发布策略自动生成这些资源。
使用 KubeSphere 微服务,需满足以下条件:
Deployment 有
appversion这两个 label;Service 有appLabel;且 Deploy 与 service 的 App Label 一致,等于 Service Name(Istio 需要)在一个应用内,所有资源需要有这两个标签 app.kubernetes.io/name=
, app.kubernetes.io/version= (Application 需要) Deployment Name 为 Service Name 后面加 v1;如 Serevice 为 nginx, deployment 为 nginx-v1 (v3.0 及以前版本)
Deployment Template 中有相应 Annotation (Istio Sidecar 自动注入需要)
  template:
    metadata:
      annotations:
        sidecar.istio.io/inject: "true"
- Service/Deployment 有相应 Annotation (KubeSphere CRD Controller 会自动将 Service 同步为 Virtual Service/DestinationRules,CRD controller 需要)
# Service
kind: Service
metadata:
  annotations:
    servicemesh.kubesphere.io/enabled: "true"

# Deployment
kind: Deployment
metadata:
  annotations:
    servicemesh.kubesphere.io/enabled: "true"
示例说明
下面将首先创建 Wordpress + Mysql 两个单独的应用,功能正常后,将它们转化成 KubeSphere 微服务,并注入 Sidecar 实现流量治理等功能。
仅仅一个 Service 使用 Sidecar 功能是没有意义的,最少要有两个 Service 才能看到流量拓扑;因此这里使用两个最简单的服务来演示功能。
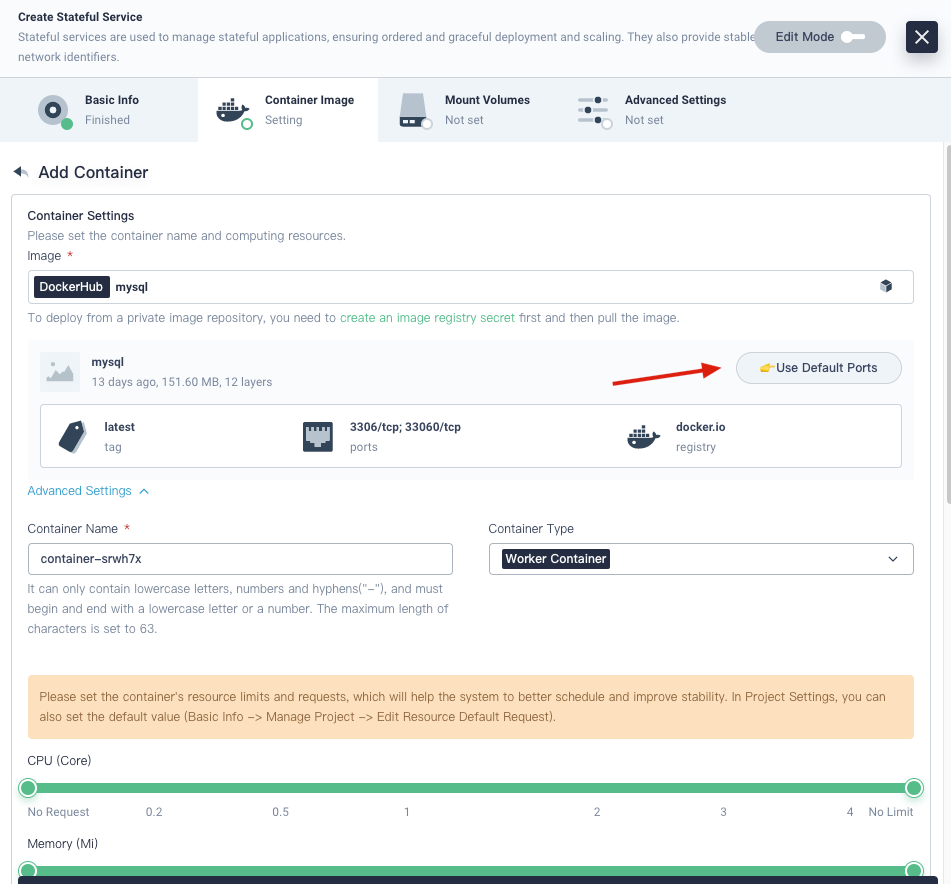
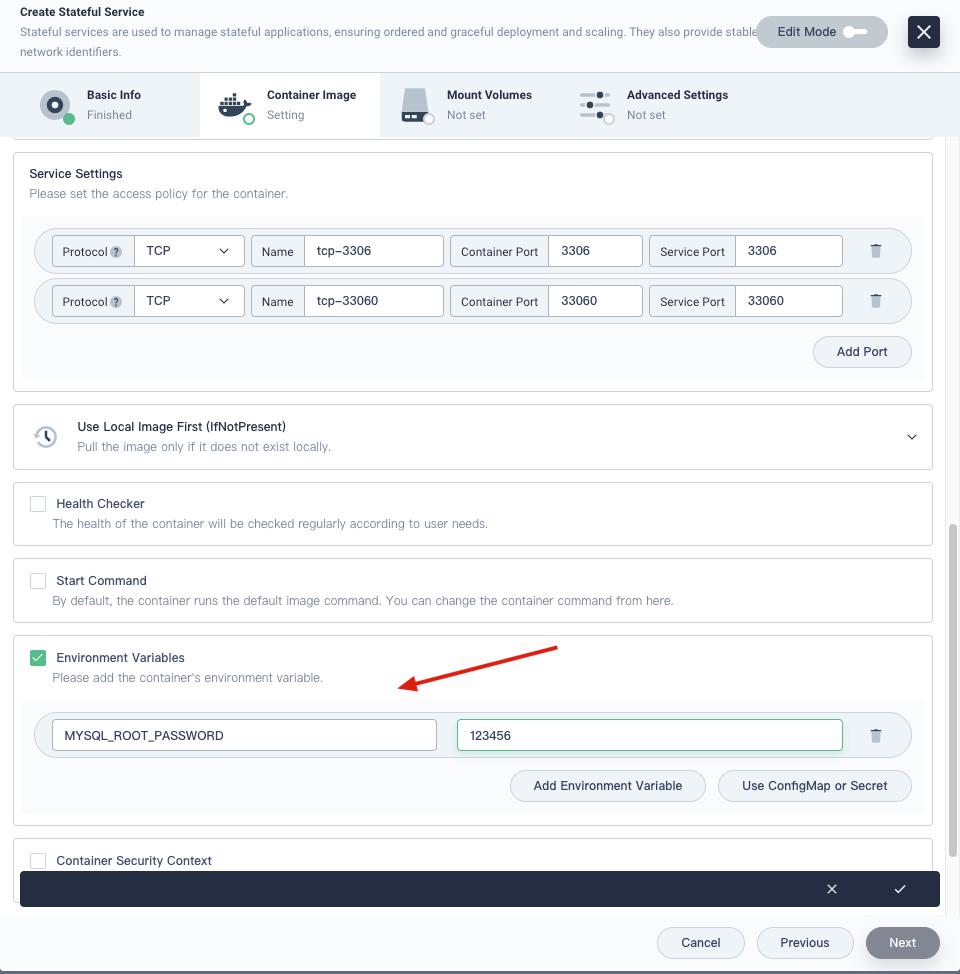
打开 Mysql DockerHub 页面,可以看到设置 MYSQL_ROOT_PASSWORD 变量,可以设置默认密码。
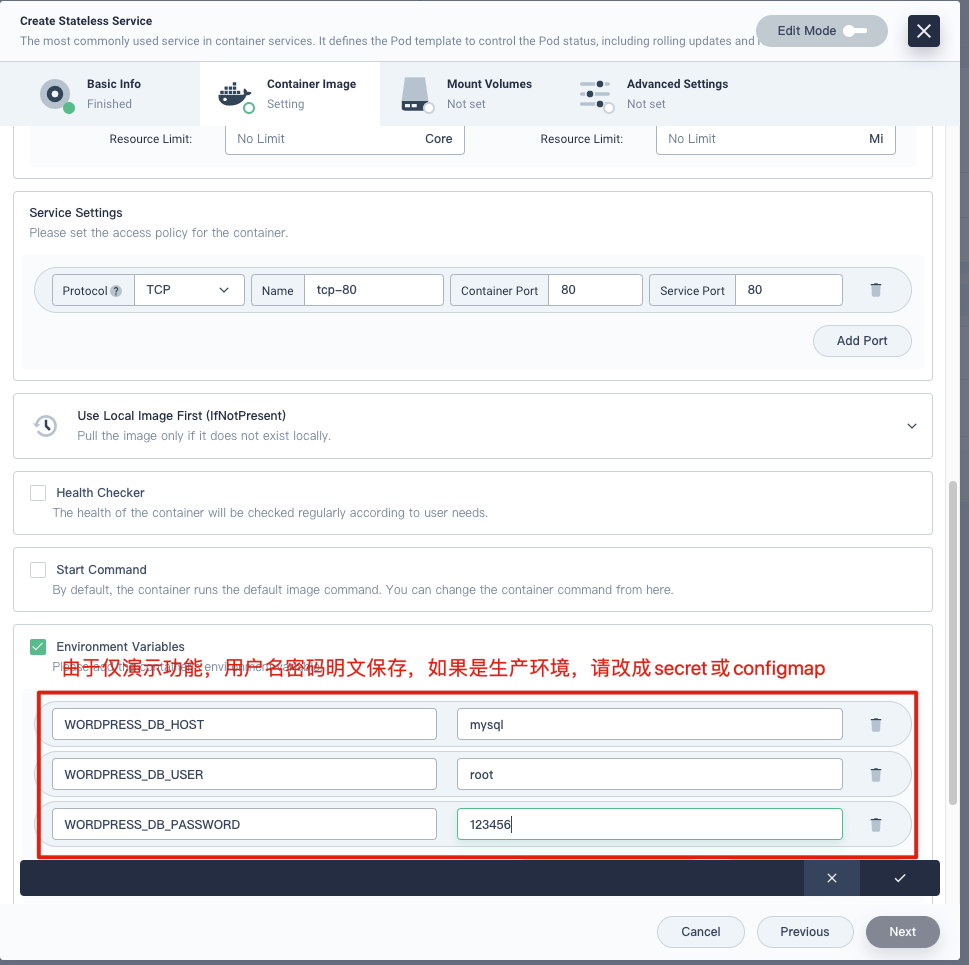
打开 Wordpress DockerHub 页面,可以看到可以数据库设置的三个变量 WORDPRESS_DB_PASSWORD WORDPRESS_DB_USER WORDPRESS_DB_HOST,通过设置这三个变量,让 Wordpress 连接到 Mysql 应用.
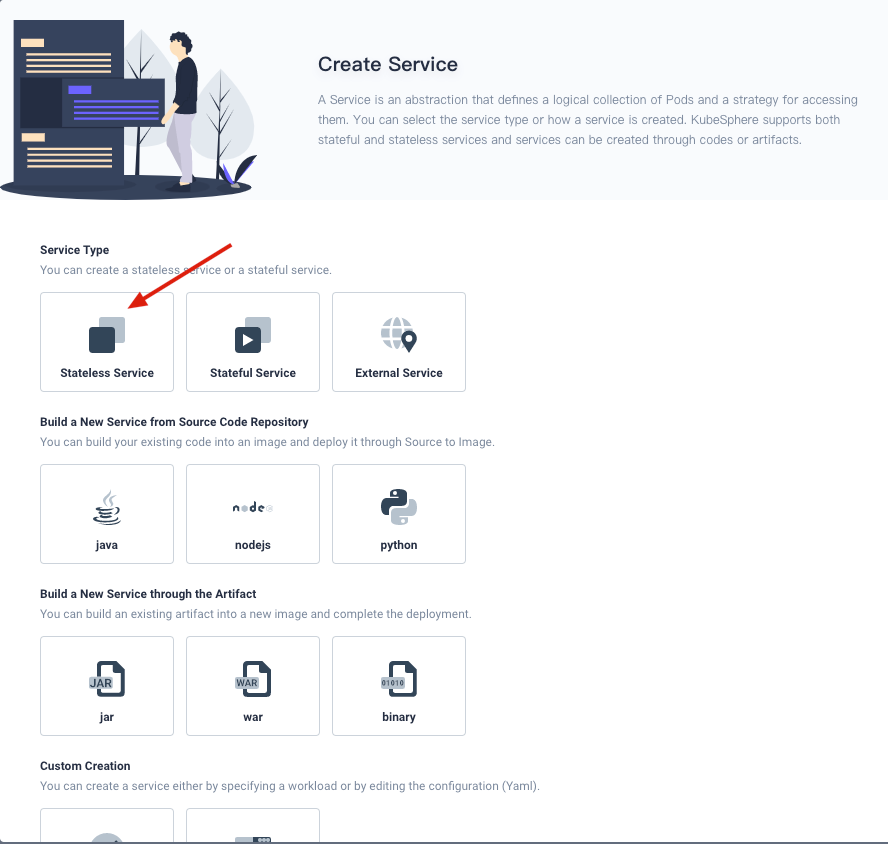
创建传统的应用
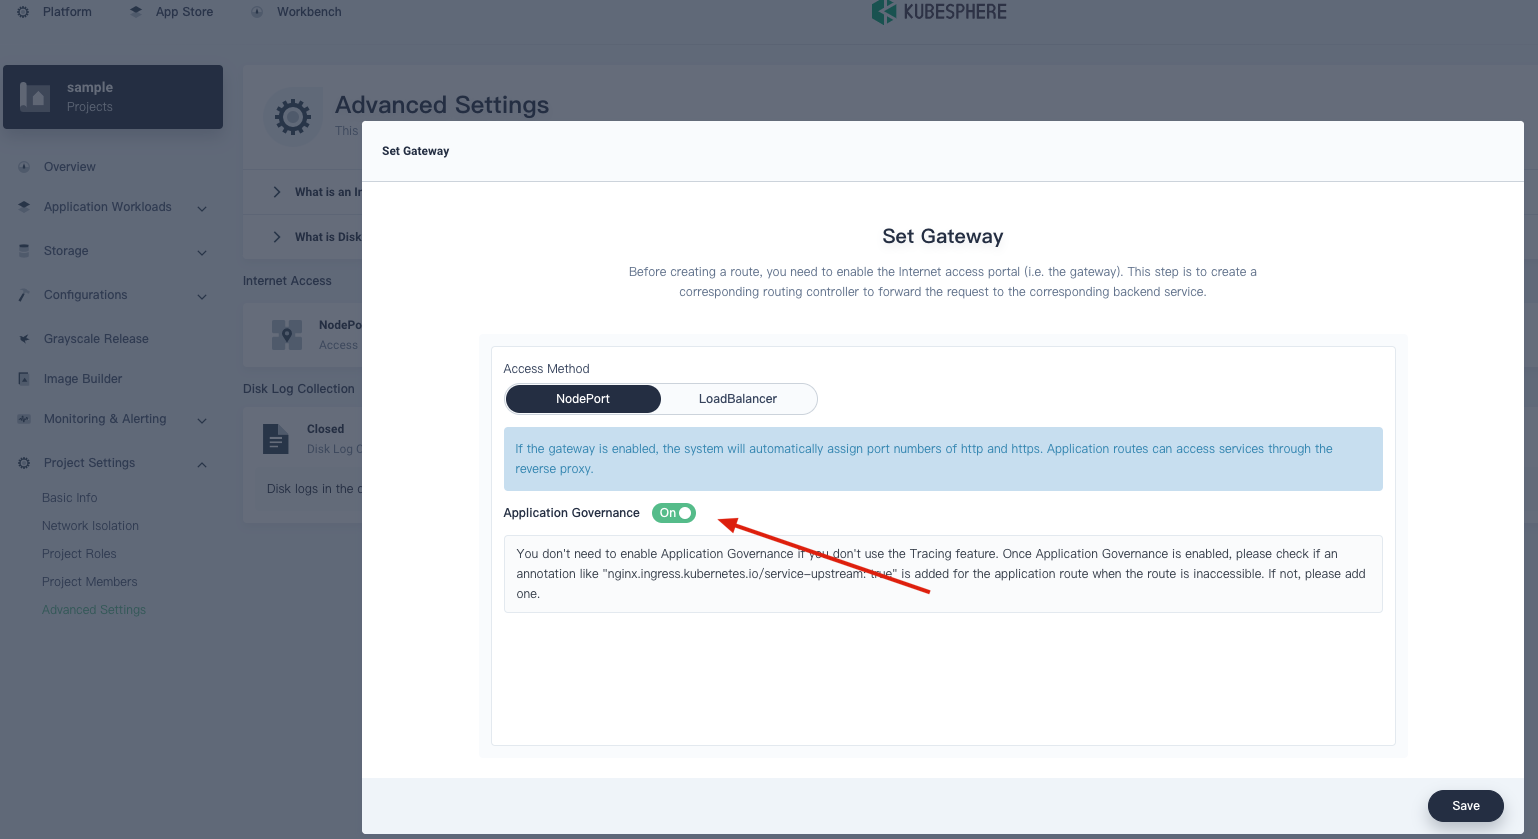
首先创建 Workspace、Namespace, 且 Namespace 开启网关及流量治理功能。
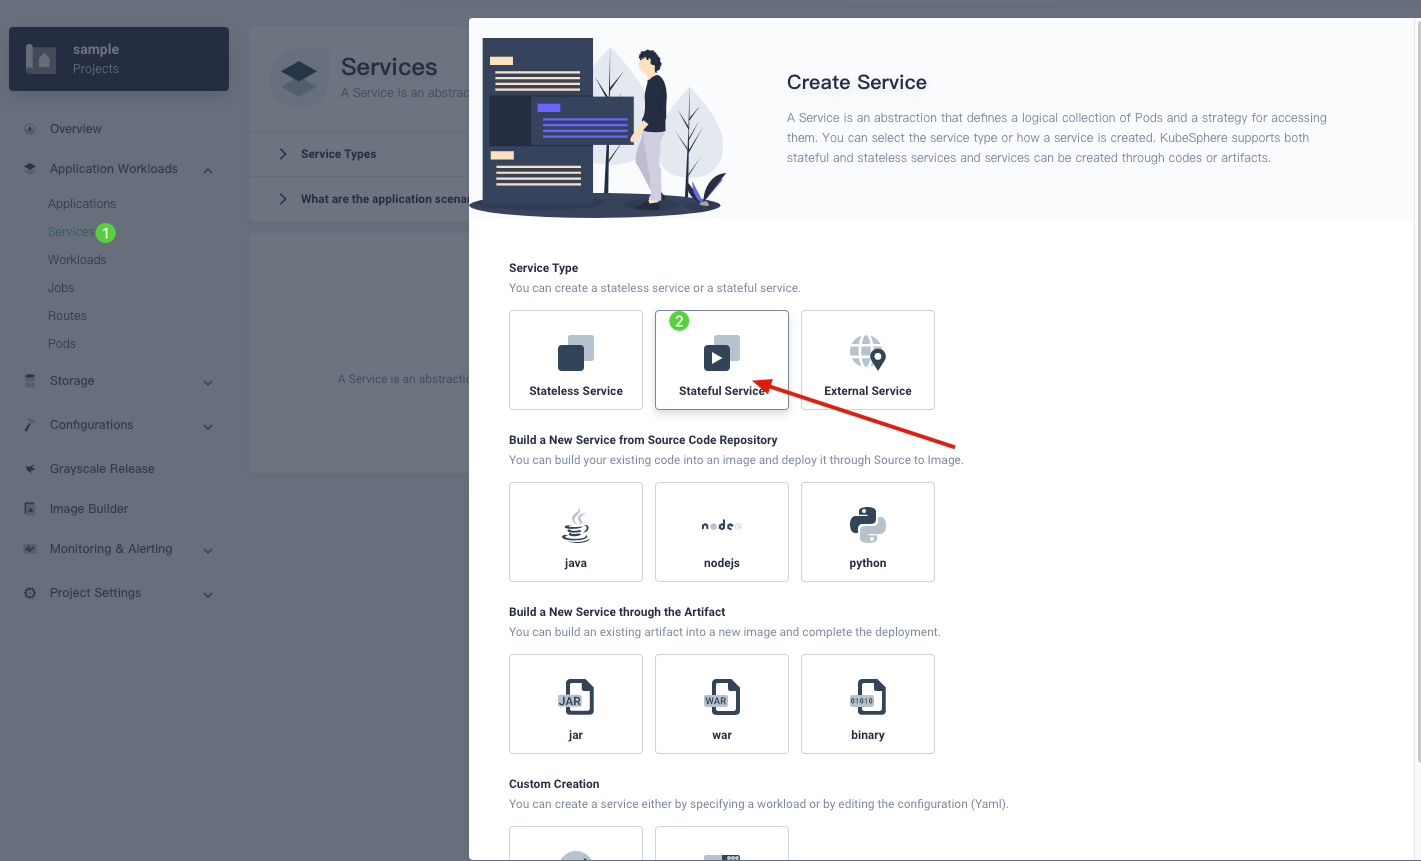
创建 Mysql。
设置初始密码。
同理,创建一个 Stateless 的 Wordpress 服务。

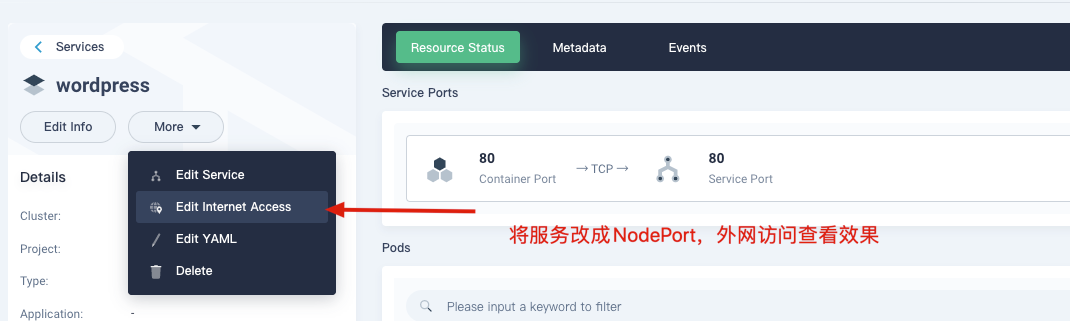
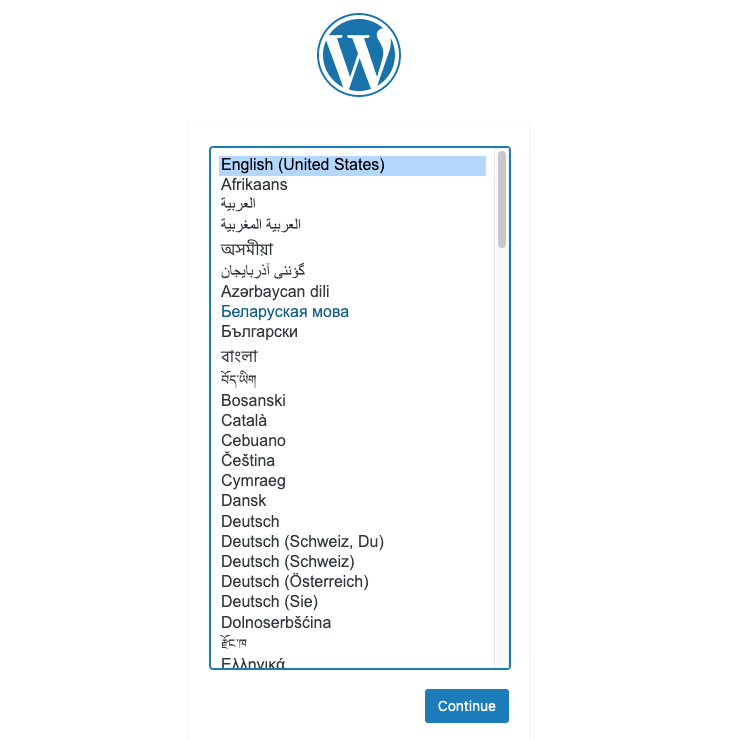
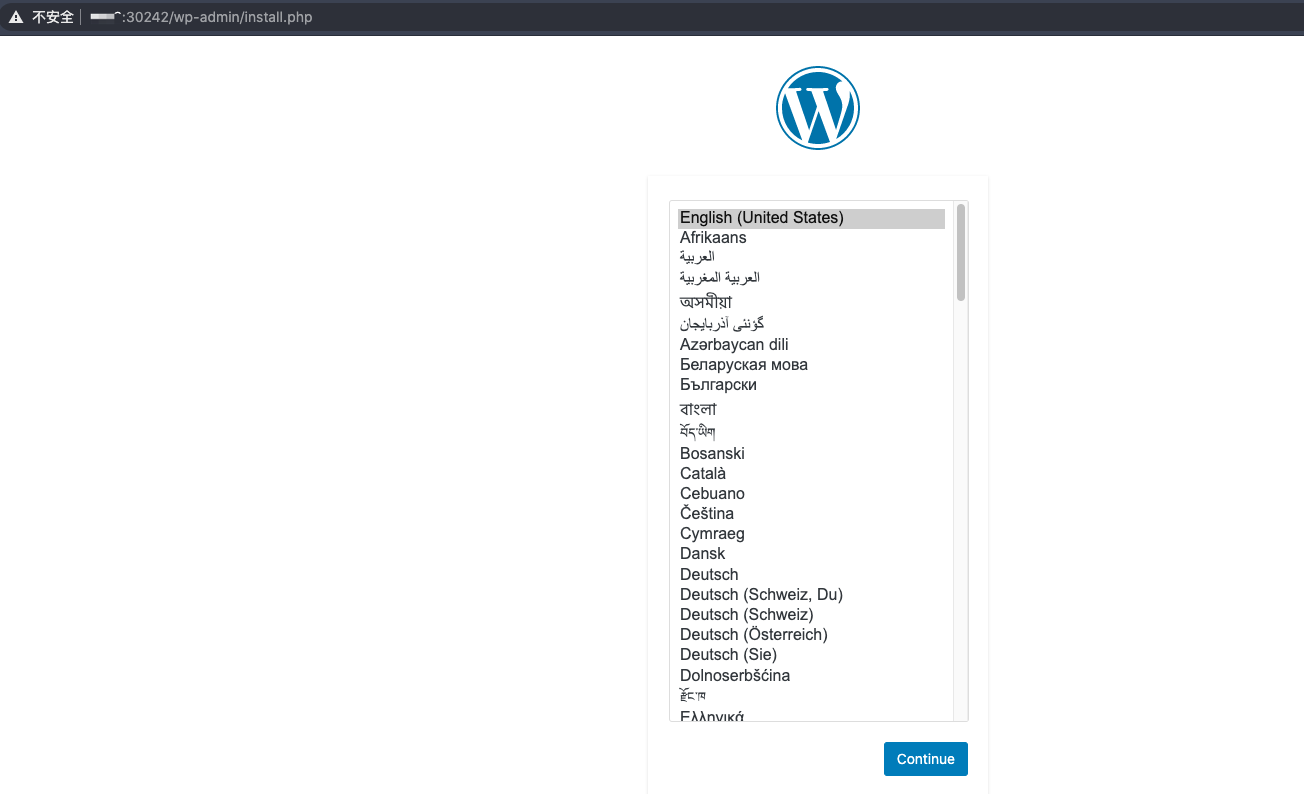
待 Pod 全部正常后,根据 Service NodePort 端口,直接访问页面,可以看到应用正常。
查看 Pod,未启用 Sidecare,每个 Pod 只有一个容器。

由于没有使用微服务功能,无法看到流量的具体走向。下面将它转化成 Service Mesh 服务网格形式。
部署 Application 应用
- apply 下面的 yaml,部署出一个 Application。
# wordpress.yaml
apiVersion: app.k8s.io/v1beta1
kind: Application
metadata:
  annotations:
    kubesphere.io/creator: admin
    servicemesh.kubesphere.io/enabled: "true"
  labels:
    app.kubernetes.io/name: wordpress-app
    app.kubernetes.io/version: v1
  name: wordpress-app  # 注意应用的 name 要跟 label 定义的一样:app.kubernetes.io/name
spec:
  addOwnerRef: true
  componentKinds:
  - group: ""
    kind: Service
  - group: apps
    kind: Deployment
  - group: apps
    kind: StatefulSet
  - group: extensions
    kind: Ingress
  - group: servicemesh.kubesphere.io
    kind: Strategy
  - group: servicemesh.kubesphere.io
    kind: ServicePolicy
  selector:
    matchLabels:
      # 相关资源需要打上这两个label,表示归属关系
      app.kubernetes.io/name: wordpress-app
      app.kubernetes.io/version: v1

可以看到现在这个应用状态是 0/0,表示没有关联任何应用。
如果看不到应用状态,且无法使用
kubectl get app命令,说明你环境的 Application 的 CRD 较老,更新方法:
kubectl apply -f https://raw.githubusercontent.com/kubesphere/ks-installer/master/roles/common/files/ks-crds/app.k8s.io_applications.yaml
- 给相关应用打上 Application Label,声明服务归属于该应用。
kubectl -n sample label deploy/wordpress-v1 app.kubernetes.io/name=wordpress-app app.kubernetes.io/version=v1
kubectl -n sample label svc/wordpress app.kubernetes.io/name=wordpress-app app.kubernetes.io/version=v1

kubectl -n sample label sts/mysql-v1 app.kubernetes.io/name=wordpress-app app.kubernetes.io/version=v1
kubectl -n sample label svc/wordpress app.kubernetes.io/name=wordpress-app app.kubernetes.io/version=v1
此时检查 App,可以发现已经可以看到应用中的关联服务数量已经不为 0 了。

- Deployment/Service 打上相应的 Annotation
kubectl -n sample annotate svc/wordpress servicemesh.kubesphere.io/enabled="true"
kubectl -n sample annotate deploy/wordpress-v1 servicemesh.kubesphere.io/enabled="true"
kubectl -n sample annotate svc/mysql servicemesh.kubesphere.io/enabled="true"
kubectl -n sample annotate sts/mysql-v1 servicemesh.kubesphere.io/enabled="true"
- deploy/sts templates 中增加相应 Annotation,启用 Sidecar。
 kubectl -n sample edit deploy/wordpress-v1
...
  template:
    metadata:
      annotations:
        sidecar.istio.io/inject: "true"  # 添加该行

kubectl -n sample edit sts/mysql-v1
...
  template:
    metadata:
      annotations:
        sidecar.istio.io/inject: "true" # 添加该行
注意:只需要给 Template 中加 Annotations 就可以注入 Sidecar,无需给 Mamespace 加
istio.injection=enable的 Label。
检查已经注入 Sidecar。

- Istio 相关 Label、命名规则符合要求,如果是通过 KubeSphere 创建的服务,这两项默认支持,不用修改。
即 App version 相关的 Label,如果是使用 KubeSphere 页面创建的服务,会默认添加上这两个 Label。

检查
至此,改造已经完成,检查页面。
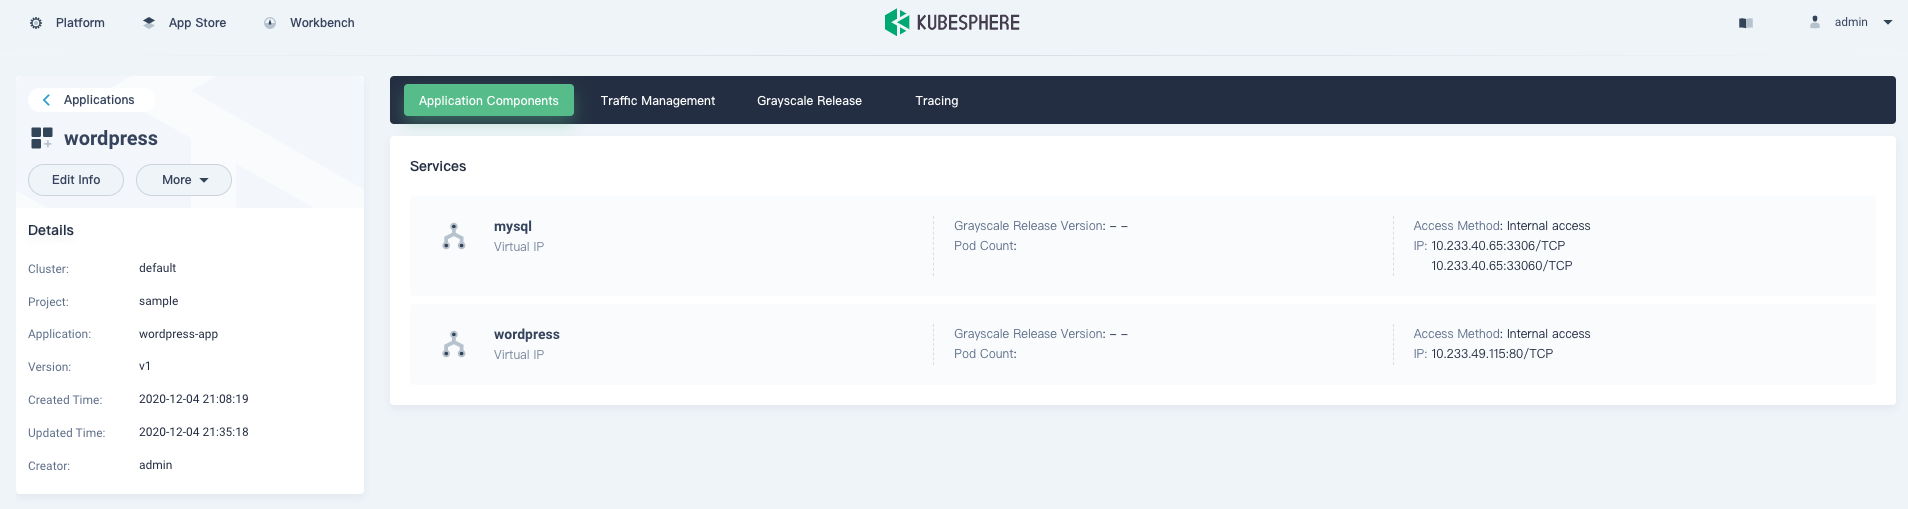
我们将 Wordpress 服务暴露出来。
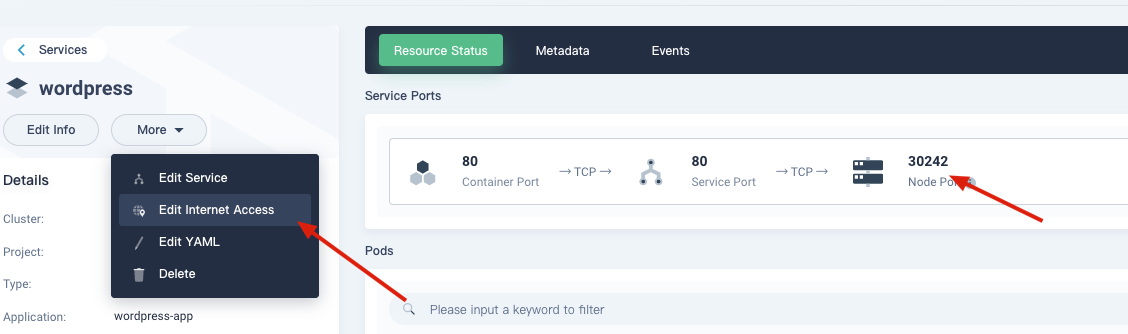
页面访问服务,可以看到应用正常。
检查流量,发现正常,流量可以视化已经可以看到数据。
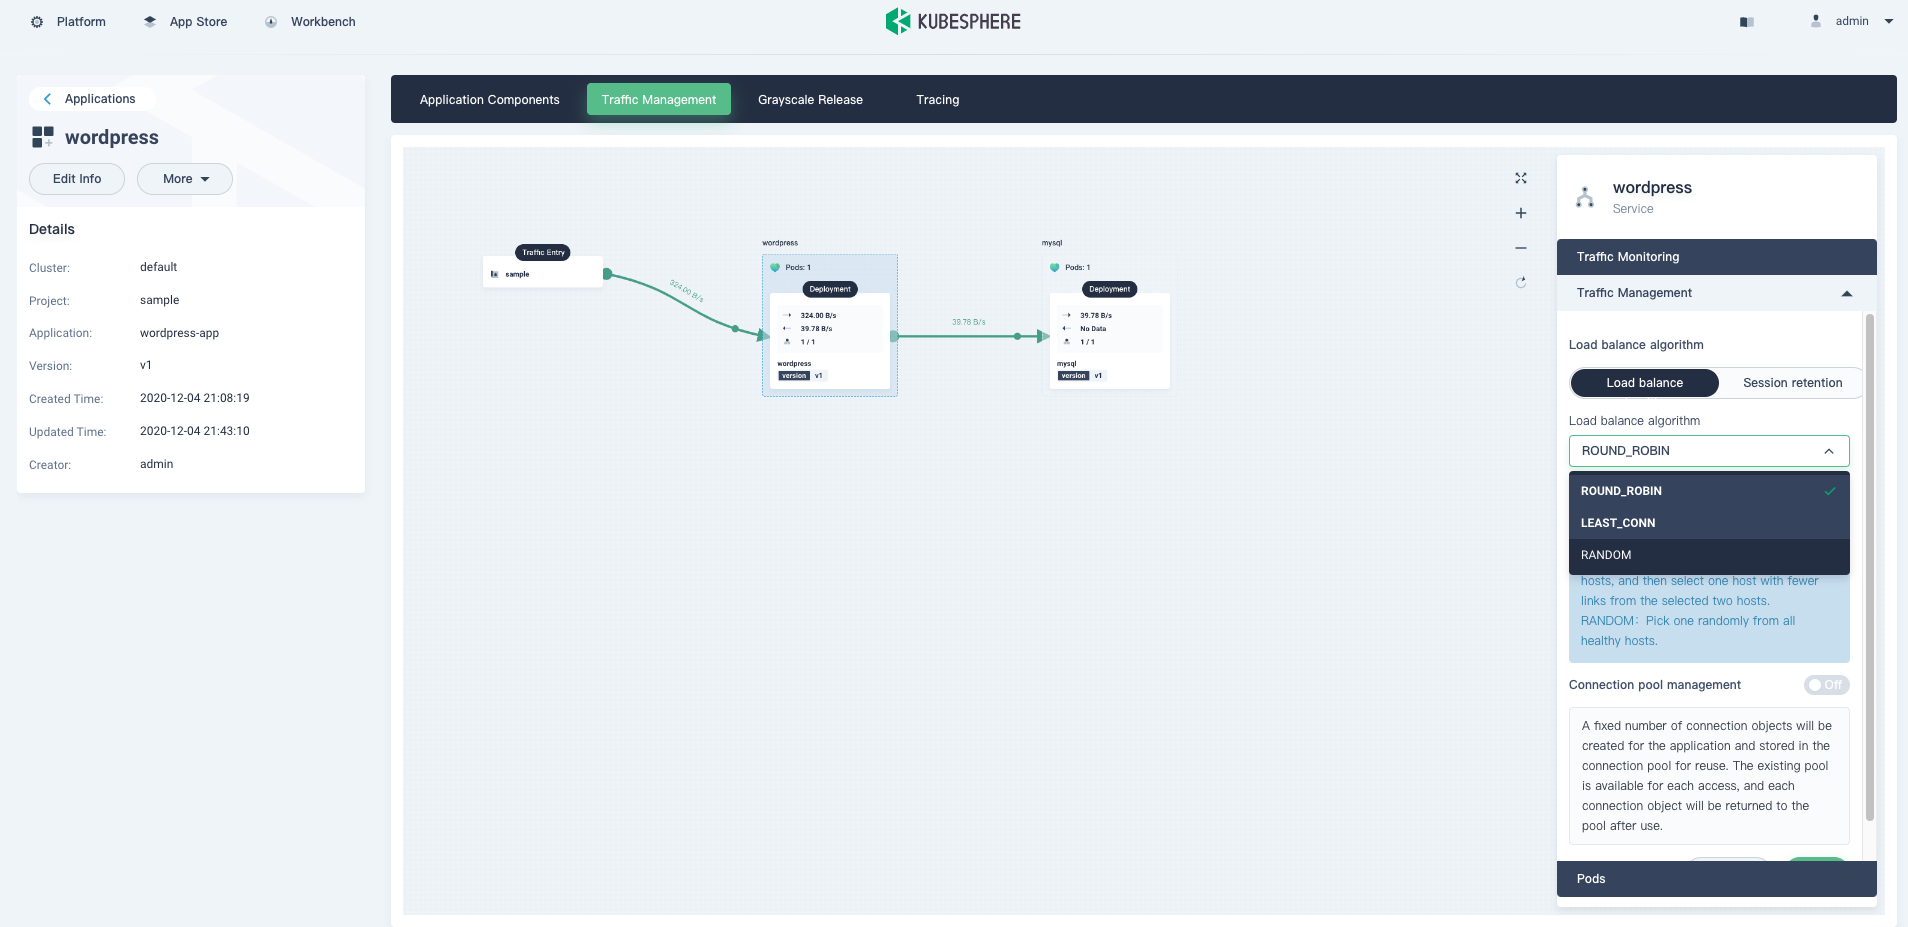
同理,灰度发布/Tracing 功能也正常。
Tracing 功能需要启用 Ingress 才能看到效果。
总结
微服务改造按照上述步骤修改,即可顺利完成应用的改造,但是步骤仍然较为繁琐,KubeSphere 会继续优化功能,降低使用门槛。
